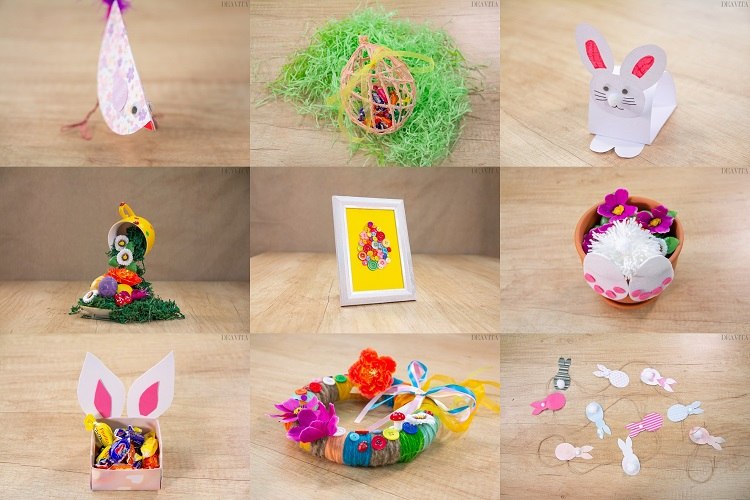
We have selected 10 Easter craft ideas for you. Easter decoration and sweet gifts will add to the festive mood in your home. Surprise the family with a beautiful door wreath, decorate the nursery with a brightly colored banner, the living area with an Easter egg made of buttons or make a flying cup with the children. By the way, homemade items can also be given away. In the article you will find several crafting instructions for small presents and gift wrapping.
Easter craft ideas – DIY yarn wreath
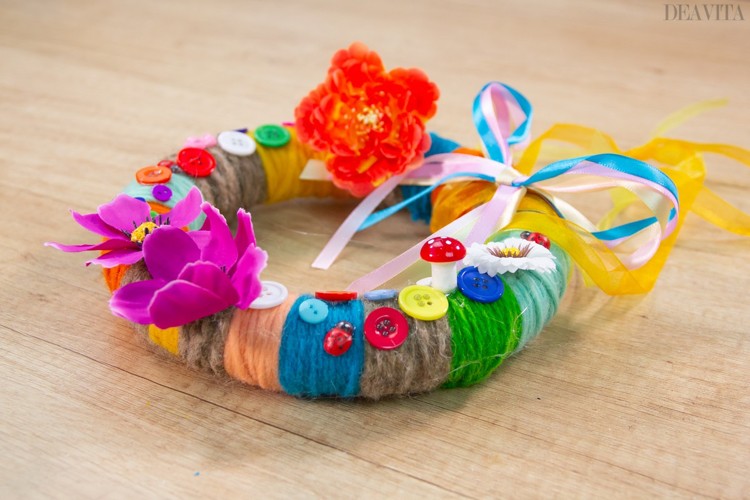
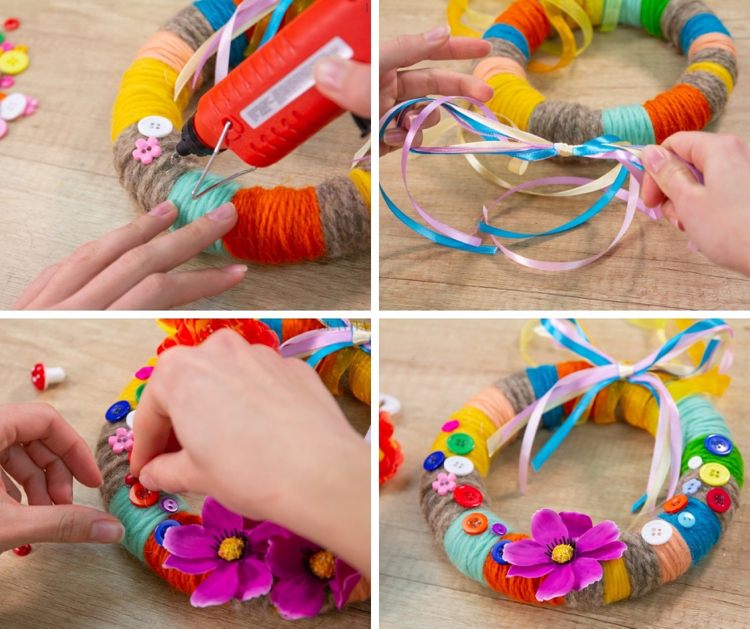
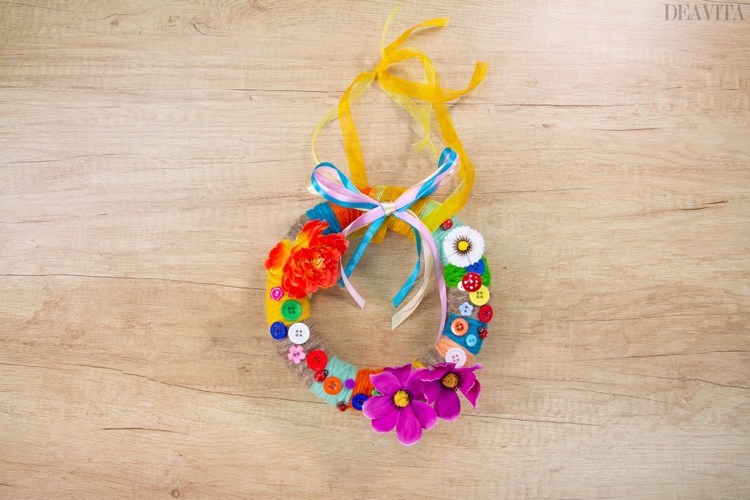
Easter craft ideas can be real fun. A colorful door wreath makes the house entrance welcoming and inviting. We offer you an idea for a long-lasting decoration. Our wreath is made of wool yarn and decorated with fabric flowers, satin ribbons, buttons and mushrooms made of wood.
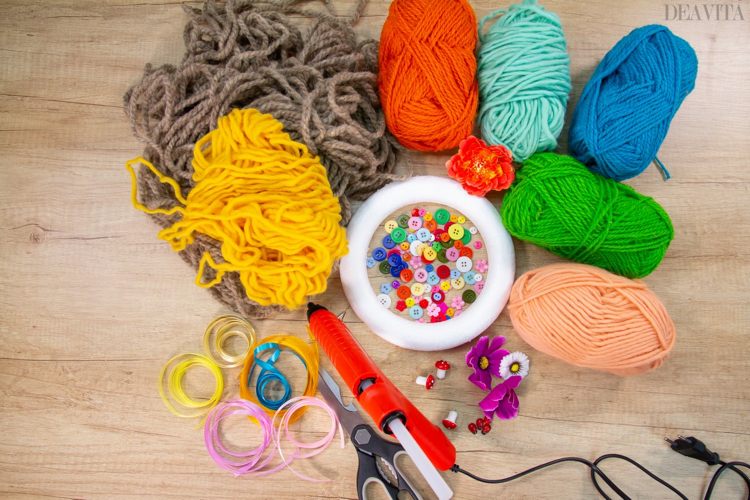
Materials:
Styrofoam Ring
Yarn (different colors)
Ribbon (different colors) – 1 m
Buttons (different colors)
Decorative Flowers
Decorative Mushrooms
Decorative Ladybugs
Hot Glue Gun
Scissors
Directions:
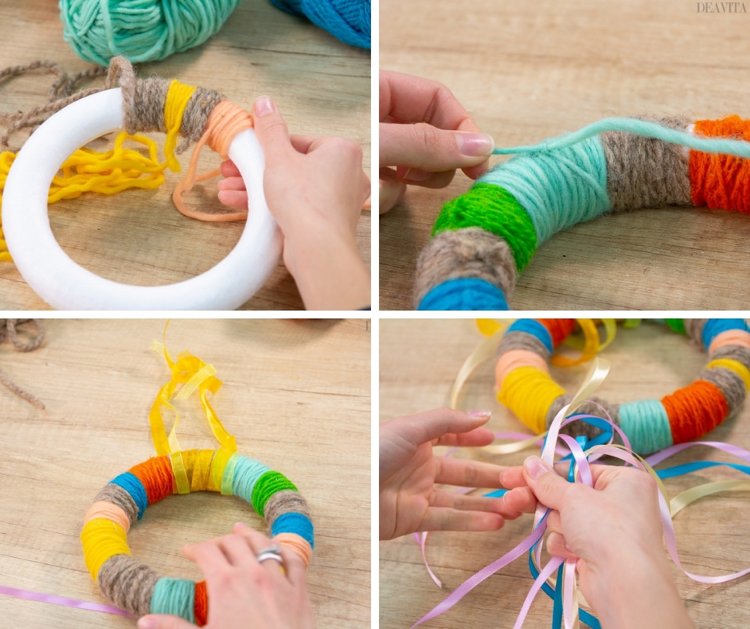
Wrap the yarn around the styrofoam wreath base.
Cut the satin ribbons into 40 cm long strips. Tie the ribbons into bows and attach them to the wreath with the hot glue gun.
Leave the finished wreath aside and let it dry. On the next day decorate it with buttons, fabric flowers and small decorative figures. For example, mushrooms and ladybugs made of wood are great.
Easter crafts ideas – how to make a bunny garland
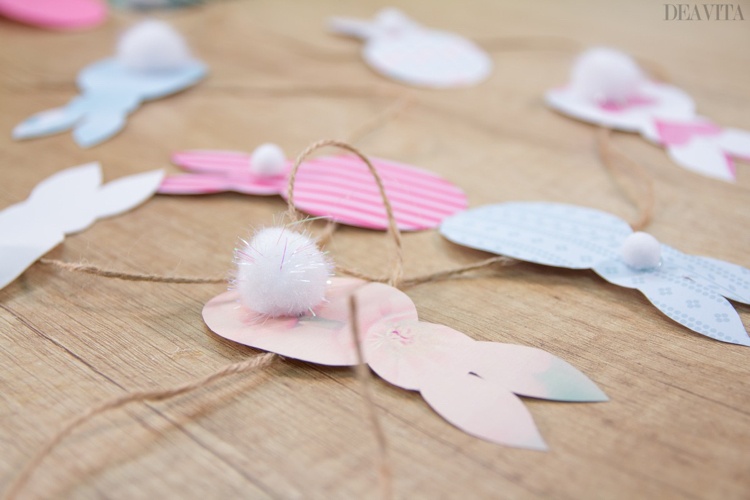
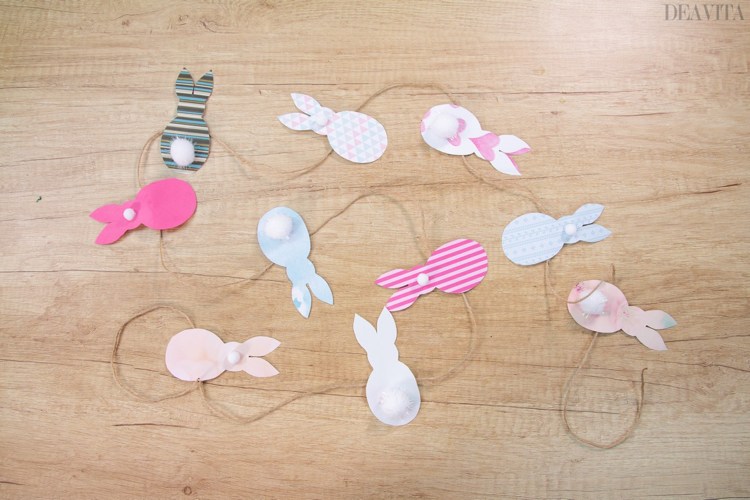
Typically, nursery rooms are decorated in soft pastel nuances such as pink and sky blue. In the next craft project, we will show you how to add a festive Easter mood with a sweet bunny garland. The cute Easter Bunny silhouettes will be a great joy to your little children!
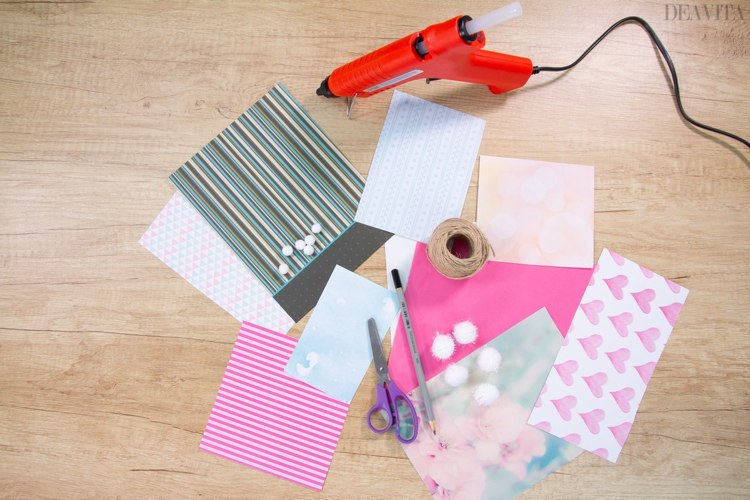
Materials:
Designer Paper
(different colors and patterns)
Craft Foam
(different colors)
Scissors
Pencil
Pompons
(2 different sizes)
Hot Glue Gun
Twine
Directions:
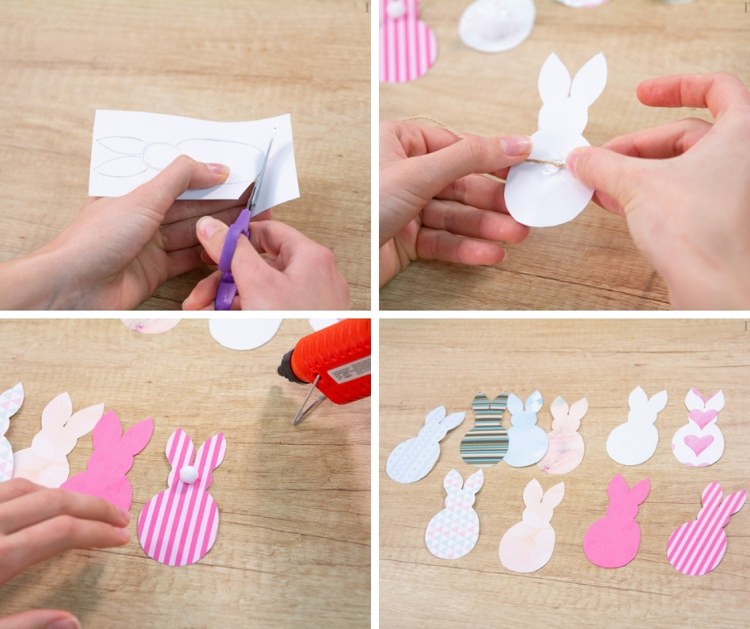
Print out a template for the Easter Bunny. Transfer and cut out nine bunny silhouette on design paper.
Attach the small pompons as a nose to the bunny head and glue the other four medium-sized pompons as tails.
Thread the Easter bunny silhouettes onto a string or twine.
Easter ideas 2019 – Egg Portrait from buttons
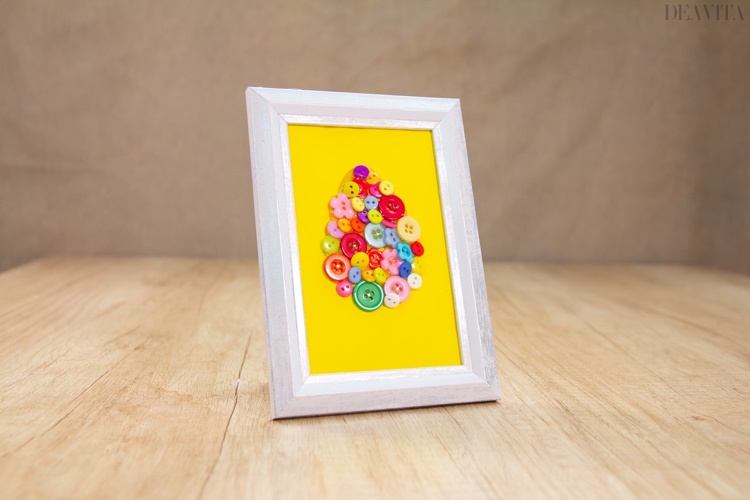
This is one of the most space saving ideas. We will show you how to make a beautiful Easter egg from buttons.
Materials:
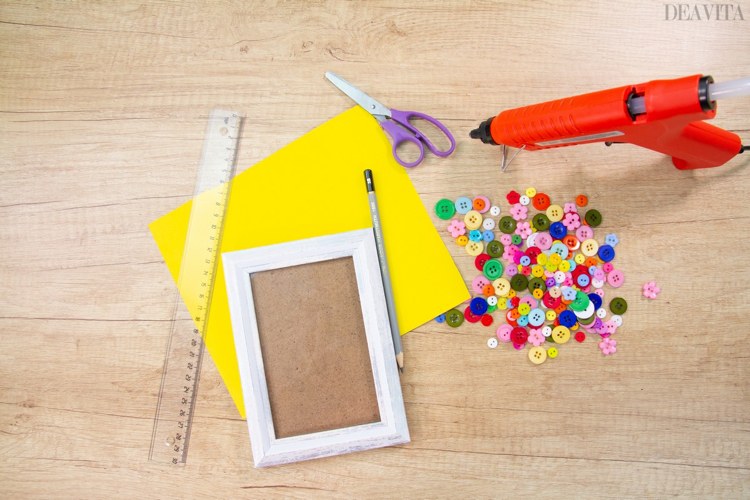
Photo Frame
Buttons
Hot Glue Gun
Pencil
Cardstock Paper (colored)
Ruler
Scissors
Directions:
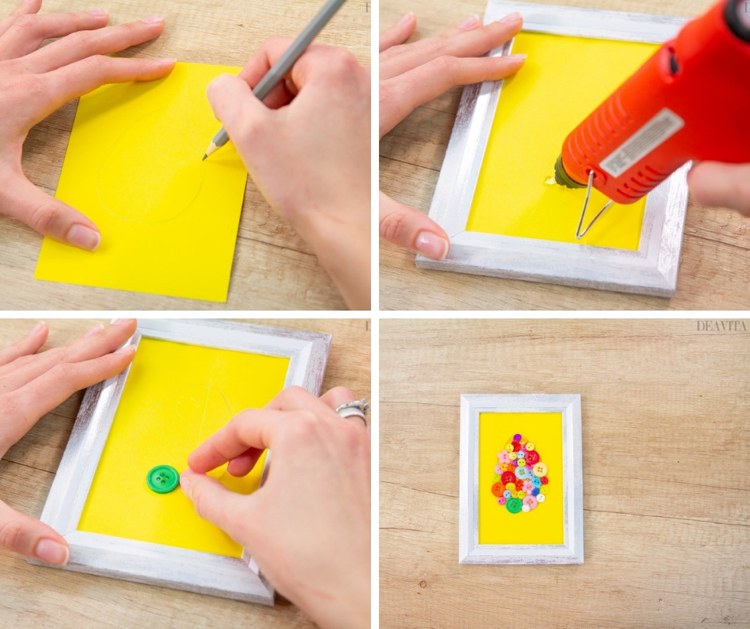
Cut a square out of yellow colored paper (it should be exactly as big as the photo frame). Draw an Easter egg in the middle.
Glue buttons in different sizes inside the Easter egg shape. Showcase the finished Easter decoration in a stylish photo frame. This can be a great handmade Easter gift as well.
Easter craft – How to make paper chicks
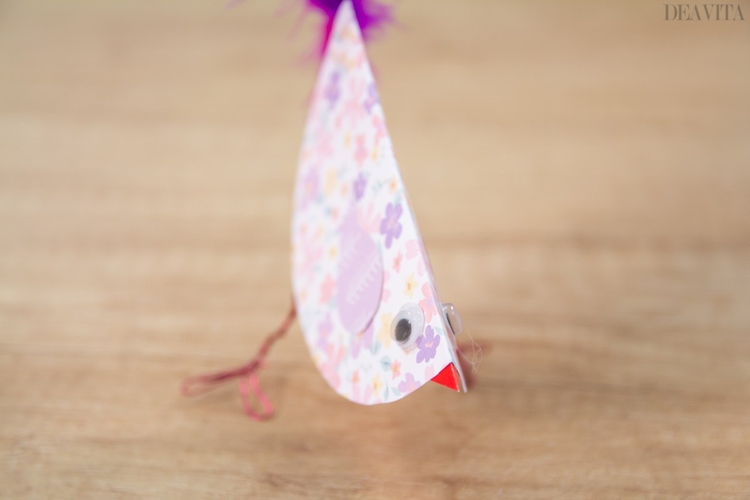
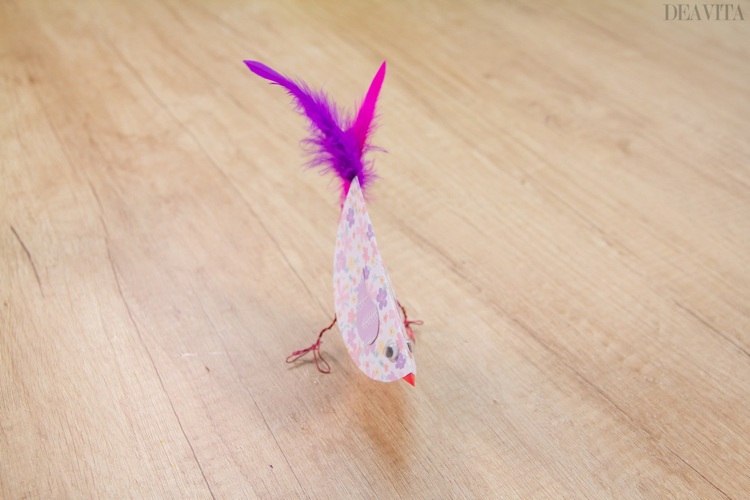
These cute chicks made of design paper also take up little space and are great mood-makers for the Easter table. You can also use them as invitations for the Easter brunch.
Find more Easter craft for kids with toilet paper rolls here.
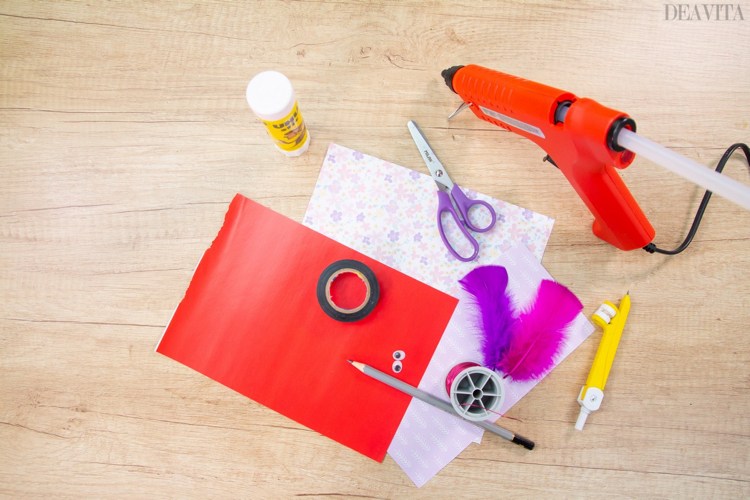
Materials:
Designer Paper
(2 different matching designs)
Red Paper
2 Wiggly Eyes
Electrical Tape
Scissors
Glue
Feathers
Hot Glue Gun
Bow Compass
Pencil
Wire
Directions:
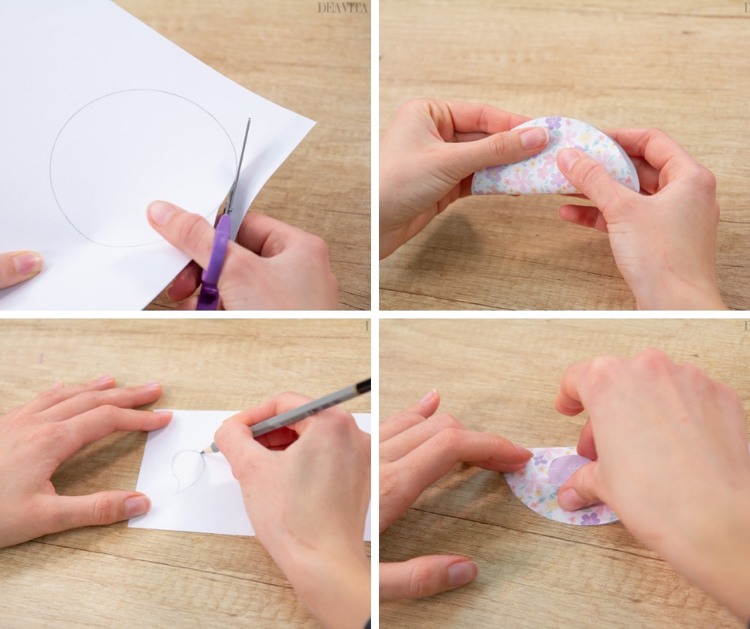
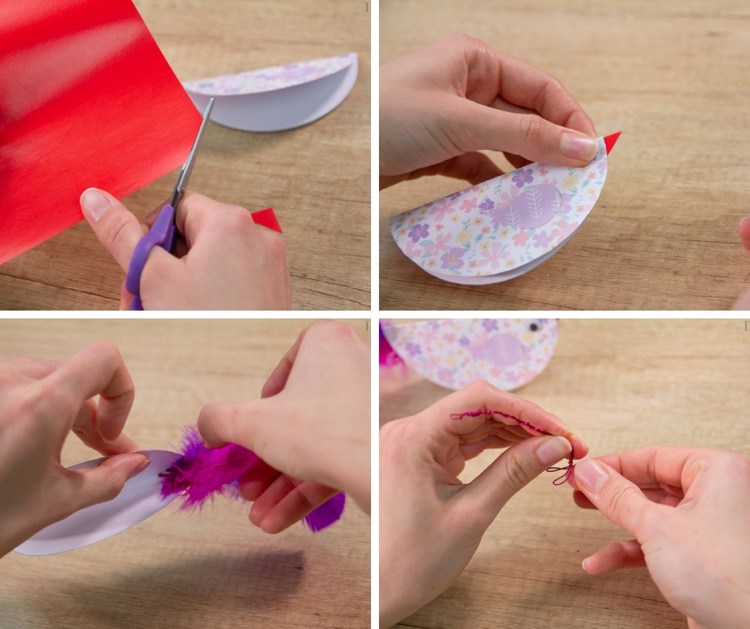
Draw a circle with a bow compass, cut it out and fold in the middle.
Draw a wing on another sheet of design paper, cut it out and glue it to the semicircle.
Cut a triangle from the red colored paper for the beak.
Make the bird’s feet from flower wire and fasten with the tape.
Glue together two-three feathers for the bird’s tail and attach to the back.
Crafts for Easter – How to make a floating cup
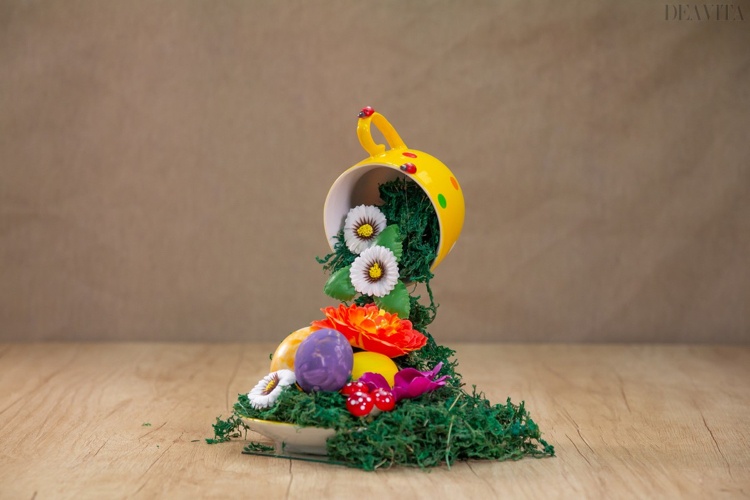
Floating cups offer numerous design options and are very popular. You can craft one and place it either in the garden or inside your house.
Materials:
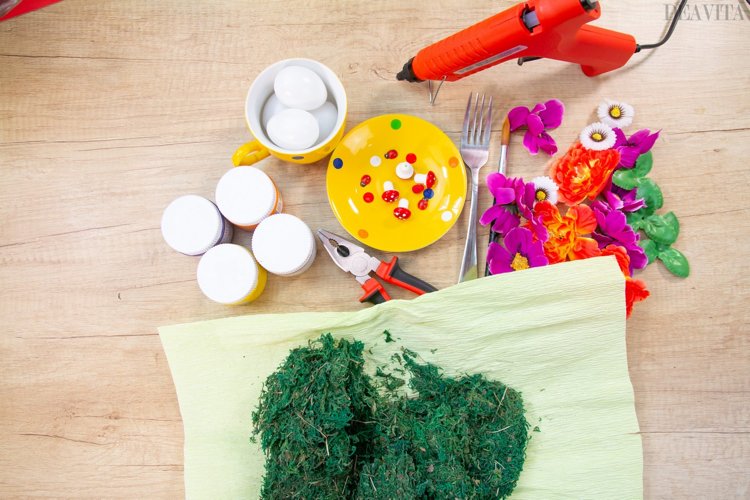
A cup and saucer Set
Fork
Pliers
Hot Glue Gun
Plastic Eggs
Decorative Flowers
Decorative Foliage
Decorative Mushrooms
Decorative Ladybugs
Decorative Moss
Acrylic Paint (different colors)
Paintbrush
Scissors
Directions:
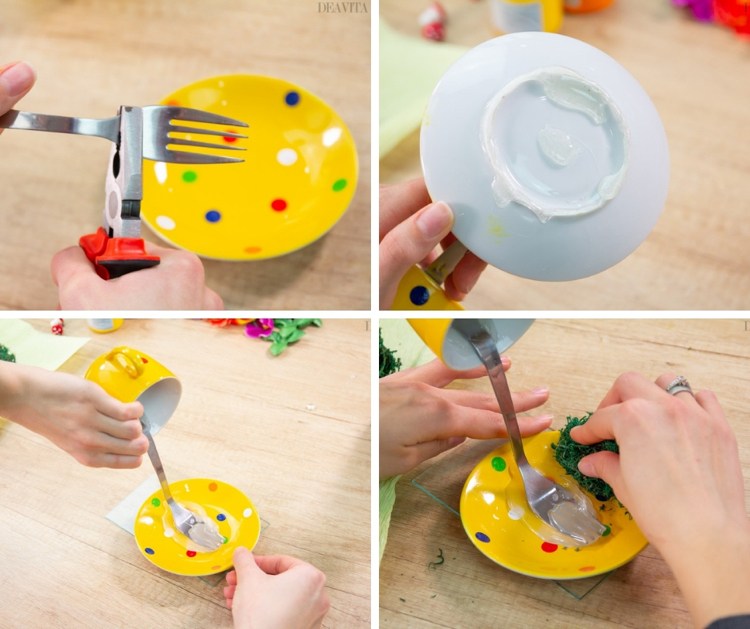
Bend the fork with the pliers. Glue one end to the saucer and the other end to the cup. Glue the cup with craft glue on the saucer and let it dry.
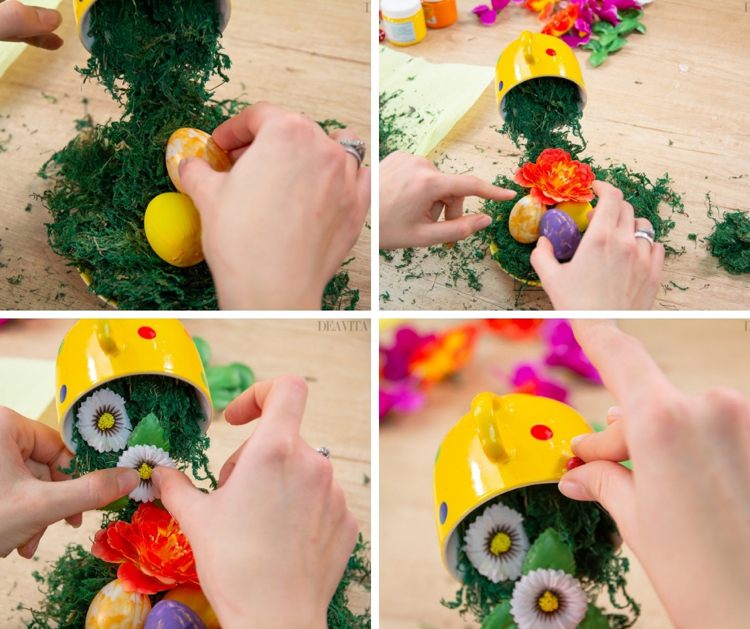
Once the construction is stable, you can start decorating. Cover the fork with artificial moss, arrange plastic Easter eggs and fabric flowers. Place smaller flowers in the cup. Decorate with decorative ladybugs made of wood.
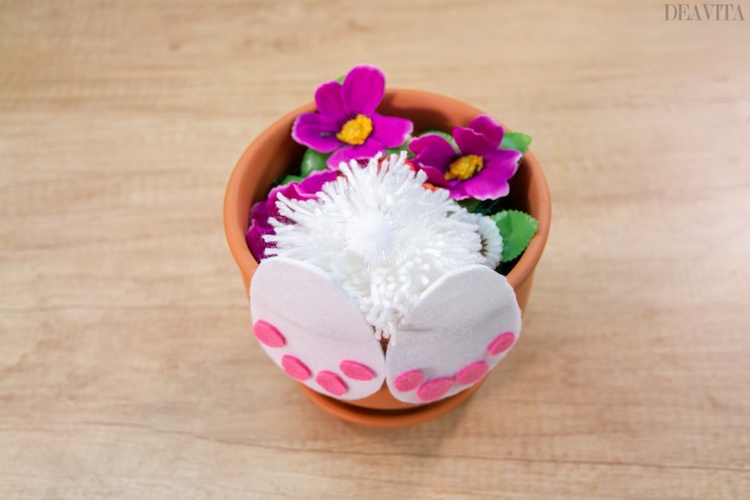
DIY Easter decorations – Bunny in a pot
Welcome spring with a cute decoration in bright colors. The next craft project leaves plenty of room for creativity and promises nice craft time for the whole family.
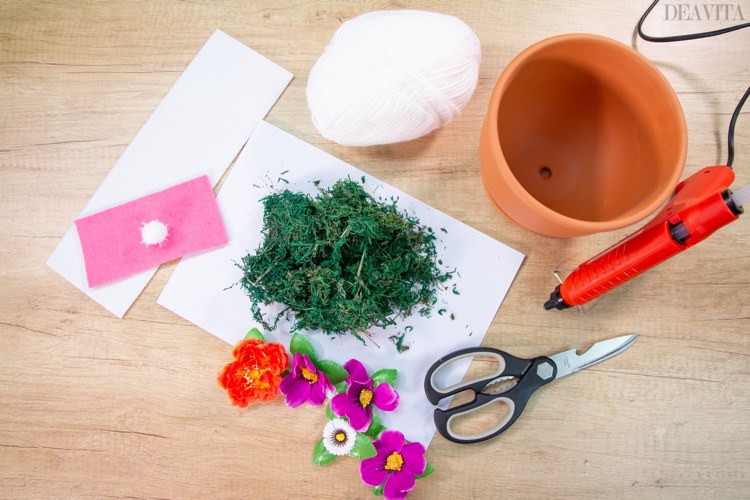
Materials:
Flower Pot
White Felt
Pink Felt
Scissors
Hot Glue Gun
White Yarn
Artificial Flowers
Decorative Moss
Directions:
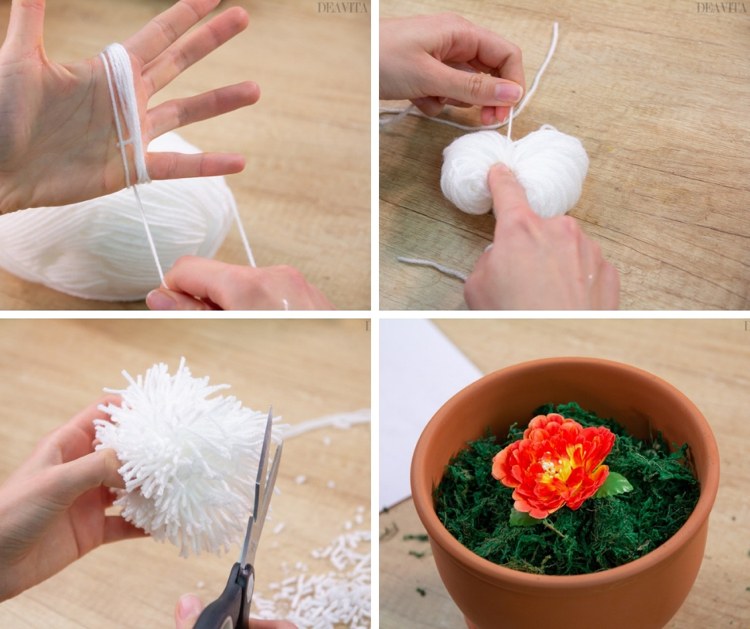
Wrap the yarn around your hand and tie it with a piece of thread in the middle.
Cut the loops at both ends. Cut the finished pompon with scissors.
Decorate the flower pot with the artificial moss and the fabric flowers.
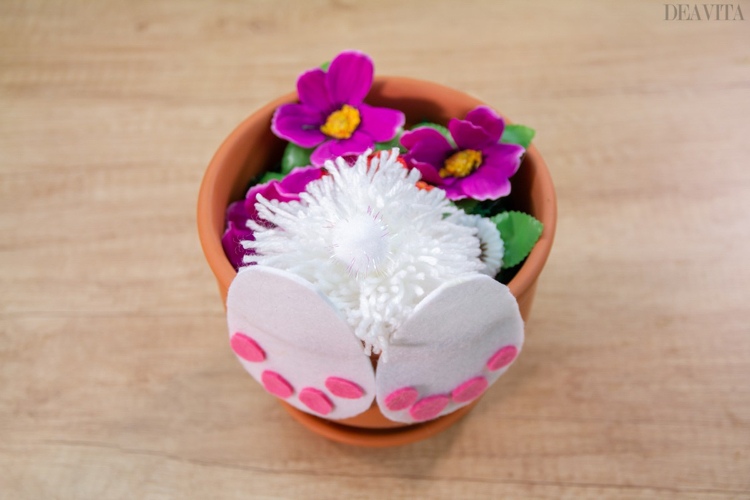
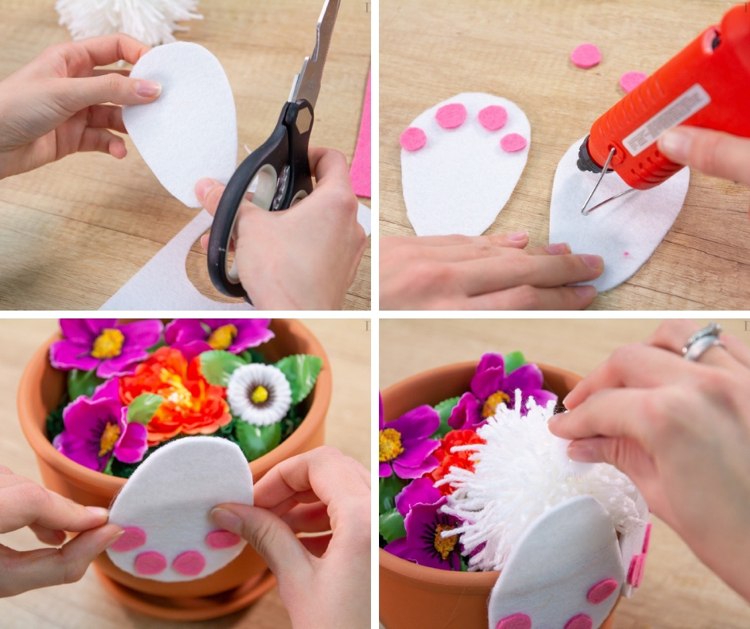
Cut out Easter bunny paws out of the white felt. Cut four circles from the felt in pink and glue them on the paws.
Attach the finished bunny paws to the flower pot with the hot glue gun.
Place the large yarn pompom in the flower pot and decorate with the little pompom.
Easter decoration ideas – how to make paper flowers
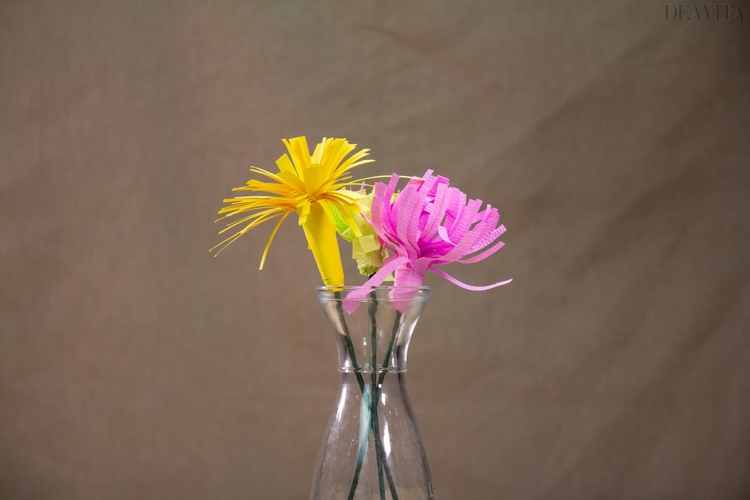
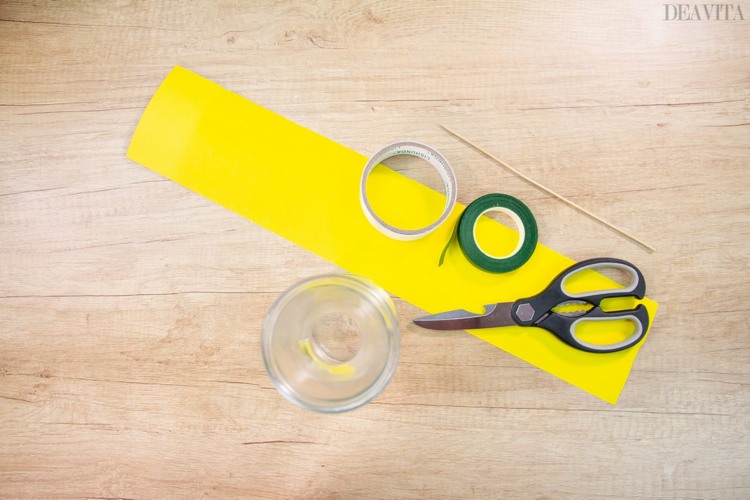
Paper flowers have a decorative effect and can be a colorful accent on the children’s table. Origami flowers have been very popular in recent years, but they are usually elaborate and complicated and are suitable for more experienced craft enthusiasts. If you are looking for a kid-friendly alternative, you will find it here. Colored paper, glue, a skewer and a pair of scissors – that’s all you need for our beautiful flower arrangement.
Materials:
Cardstock Paper (or Crepe Paper) – 50 cm X 10 cm
Scissors
Double Sided Tape
Green Floral Tape
Skewer
Glass Vase
Directions:
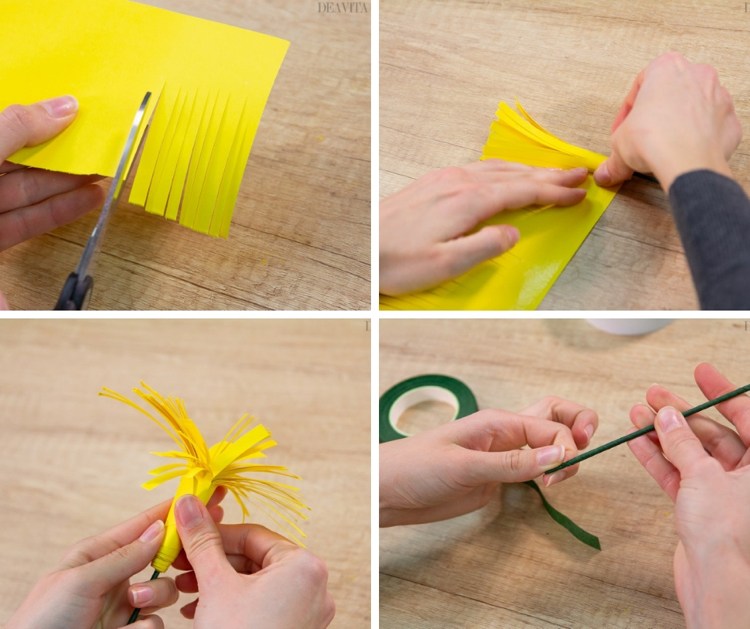
Cut narrow fringes into the paper. Do not completely cut through the crepe paper, but leave a narrow margin (3 cm).
Wrap the skewer with the green floral tape.
Attach the finished flower to one end of the skewer.
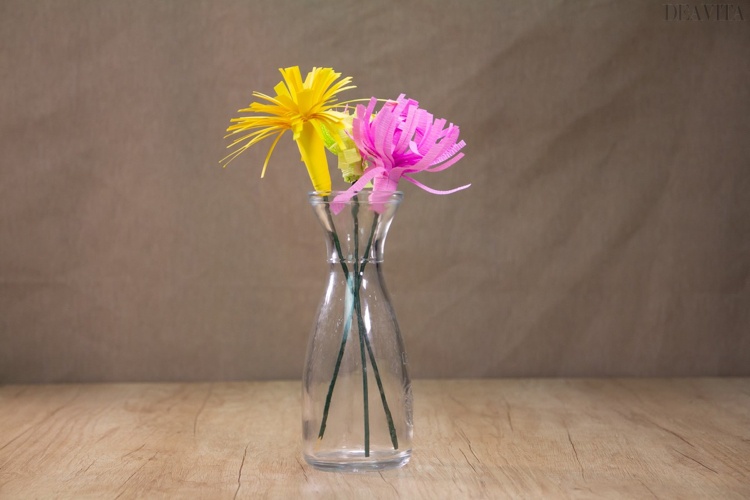
Arrange the finished flowers in a vase.
DIY Easter gifts – how to make a cute bunny candy box
When Easter is around the corner, many people are looking for small gifts to surprise their family and friends. We offer you an idea for a candy box and children will be especially happy to receive one.
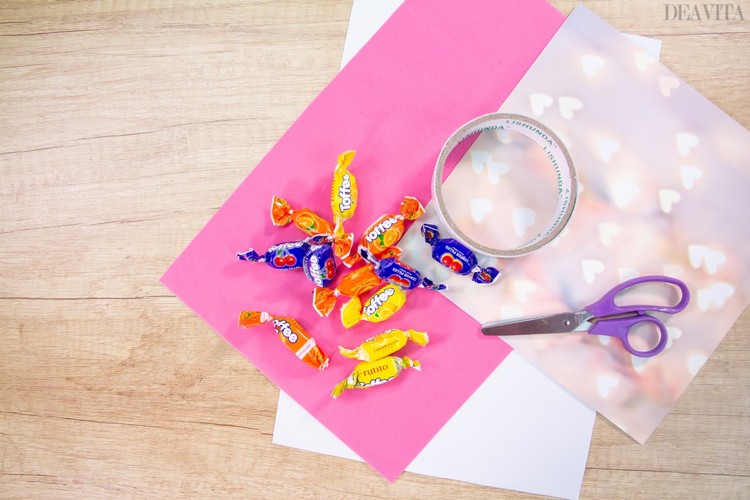
Materials:
Designer Paper (20 cm X 20 cm)
Scissors
Double Sided Tape
White Craft Foam
Pink Craft Foam
Candy
Directions:
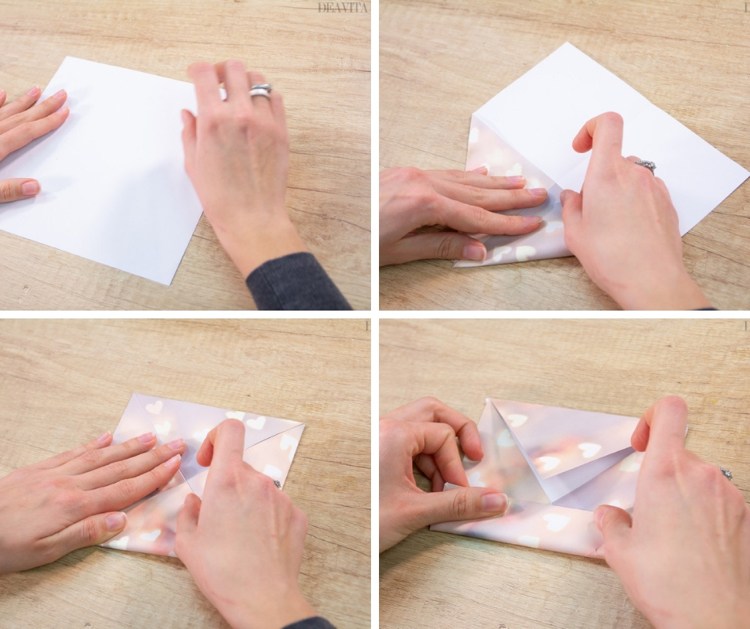
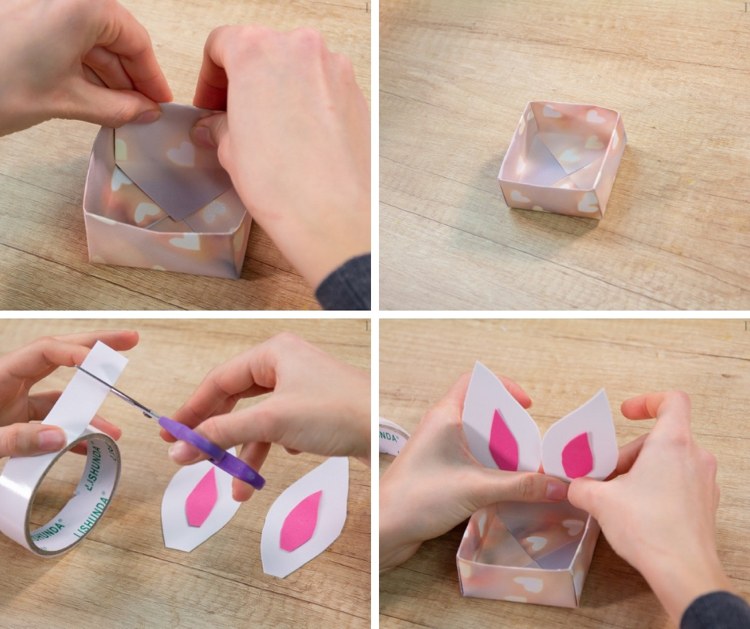
Place a sheet of design paper in front of you, with the white side facing up. Fold the corners of the sheet towards the center.
Fold the top and bottom edges towards the middle.
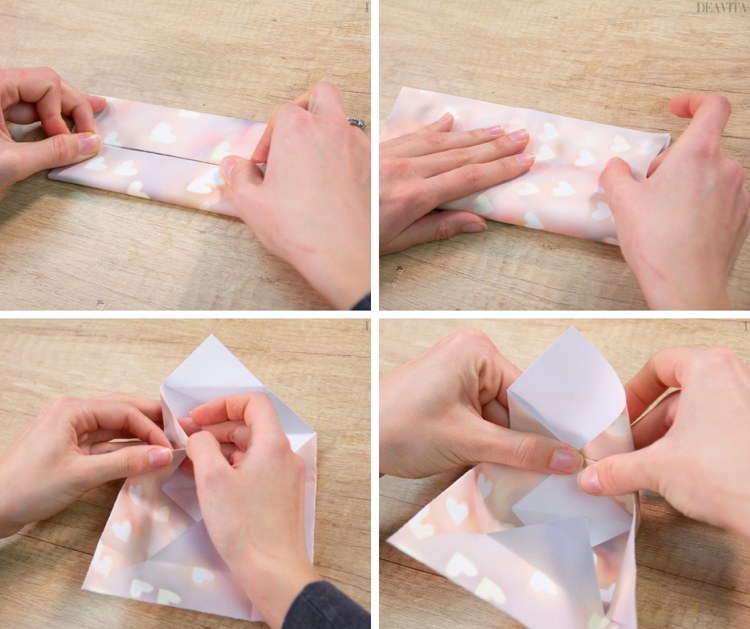
Now fold back the edges and fold the right and left edges towards the middle.
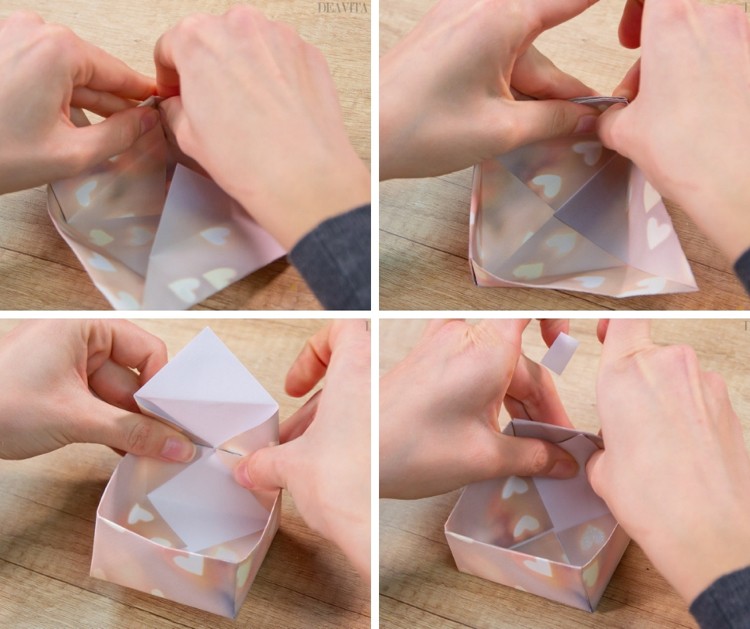
Unfold the lower and upper corners, press in the sides a little and fold up the two tips.
Fold the top and then the bottom tip into the box first.
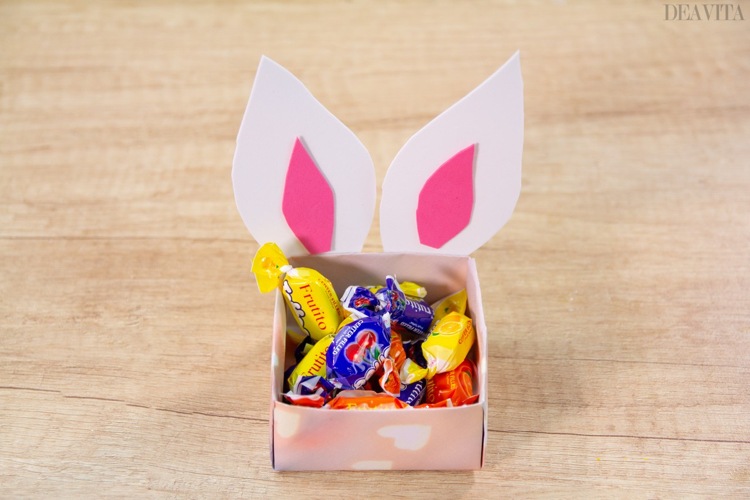
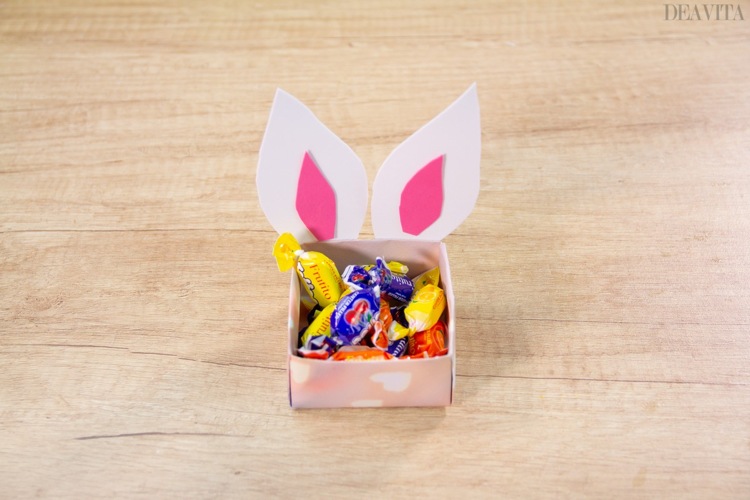
Cut bunny ears from paper and glue them on the box with the double-sided adhesive tape. Fill the box with sweets.
How to make a String egg – step-by-step tutorial
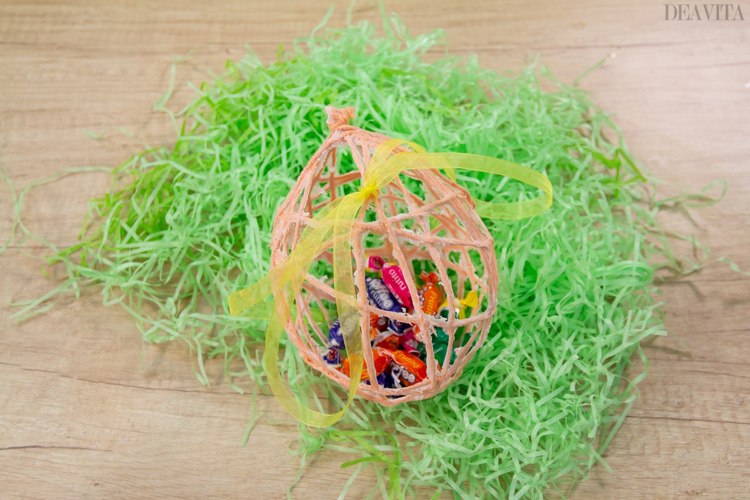
This craft project is for a string Easter egg. This egg can be used either as spring decoration or, if filled with candy, as a handmade Easter gift.
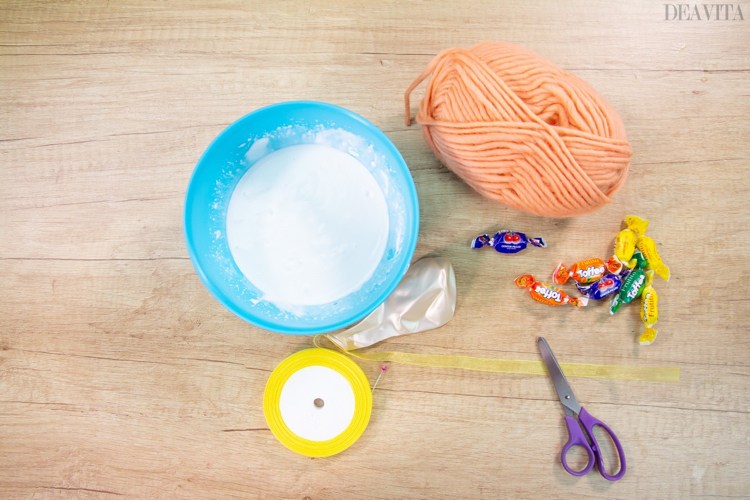
Materials:
Yarn
Glue
Balloon
Scissors
Bowl
Ribbon
Directions:
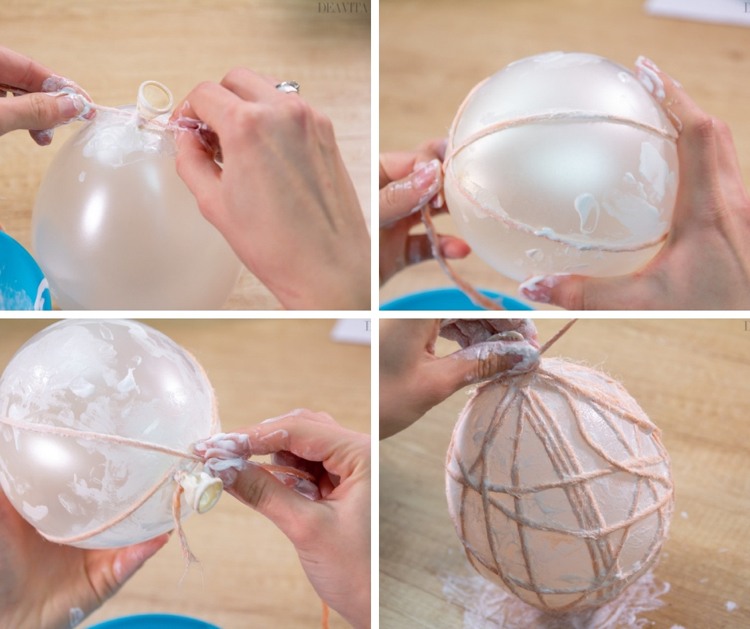
Pour some craft glue into a bowl and mix 3: 1 with water. Stir well until the glue is completely dissolved and there are no lumps. Dip the wool in the glue.
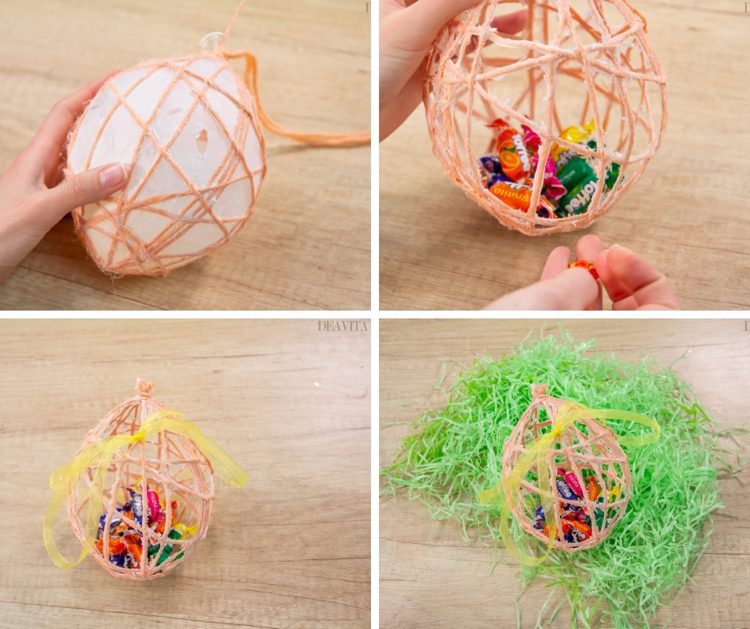
Inflate a balloon and wrap the wool around it. Let dry.
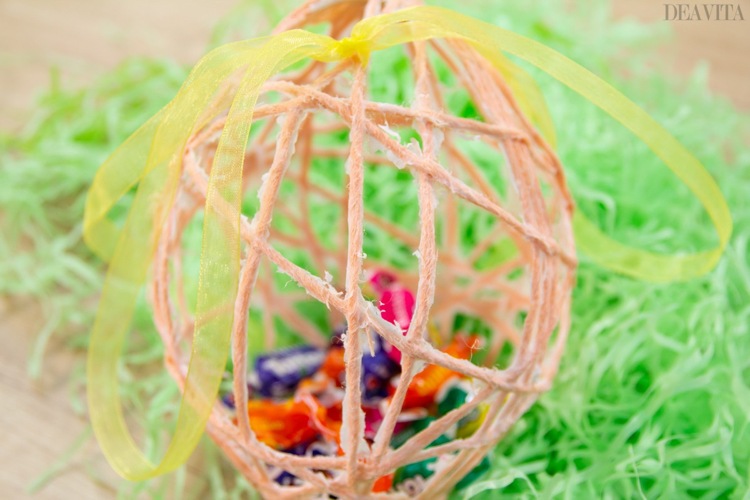
Cut the balloon with scissors and then carefully remove it from the sturdy shell. Decorate the finished yarn egg with satin ribbon and fill with sweets.
Cool Easter crafts – how to make a bobble head paper bunny
Materials:
Paper
Scissors
Pencil
Black Marker
Pink Marker
2 Pompons
Wobbly Eyes
Glue
Hot Glue Gun
Ruler
Directions:
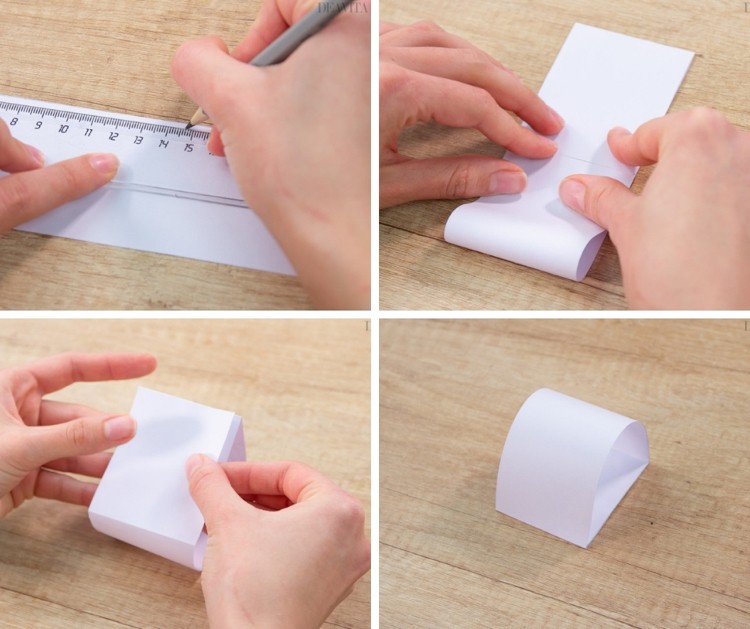
Cut a rectangle measuring 29.7 cm x 6 cm.
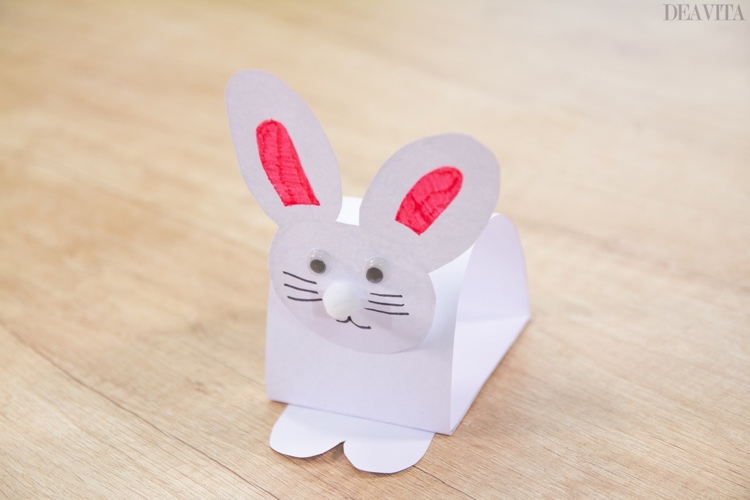
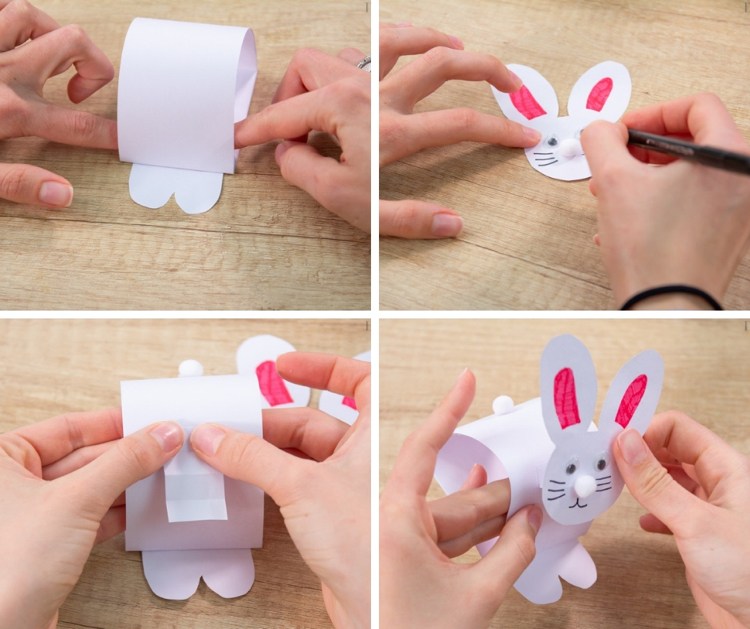
Cut the bunny paws and head out of the paper, draw the face and glue the wobbly eyes.
Fold the rectangle slightly and glue it to the bunny paws.
Cut out a small rectangle and fold it like harmonica. Glue one narrow side of the smaller rectangle to the body of the bunny. Attach the other narrow side to the head.
Glue the pompons.

