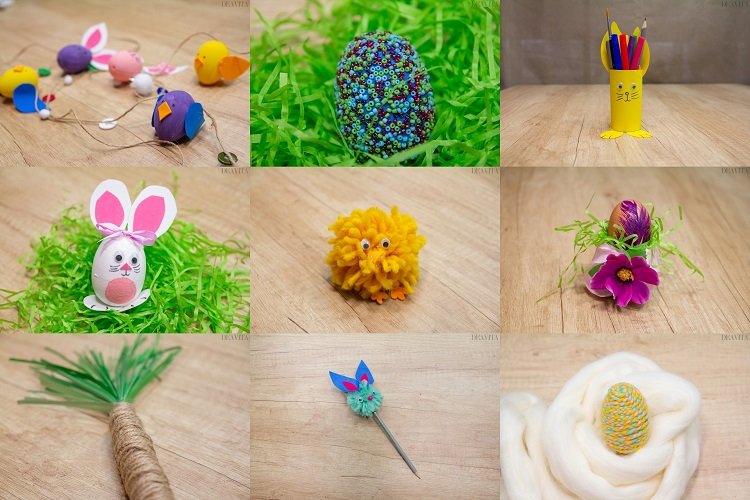
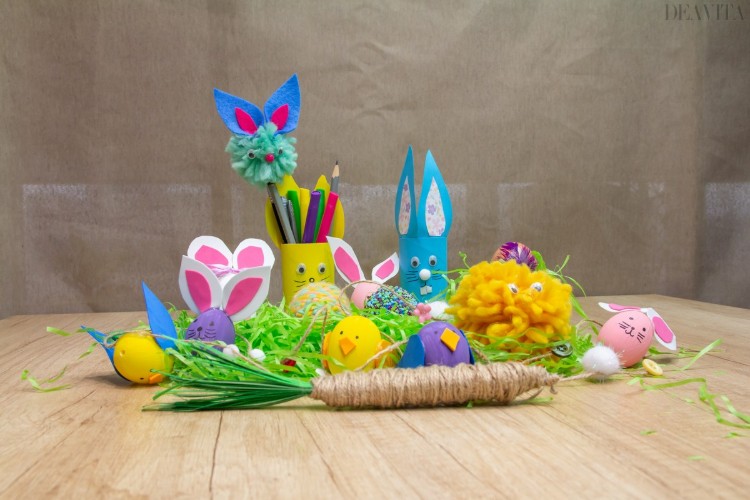
DIY Easter decorations can be much cuter and more durable than those bought in the store. We have selected 10 simple and cute Easter craft ideas for adults and children which are easy and fun. Whether you’re looking for something to decorate your door, a unique table centerpiece, or add a spring flair to the home, these craft works add a touch of sweetness to your home. Our suggestions include all the favorites you need for your homemade Easter decorations – flowers, eggs, grass, Easter Bunny, carrots and of course many beautiful pastel colors.
DIY Easter decorations ideas
These ideas for crafting are very easy and regardless of whether your style of living is rustic, sweet, glamorous or old-fashioned, our examples are suitable for every taste. Guests at your Easter celebration will certainly be impressed by your skills as you exhibit one of these festive homemade decorations. Go on reading on to discover great DIY Easter decoration step-by-step instructions. Craft these charming Easter artworks and add a wonderful spring mood to your home.
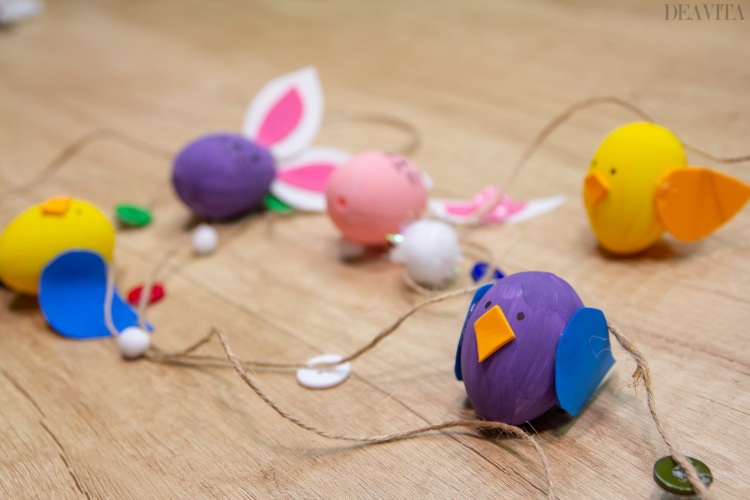
DIY Easter decorations- How to make bunny and chick Easter egg garland
Materials:
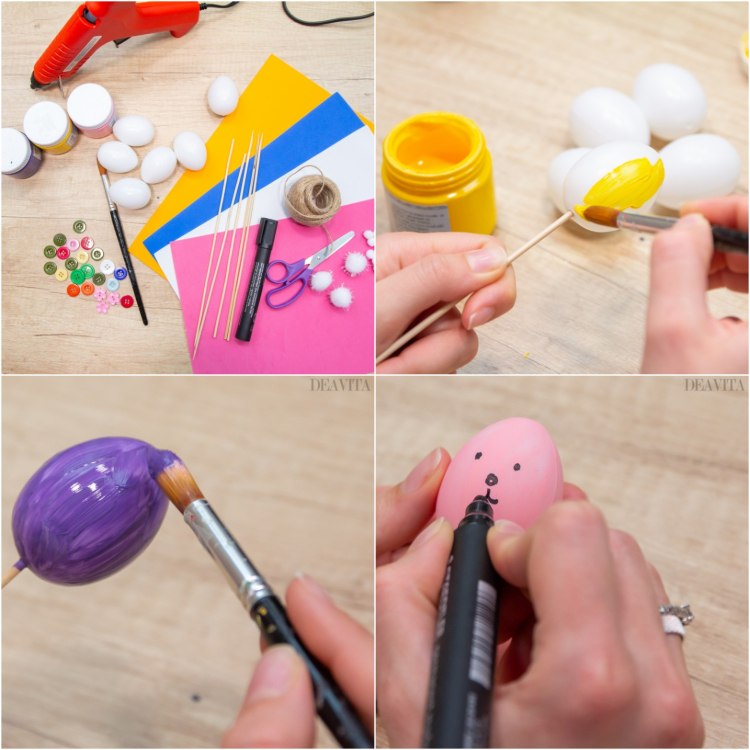
6 Plastic Eggs
Acrylic Paint (different colors)
Twine
Paintbrush
Hot Glue Gun
Pom Poms (different sizes)
Buttons (different colors)
Black Marker
Craft Foam (white, pink, orange and blue)
Scissors
Skewers
Directions:
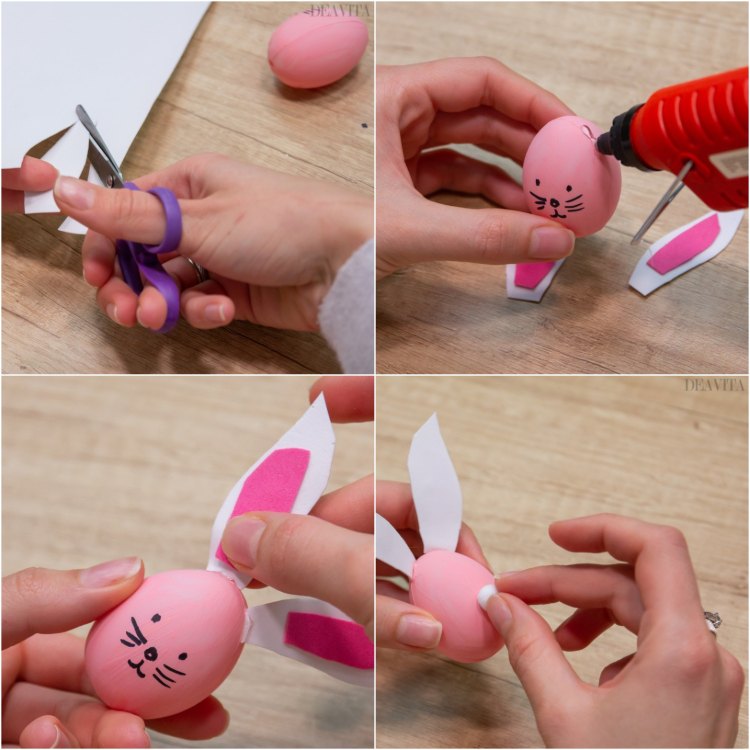
Paint the eggs with acrylic paints in different colors.
Draw eyes, nose and whiskers on three of the plastic eggs.
Cut bunny ears from the pink and the white foam and glue them together.
Glue the pom-pom on the back as a tail.
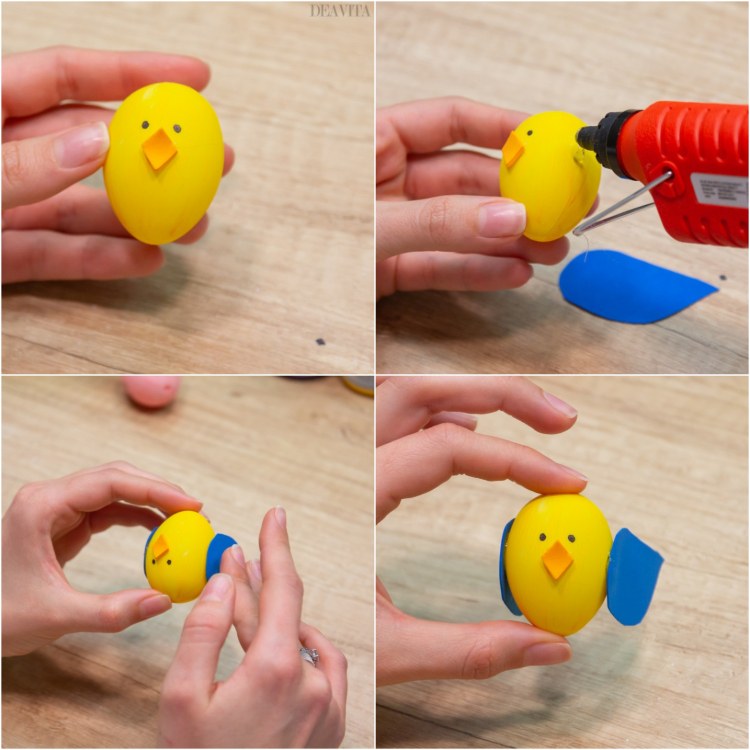
Turn the remaining 3 eggs down and draw eyes on them.
Cut rhombic pieces from the orange-colored foam and fold them to make beaks.
Cut the wings from the blue and orange fabric and glue them together again.
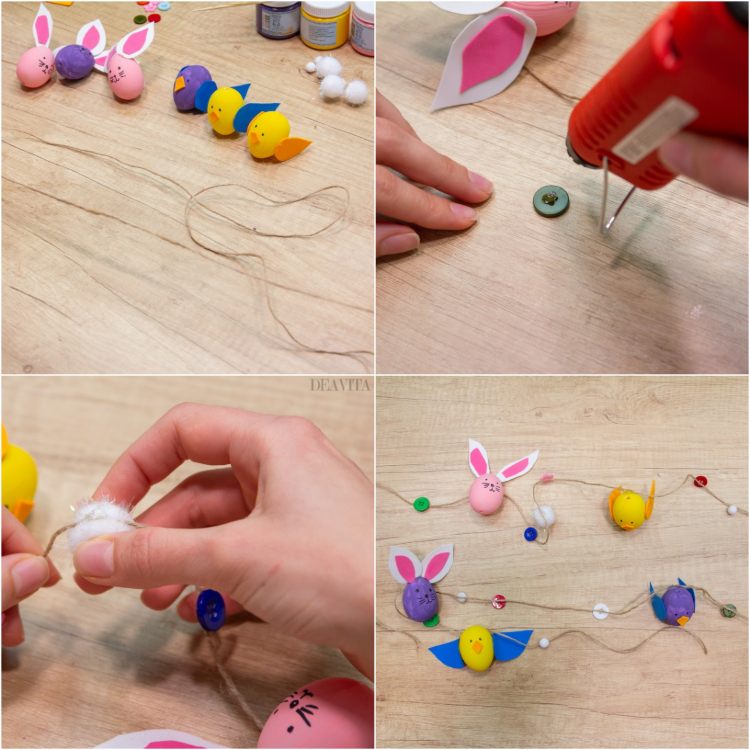
Attach the figures (bunnies and chicks) to the cord by using the hot glue.
Finally decorate the garland with pompoms and buttons.
Homemade Easter decorations – How to make toilet paper roll bunny
Materials:
Toilet Paper Roll
Designer Paper
Cardstock Paper
2 Pom-poms
Hot Glue Gun
Wobbly Eyes
Black Marker
Pencil
Scissor
White Craft Foam
Glue
Directions:
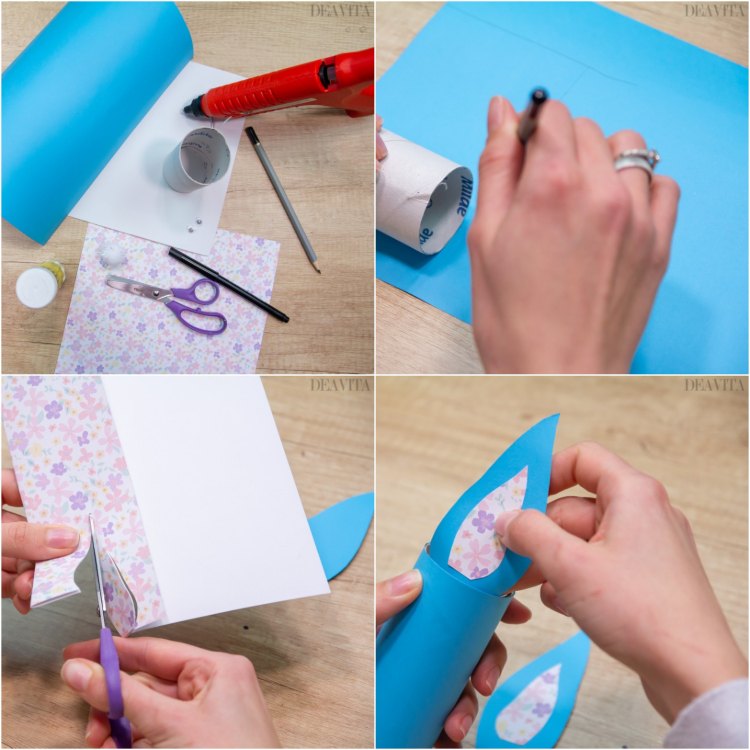
Use a pencil to mark the roll on the cardstock paper and cut a strip.
Wrap the roll with the wrapping paper using the craft glue.
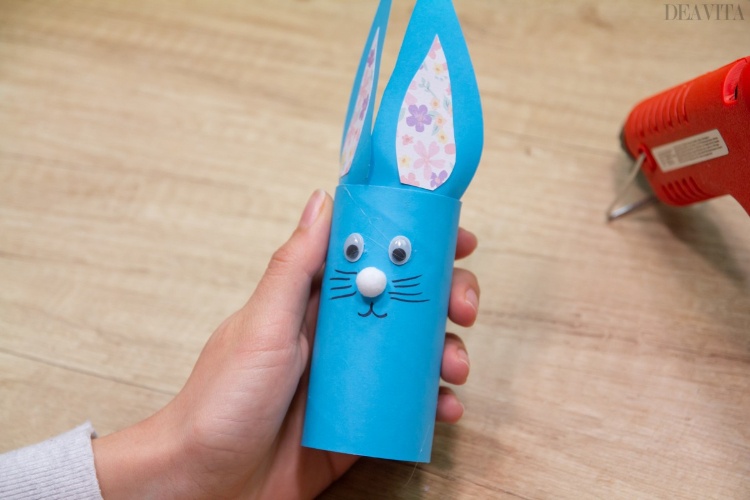
Draw 2 bunny ears on the cardboard and two smaller ears on the wrapping paper and then cut them out.
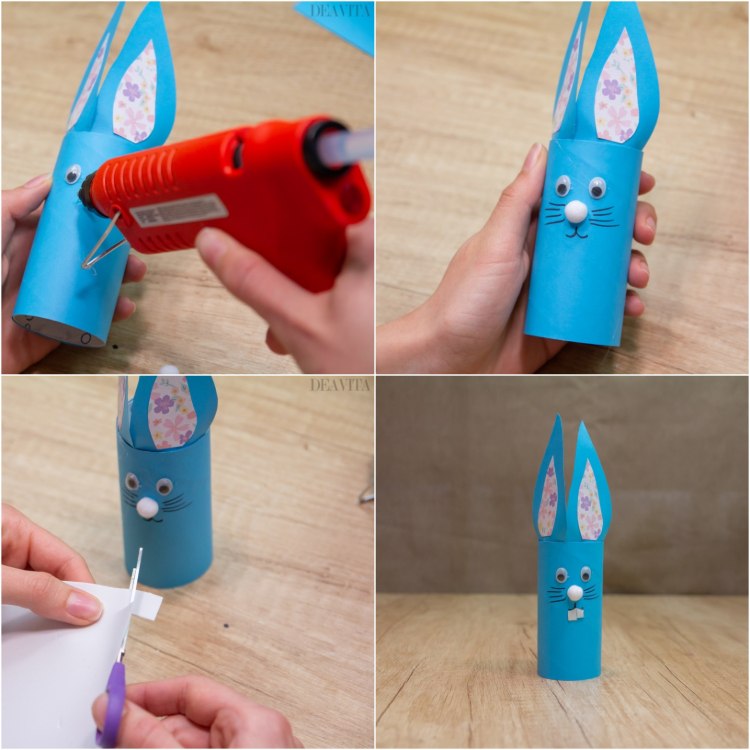
Glue the smaller ears to the larger ones and attach the finished bunny ears to the inside of the roll.
Glue the eyes and a pompom nose to the front.
Draw whiskers around the nose and mouth.
Cut 2 teeth from the white foam and glue them on the toilet paper roll.
Finally glue the other pompom on the back as a tail.
DIY Easter decoration – twine carrot
Materials:
Green Quilling Paper Strips
Scissors
Paper
Tape
Twine
Hot Glue Gun
Directions:
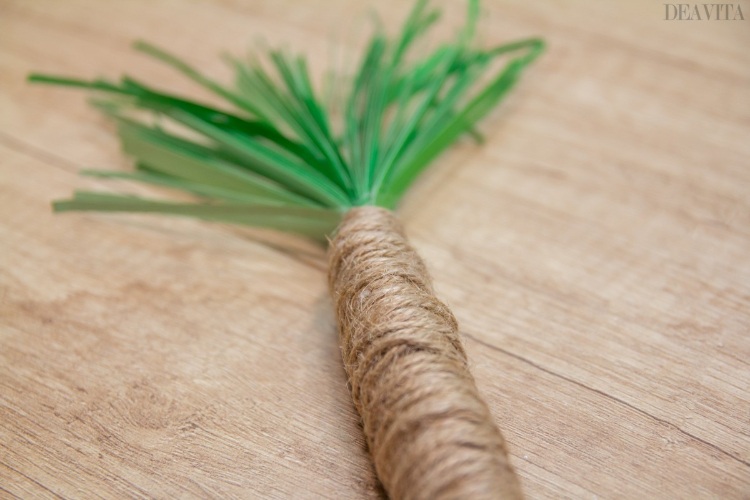
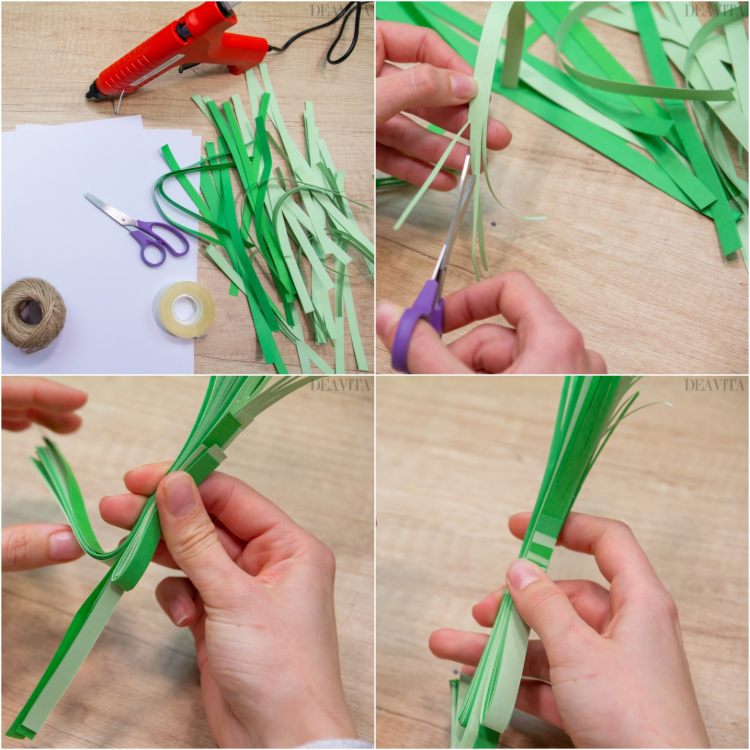
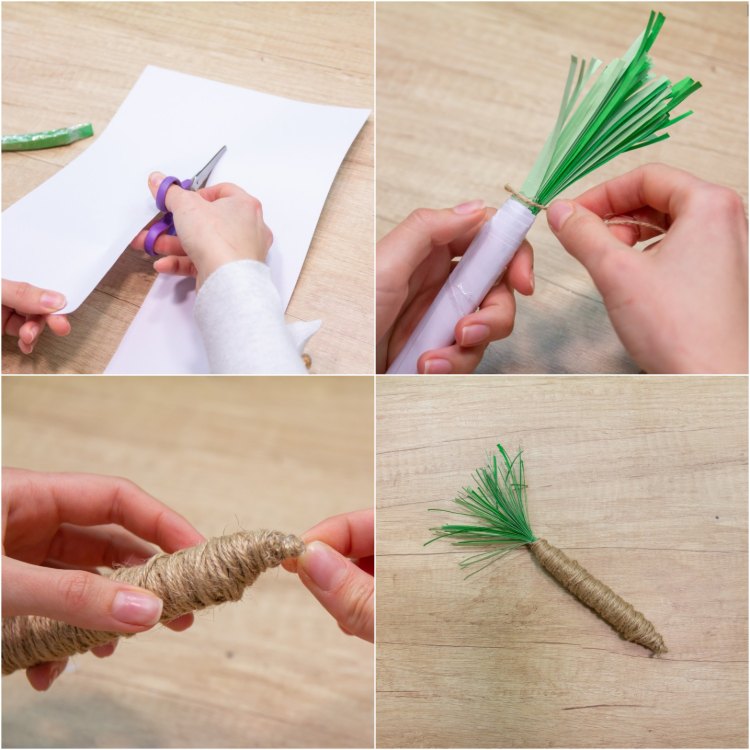
Cut thin paper strips that will stick out of the carrot. You can combine light green with dark green strips.
Flatten the undersides to the left and to the right and glue them together with the adhesive tape.
Cut one sheet of printing paper in two to wrap the paper strips over it.
Fasten again with tape and wrap the twine. After you reach the top, you can cut off the twine.
Use the hot glue to attach the remaining thread.
Easy Easter craft ideas – how to make a beaded Easter egg
Materials:
Styrofoam Egg
Acrylic Paint
Paintbrush
Mod Podge
Seed Beads
Skewer
Directions:
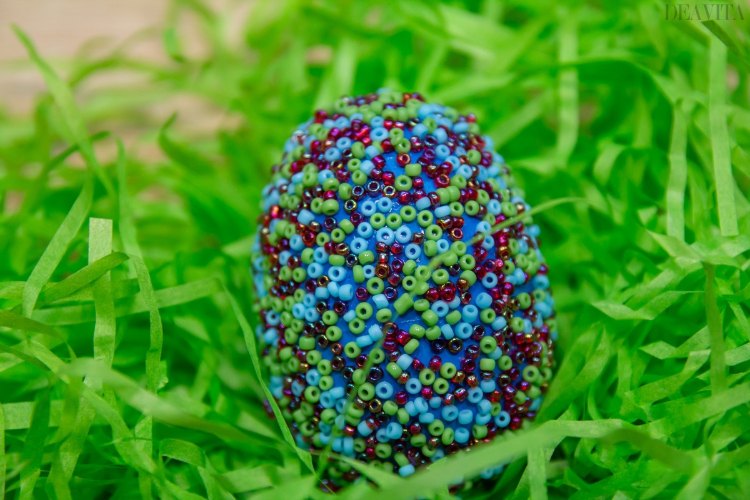
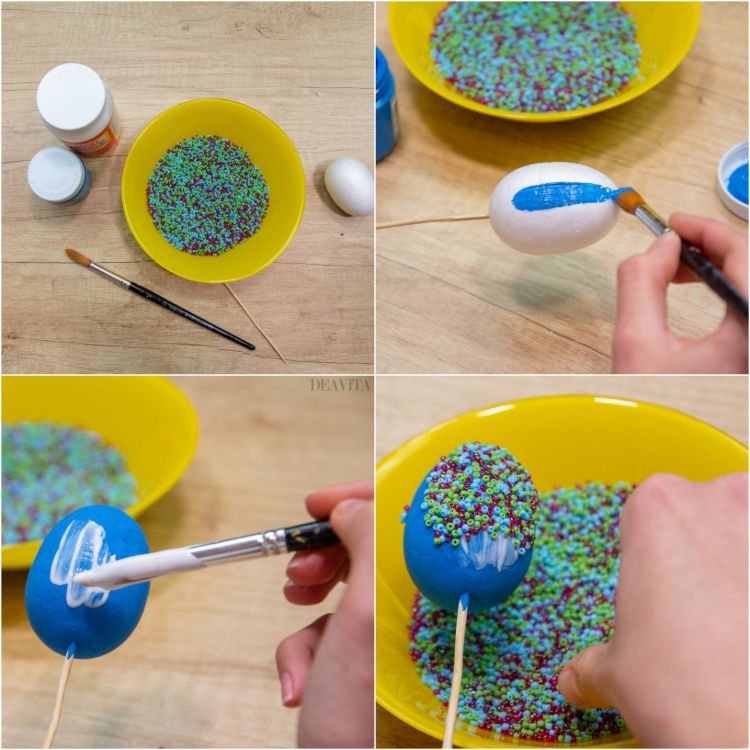
Fix the egg on a skewer, paint it with the acrylic paint and let it dry.
Glue the beads on the egg with the craft glue and let it dry again.
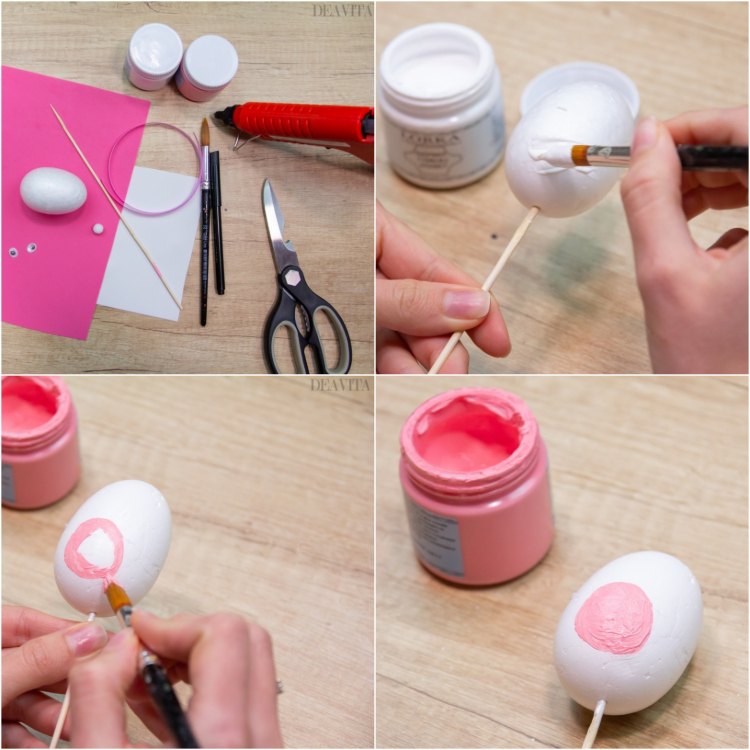
Cute DIY Easter decoration – bunny egg
Materials:
Styrofoam Egg
White Acrylic Paint
Pink Acrylic Paint
White Craft Foam
Pink Craft Foam
Paintbrush
Hot Glue Gun
Wiggly Eyes
Black Marker
Ribbon
1 Pompom
Skewer
Directions:
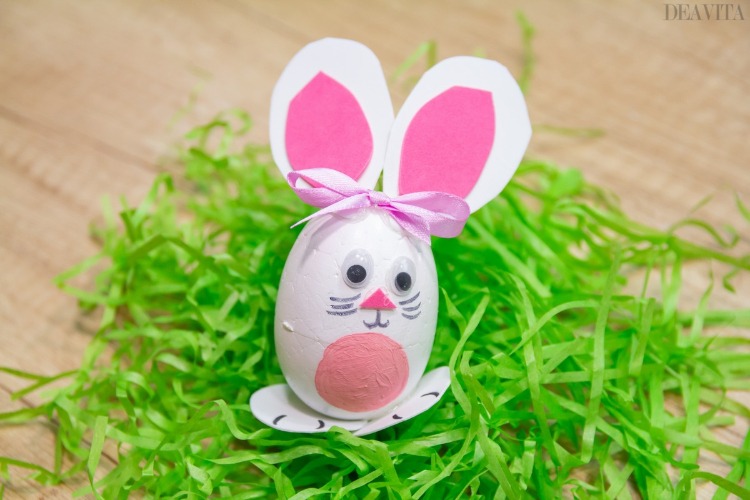
Paint the egg in white with the acrylic paint and let it dry.
Draw a tummy with the pink acrylic paint and let it dry.
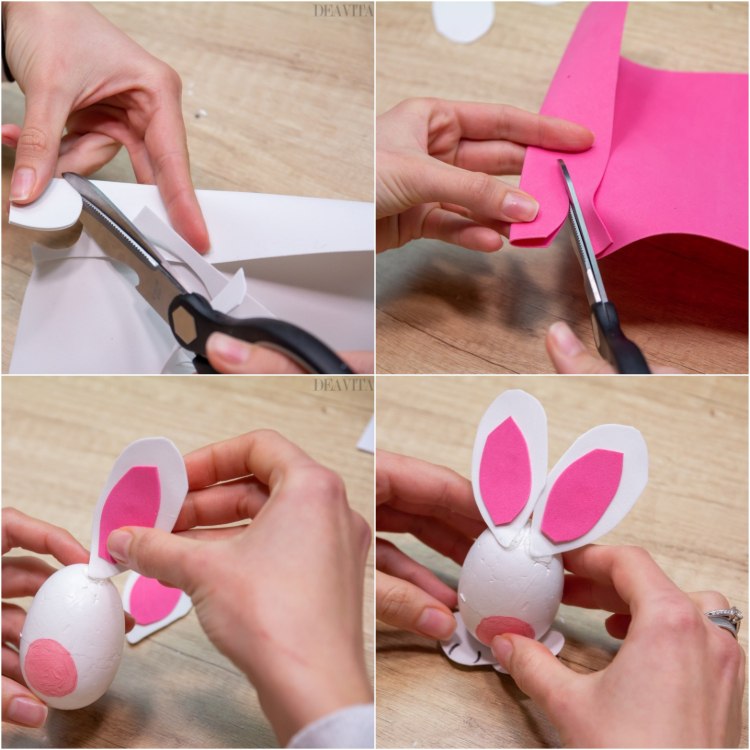
Cut two large bunny ears from the white foam and two smaller ones from the pink foam. Repeat the process to make bunny feet.
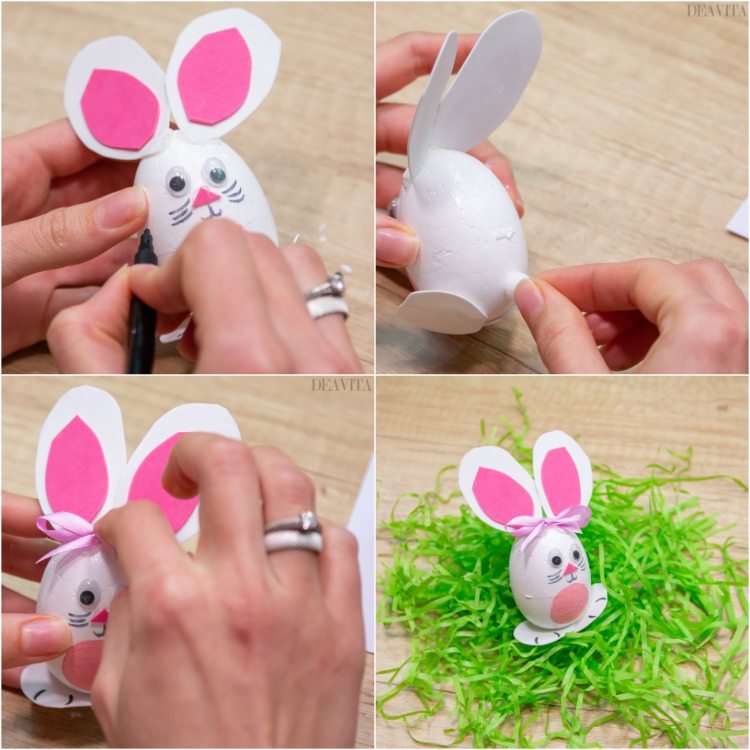
Glue the ears and draw toes on the feet, then attach them all to the egg with the glue.
Cut the nose and the eyes from the pink craft foam.
Draw the mouth and the whiskers with the black marker and glue the pompom to the back.
Tie the ribbon and glue it between the ears.
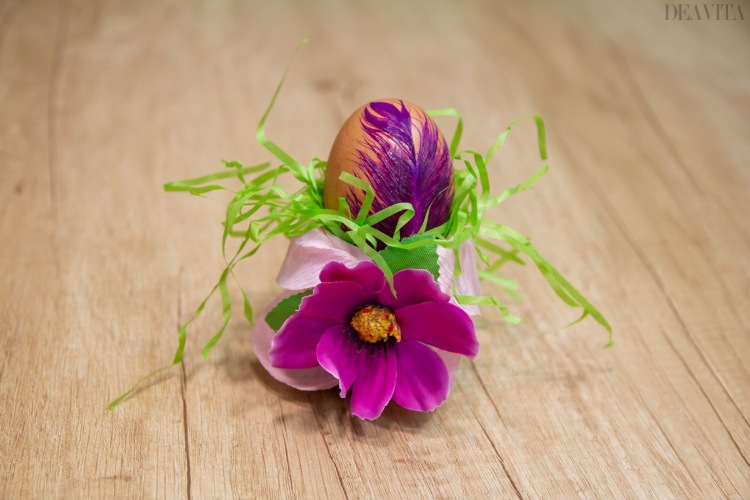
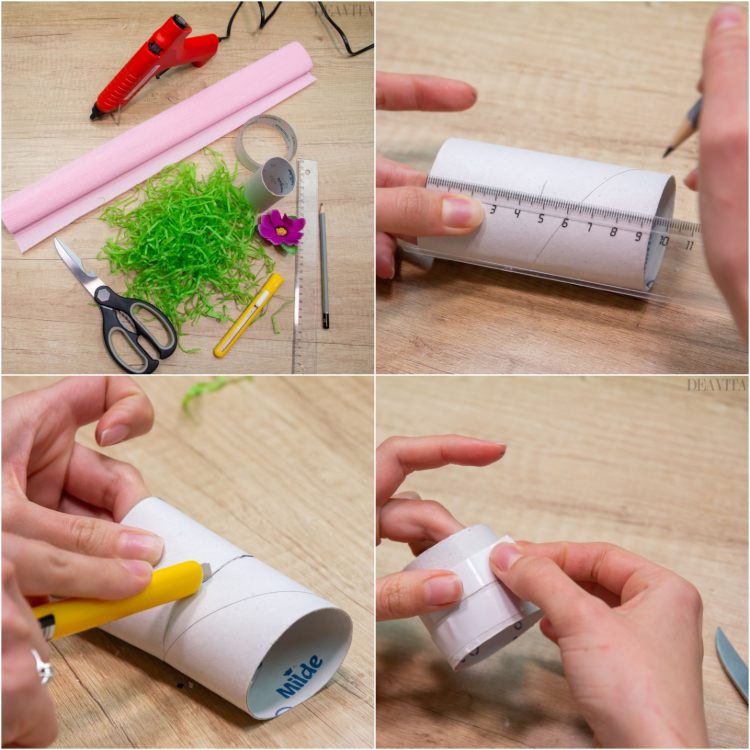
DIY Easter craft – Egg cup made of paper rolls
Materials:
Toilet Paper Rolls
Crepe Paper
Double Sided Tape
Paper Grass
Decorative Flowers
Hot Glue Gun
Scissors
Craft Knife
Ruler
Pencil
Directions:
Divide the roll of toilet paper in two.
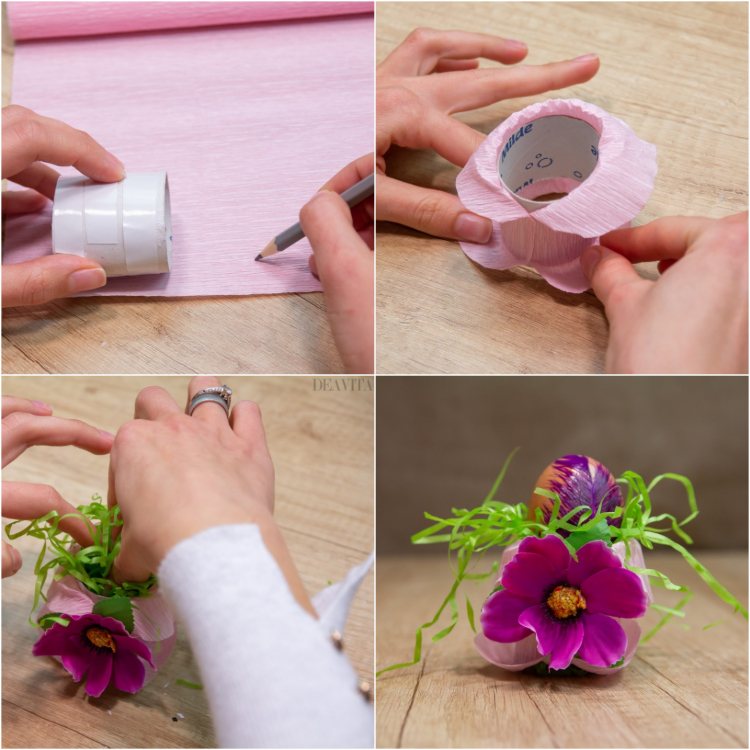
Glue the pieces with the double-sided tape and cut out crepe paper that should be slightly larger than the roll itself.
Wrap the toilet paper roll over it and round off the ends.
Glue the flower where the two sides of the paper meet for extra stability.
Fill the cup with the paper grass as a nest and place an Easter egg in it.
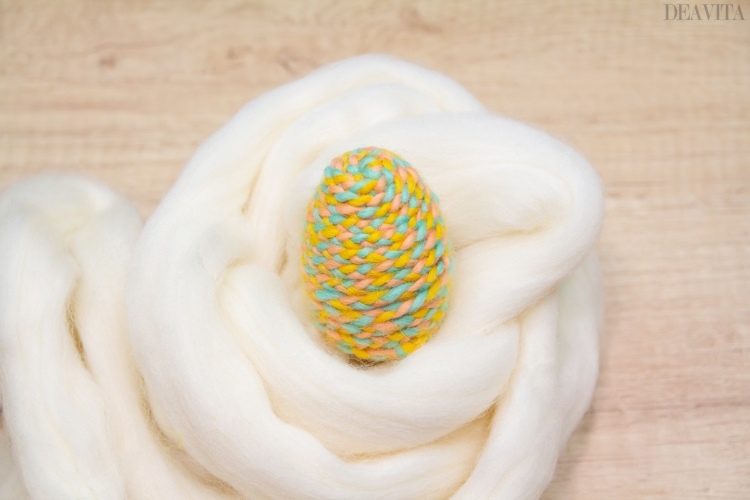
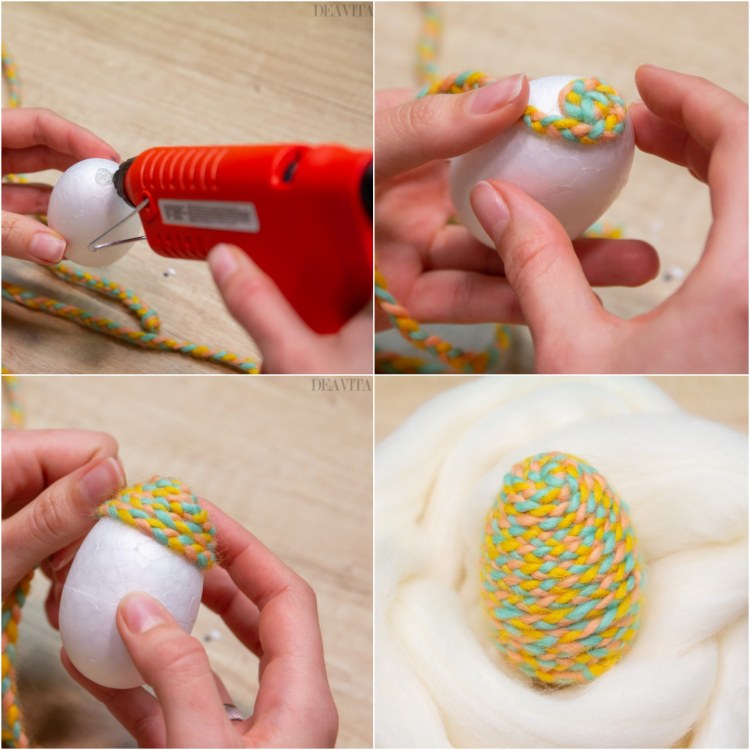
How to make a braided egg
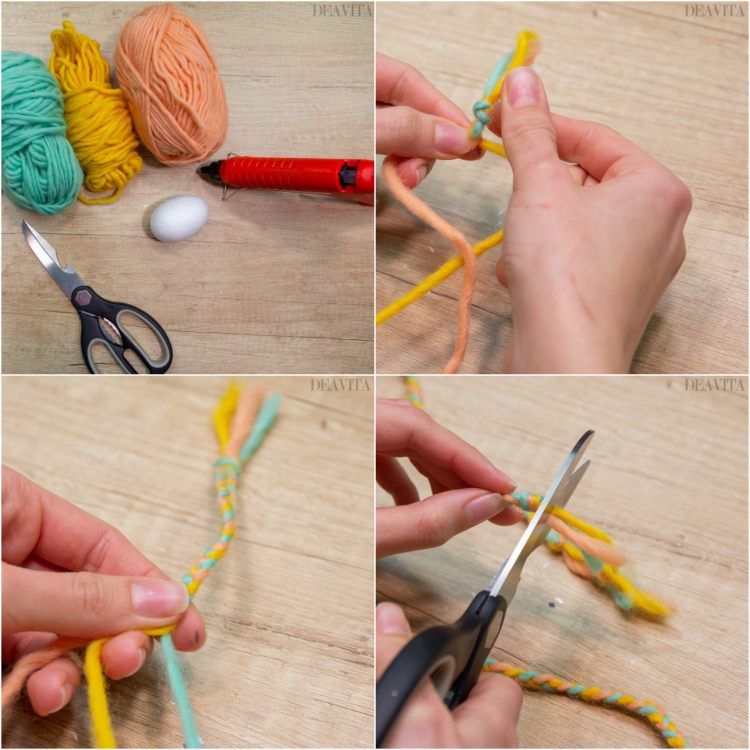
Materials:
Styrofoam Egg
Hot Glue Gun
Yarn (different colors)
Scissors
Directions:
Braid different yarn colors.
Glue the braid on the egg using hot glue as shown in the photos.
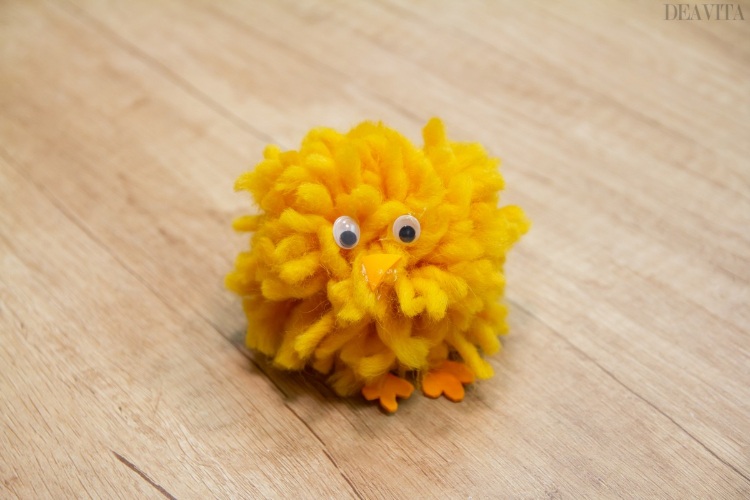
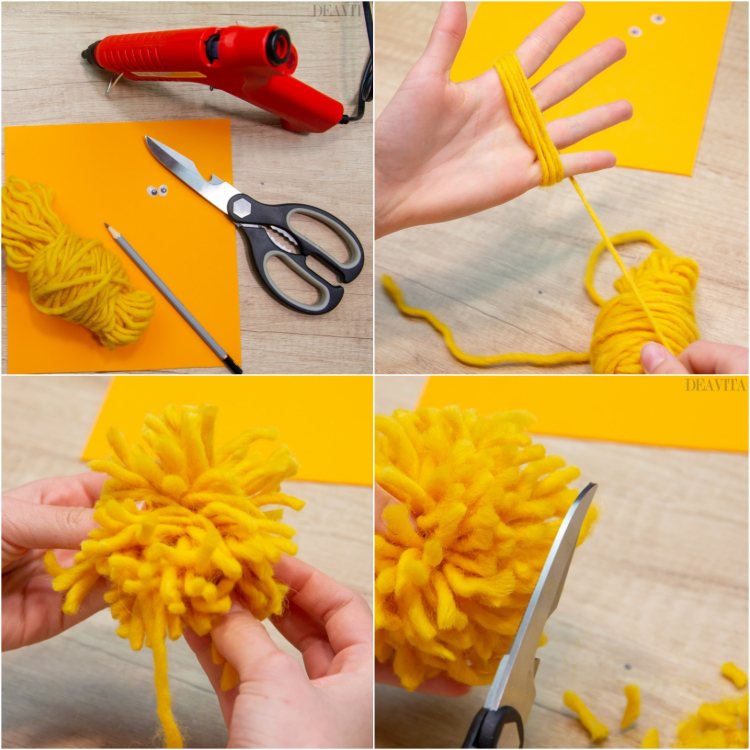
How to make a cute pom-pom chick
Materials:
Yellow Yarn
Orange Craft Foam
Scissors
Pencil
2 Wiggly Eyes
Hot Glue Gun
Directions:
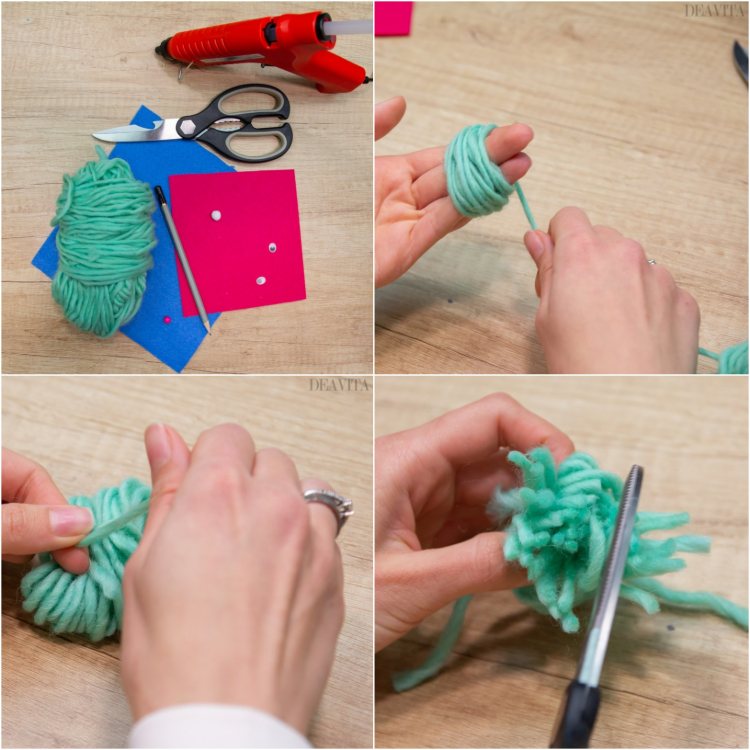
Wrap the yarn around your fingers and cut the ends.
Tie it well and cut it in the middle so that you can make a big pom-pom.
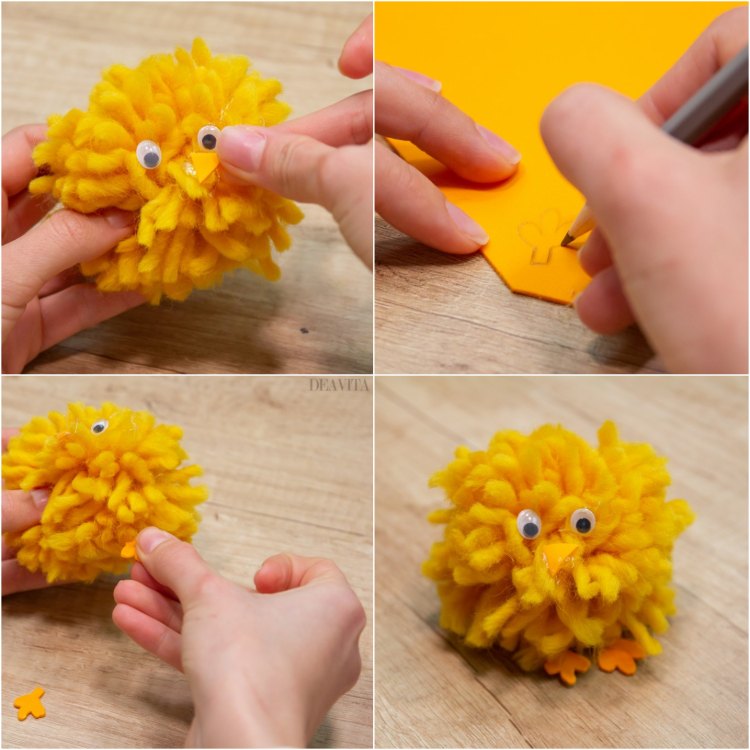
Glue the eyes and cut out a small beak as well as the feet from the orange craft foam.
Attach them to the pom-pom with the hot glue gun.
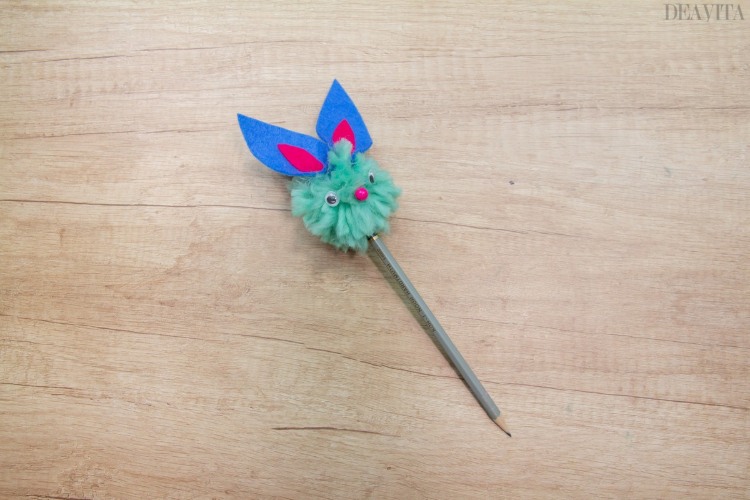
DIY Bunny pom-pom pencil topper
Materials:
Pencil
Yarn
Felt (different colors)
Hot Glue Gun
Scissors
Wiggly Eyes
1 Pompom
1 Pink Bead
Directions:
Wrap the yarn around your fingers and cut the ends.
Tie it well and cut it in the middle so that you can make a big pom-pom.
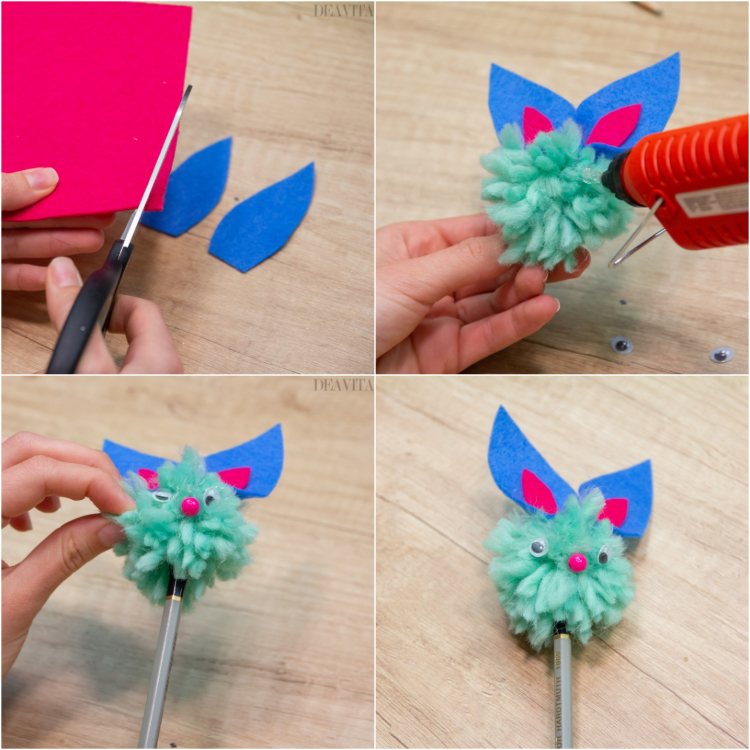
Cut bunny ears from the felt and glue them together.
Attach the ears, the eyes and the pearl as a nose on the pom-pom with hot glue gun.
Glue the small pom-pom on the back as a bunny tail.
Glue the finished bunny to the top of the pencil using the hot glue gun.
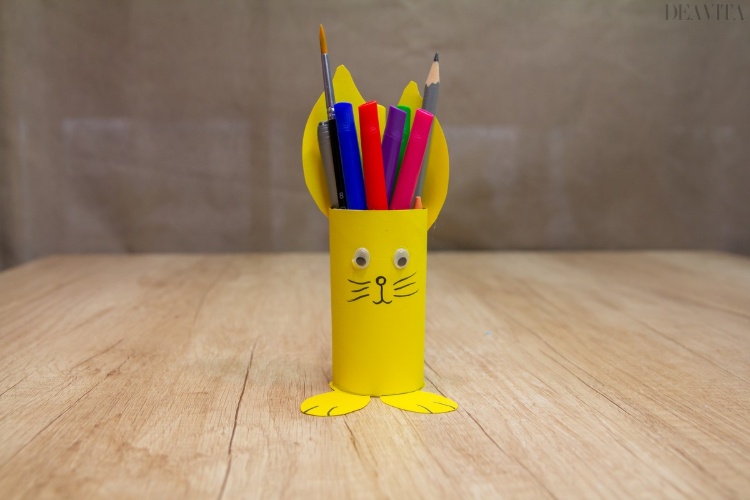
Cute bunny pencil holder as a DIY Easter decoration
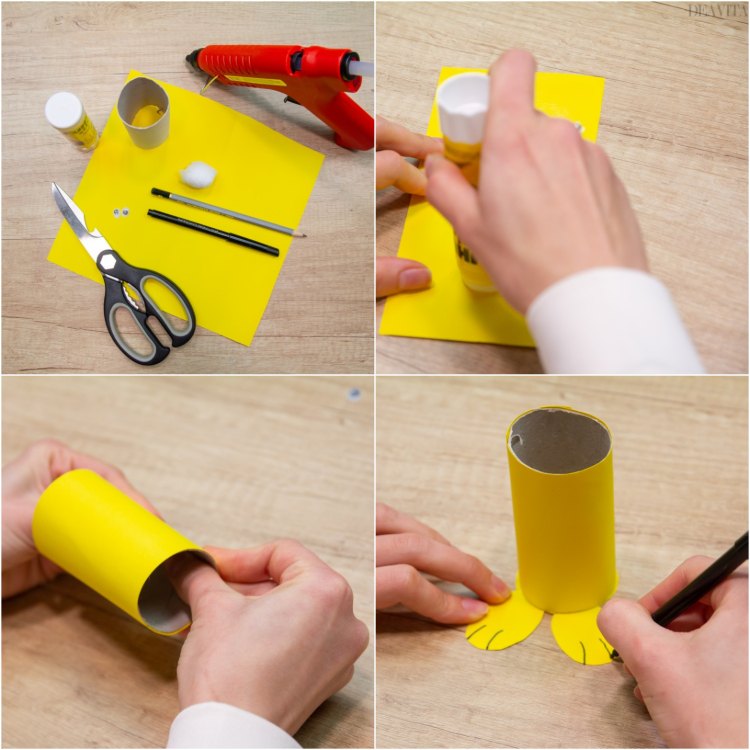
Materials:
Toilet Paper Roll
Cardboard Paper
Glue
Hot Glue Gun
Cotton Ball
Black Marker
Wiggly Eyes
Directions:
Mark the height and length of the roll on the cardboard and cut out the piece.
Glue the toilet paper roll to the cardboard box.
Draw the bottom of the roll and two feet on the cardboard and then cut them.
Glue the bottom to the paper roll with the hot glue gun.
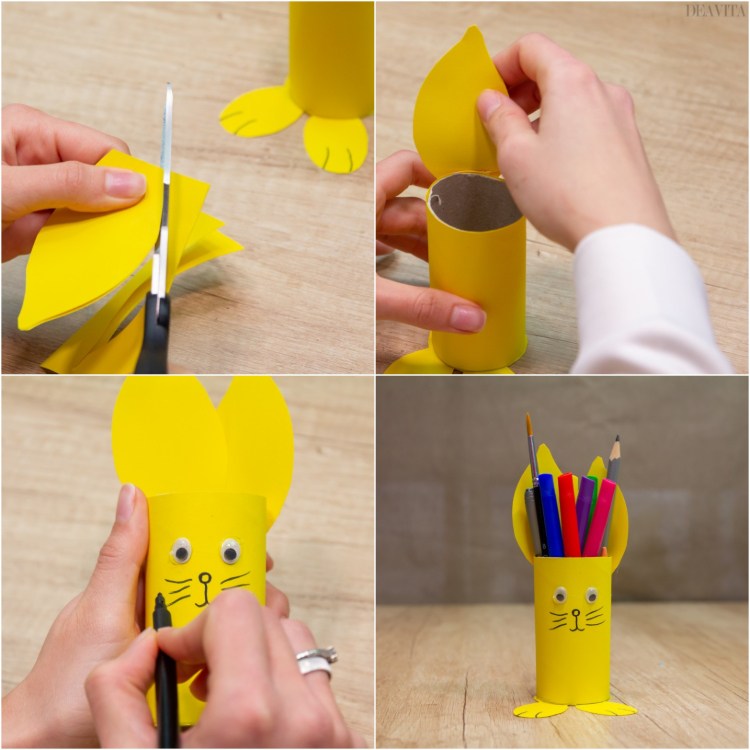
Draw toes on the feet with the black marker.
Draw two ears on the cardboard, cut them and attach them to the back using the hot glue gun.
Glue the eyes to the front and the cotton ball to the back as a tail.
Finally, draw the mouth and the whiskers on the roll and place pens in the holder.
Also read: 10 DIY Easter Gifts – Cute and Funny Ideas for a Great Easter
and

