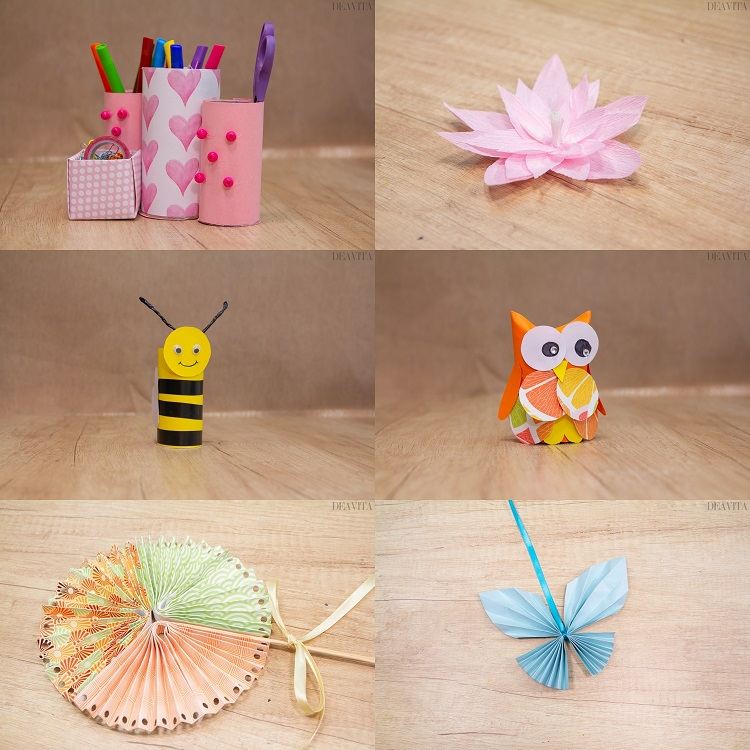
Whether cardboard, tissue, crepe paper or toilet paper rolls – you can do a lot with this material – paper folds, cuts, origami and more! Here we will show 10 simple and original paper craft ideas for different occasions and for all ages. Paper crafts are a huge fun throughout the year! Colorful paper sheets, scissors and glue – you do not need much more in these craft projects.
Paper craft ideas – How to make a butterfly
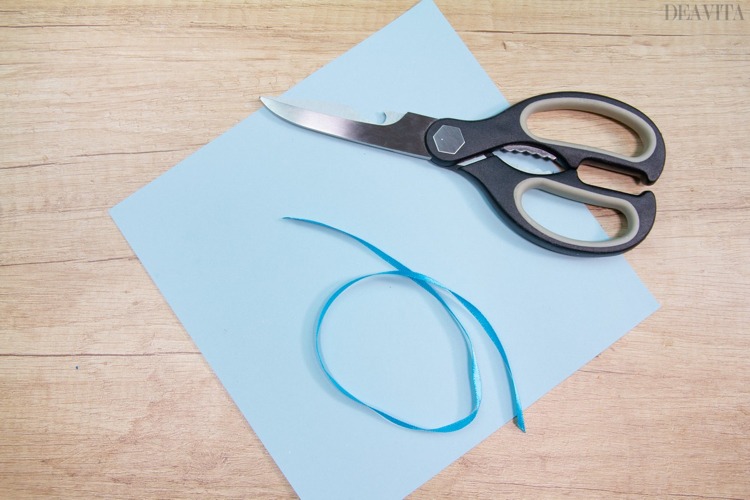
Required materials:
Square Sheet of Paper
Scissors
Ribbon
Directions:
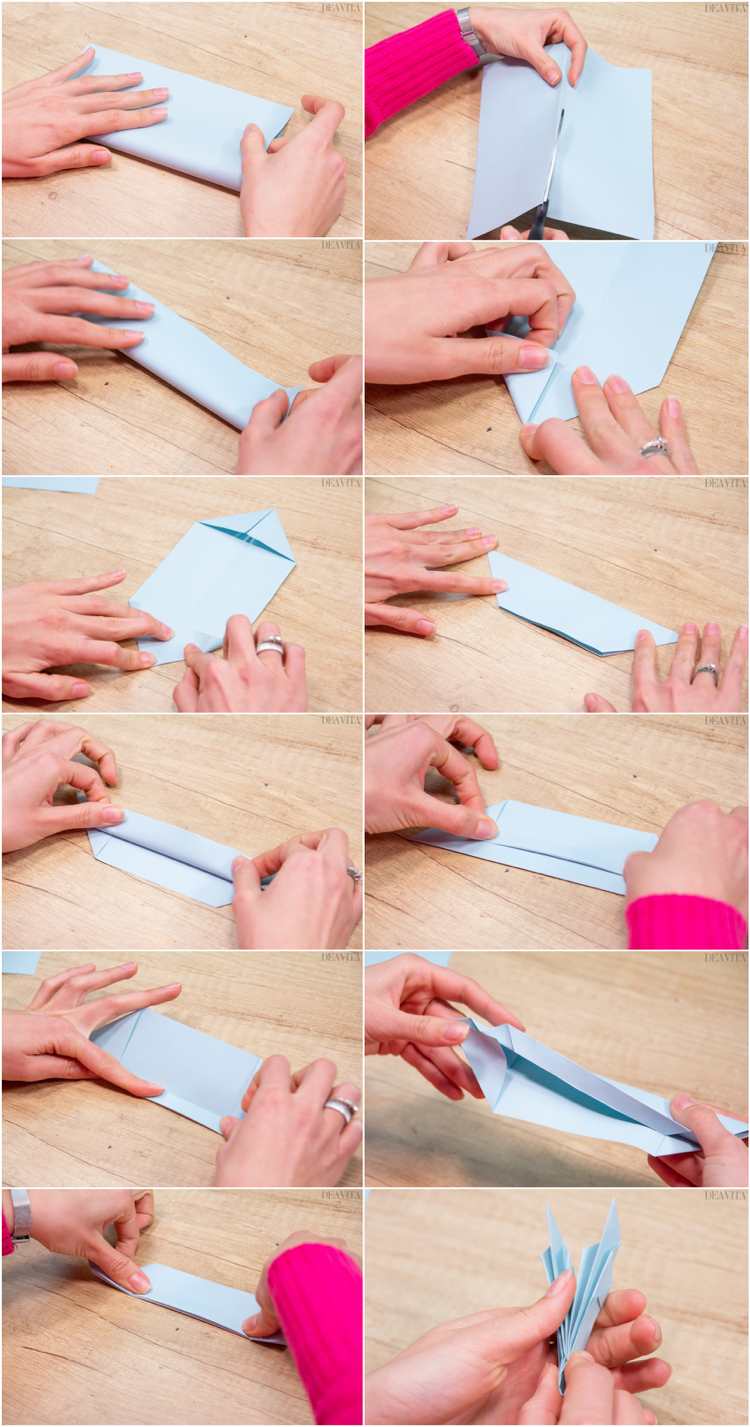
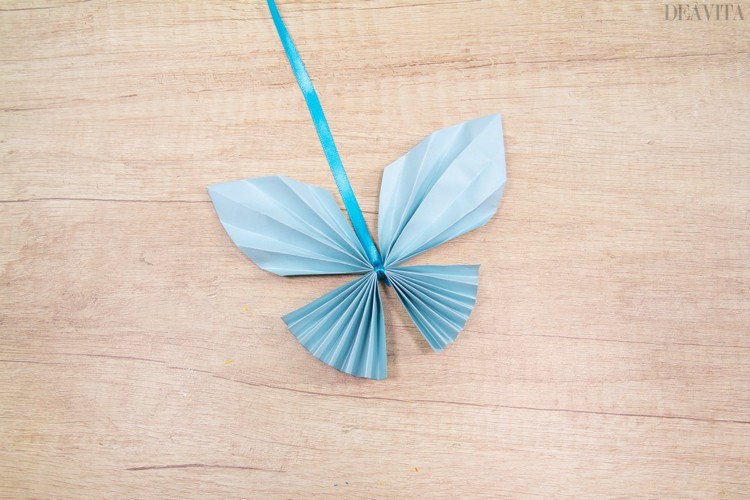
Cut the square sheet of paper into two rectangles.
Fold the first rectangle horizontally. Then open and fold the corners in.
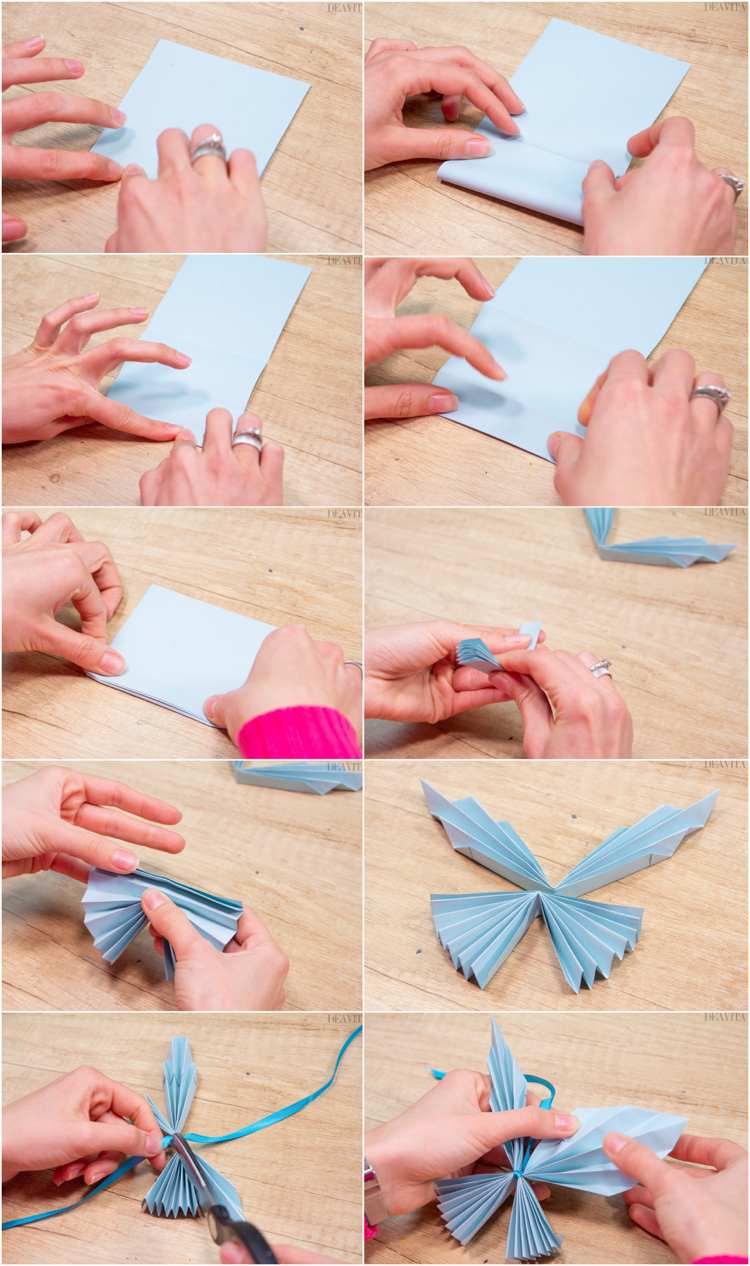
Now the paper will fold into narrow strips like an accordion perpendicular to the middle fold.
Then fold in the middle. Fold the second sheet of paper in the same way.
Lay the two sheets together and tie a thin decorative ribbon in the middle.
Fold the upper wings slightly with your thumb.
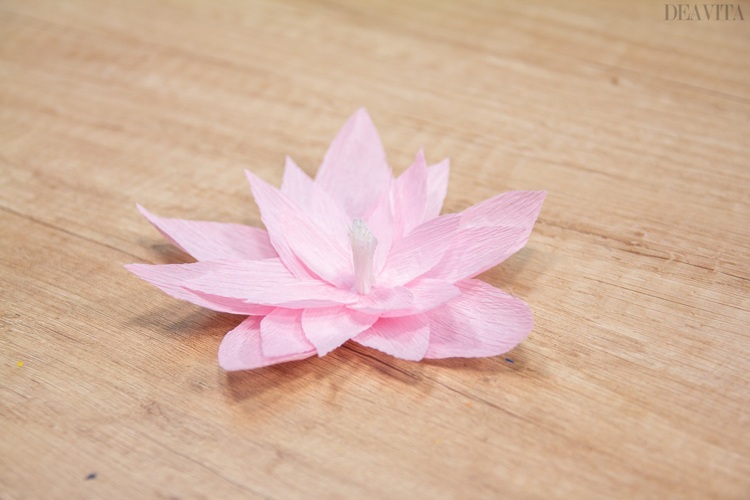
Easy craft ideas – Crepe paper water lily
Materials:
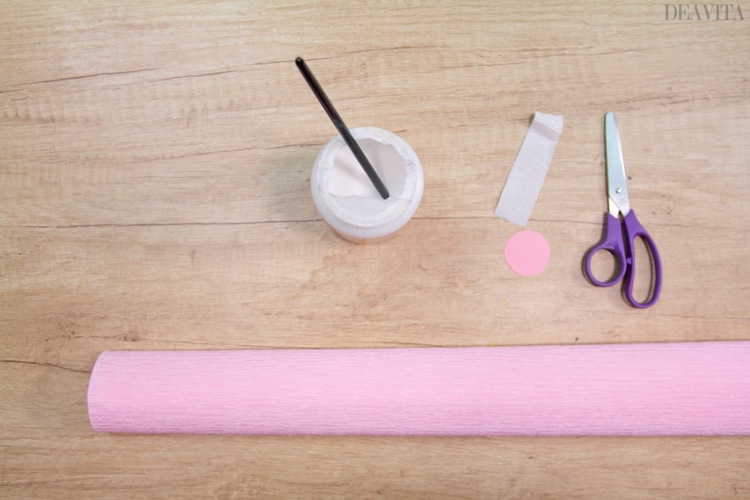
1 Rectangular Piece of White Crepe Paper – 2 cm X 8 cm
Pink Crepe Paper
Paper Circle (diameter – 3 cm)
Scissors
Glue
Brush
Directions:
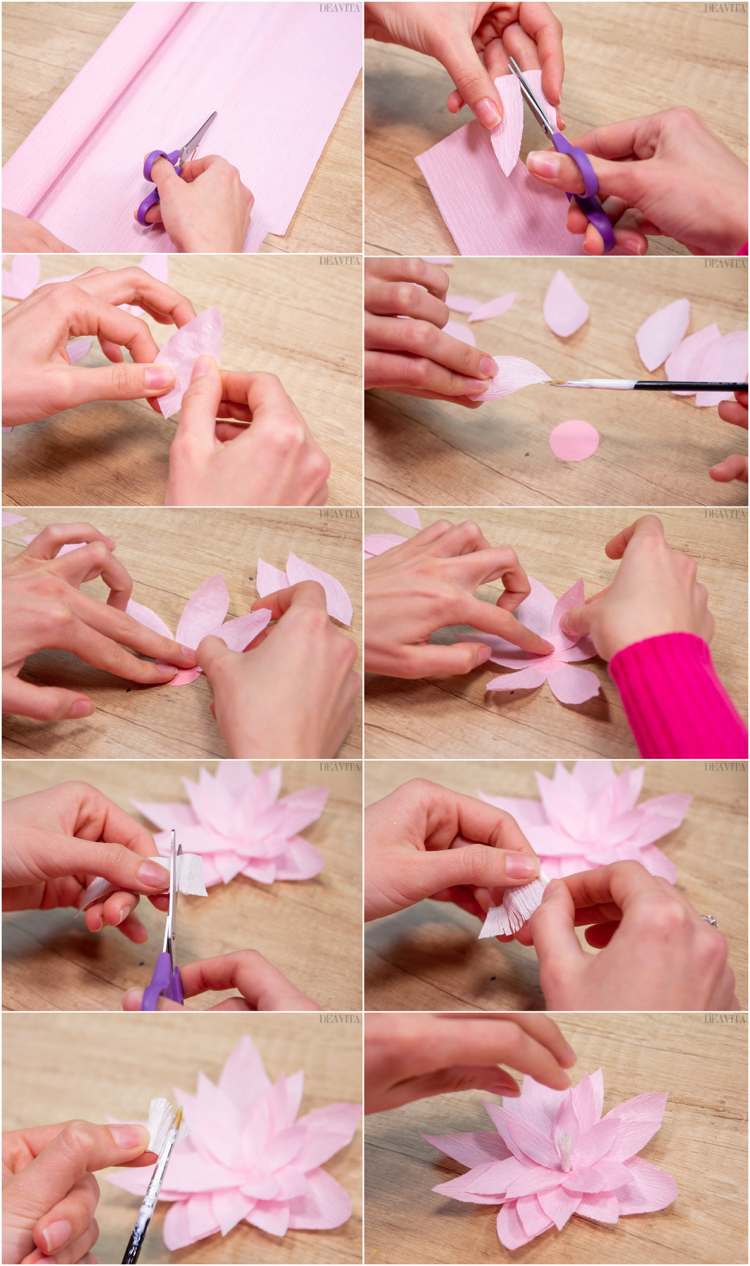
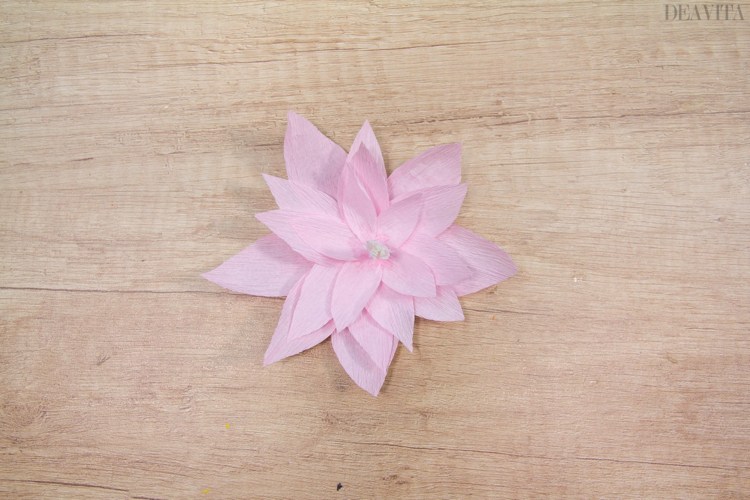
Cut the crepe paper. Glue the petals in 3 layers around the paper circle.
Cut the white paper strip into fringes, roll up and fix with a dab of glue.
Glue the fringe in the center of the water lily.
Also read: Valentines Day Construction Paper Crafts for Kids: 5 Easy Ideas to Try This Weekend
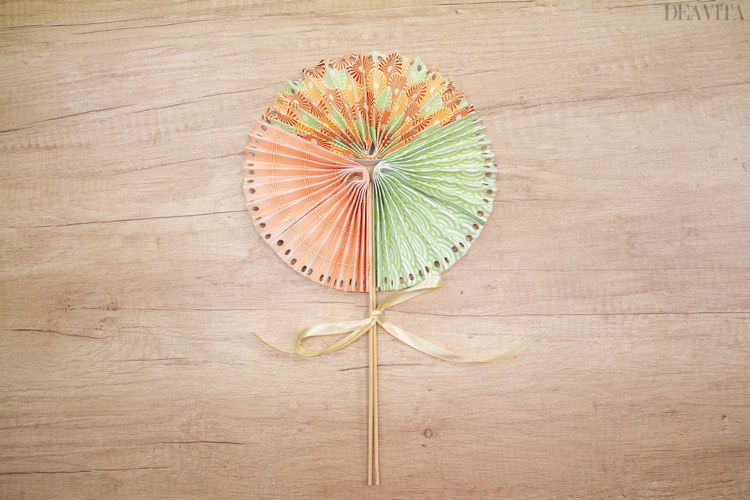
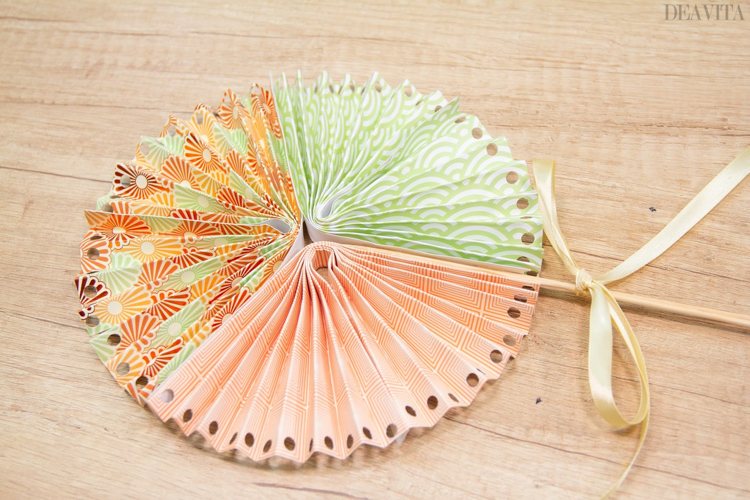
Cute paper craft ideas – how to make a round hand fan
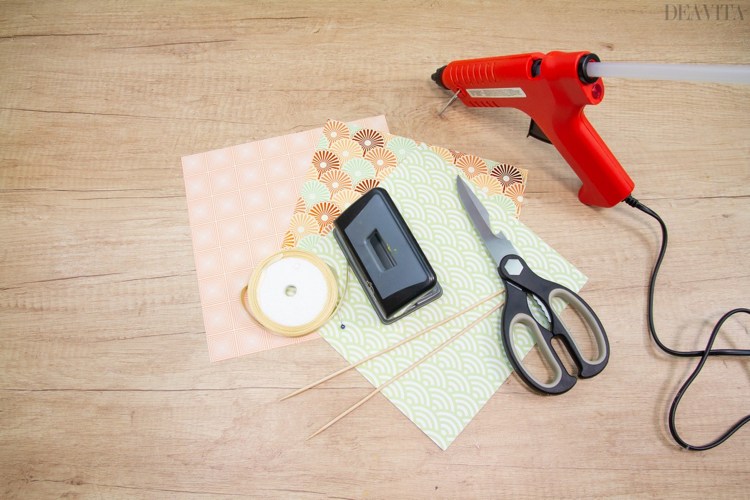
Required materials:
Designer Paper / 3 Sheets (colored)
Hot Glue Gun
2 Skewers
Scissors
Ribbon
Paper Punch
Directions:
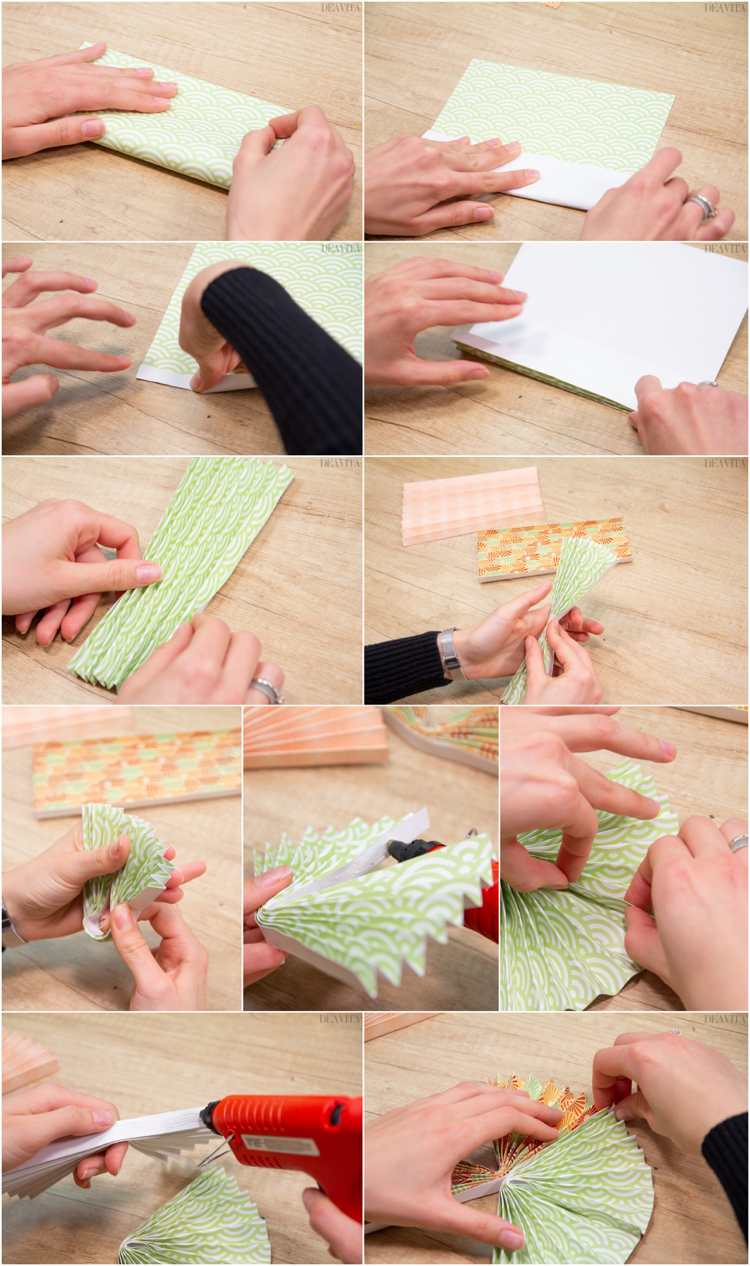
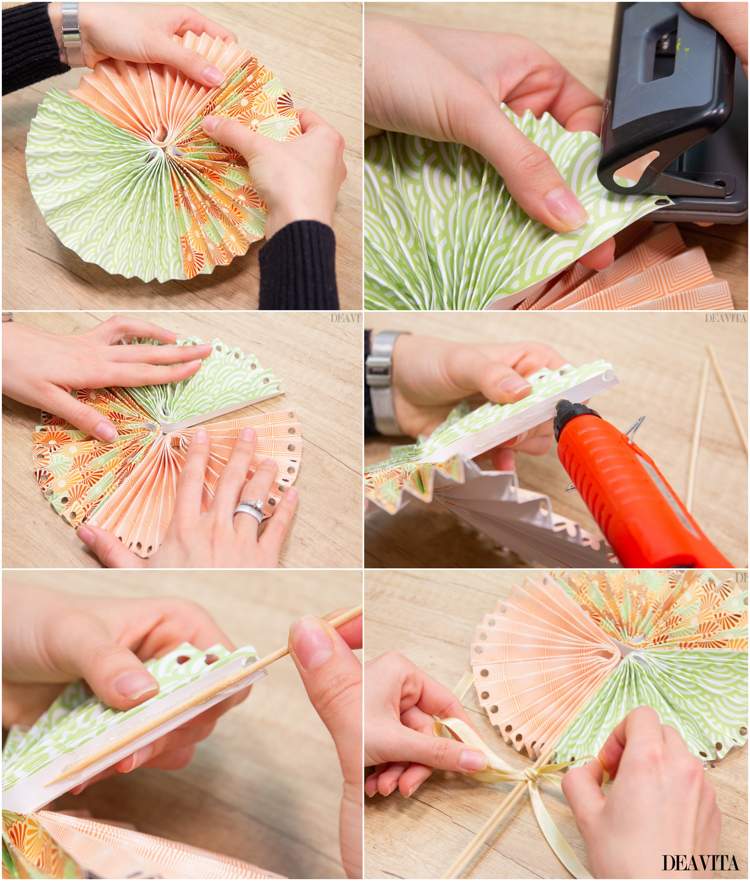
Fold each sheet into an accordion and then bend in the middle. Glue the three pieces of paper together. Make holes along the edge with the punch. Finally glue the wooden skewers and tie a bow.
How to make super cute Monster bookmarks
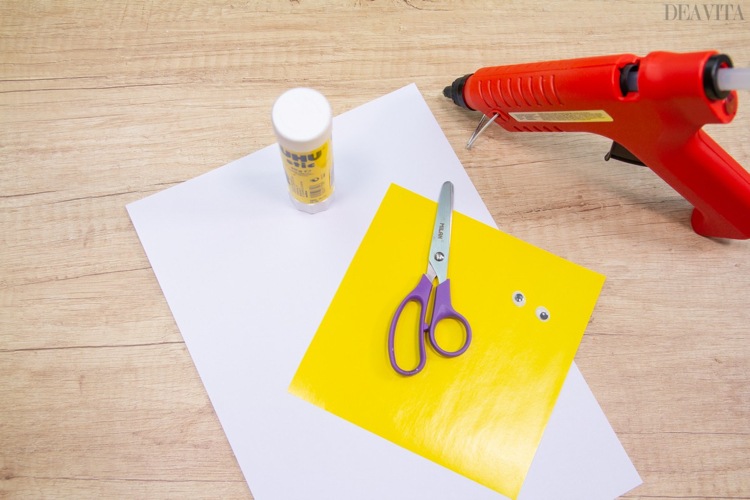
Required materials:
Square Sheet of Paper (colored)
White Paper
Scissors
Glue
Wiggly Eyes
Hot Glue Gun
Directions:
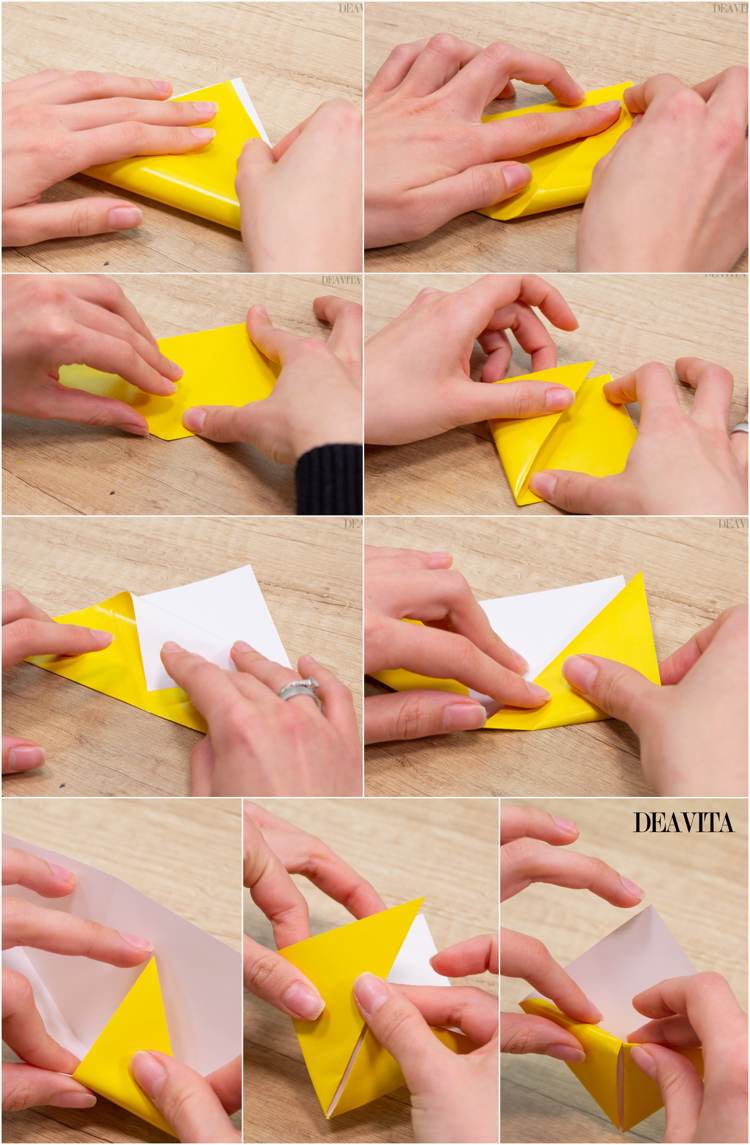
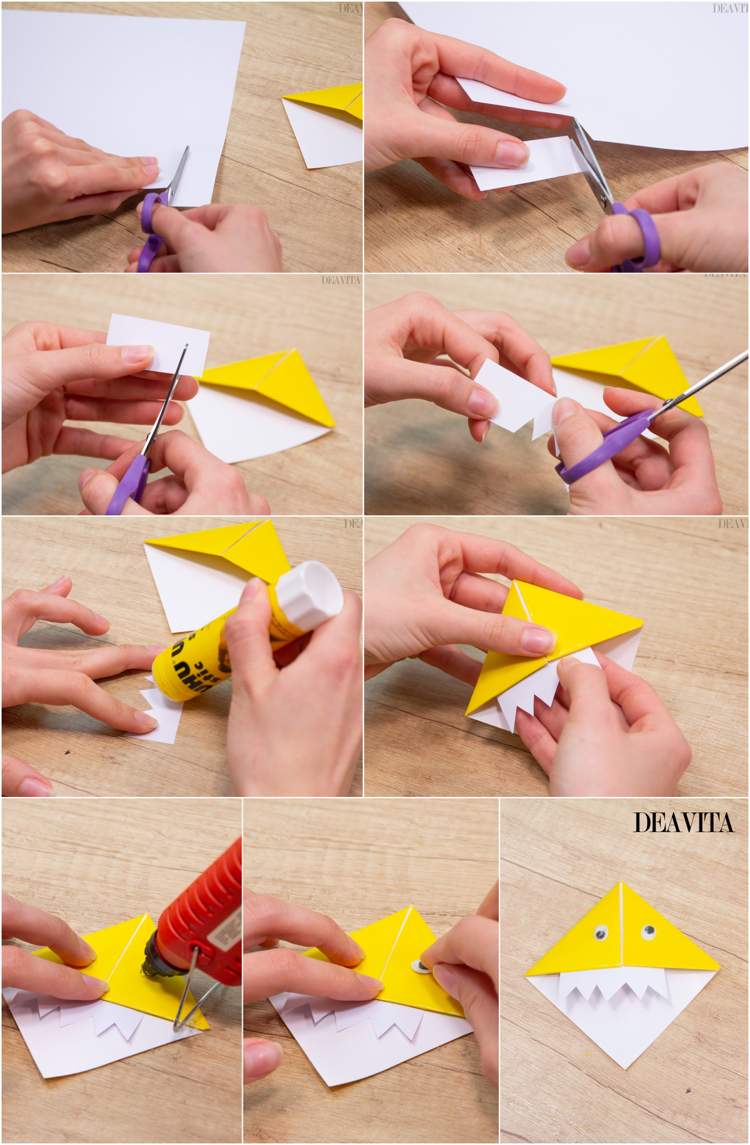
Fold the square diagonally to form a triangle and fold the corners upwards. This result is a square again. Open. Fold down the top of the triangle.
Fold the right and left corners up again and put them under the middle folded corner.
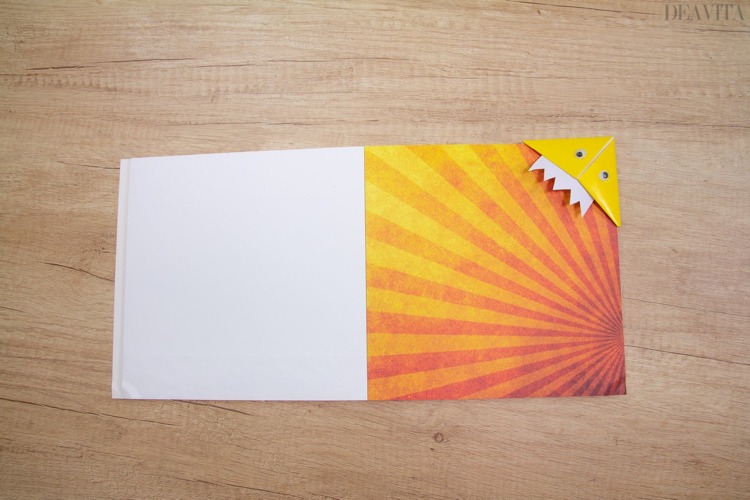
Now cut out the teeth and glue the eyes. You monster bookmark is ready!
How to make an origami butterfly
You only need a square sheet of paper.
Directions:
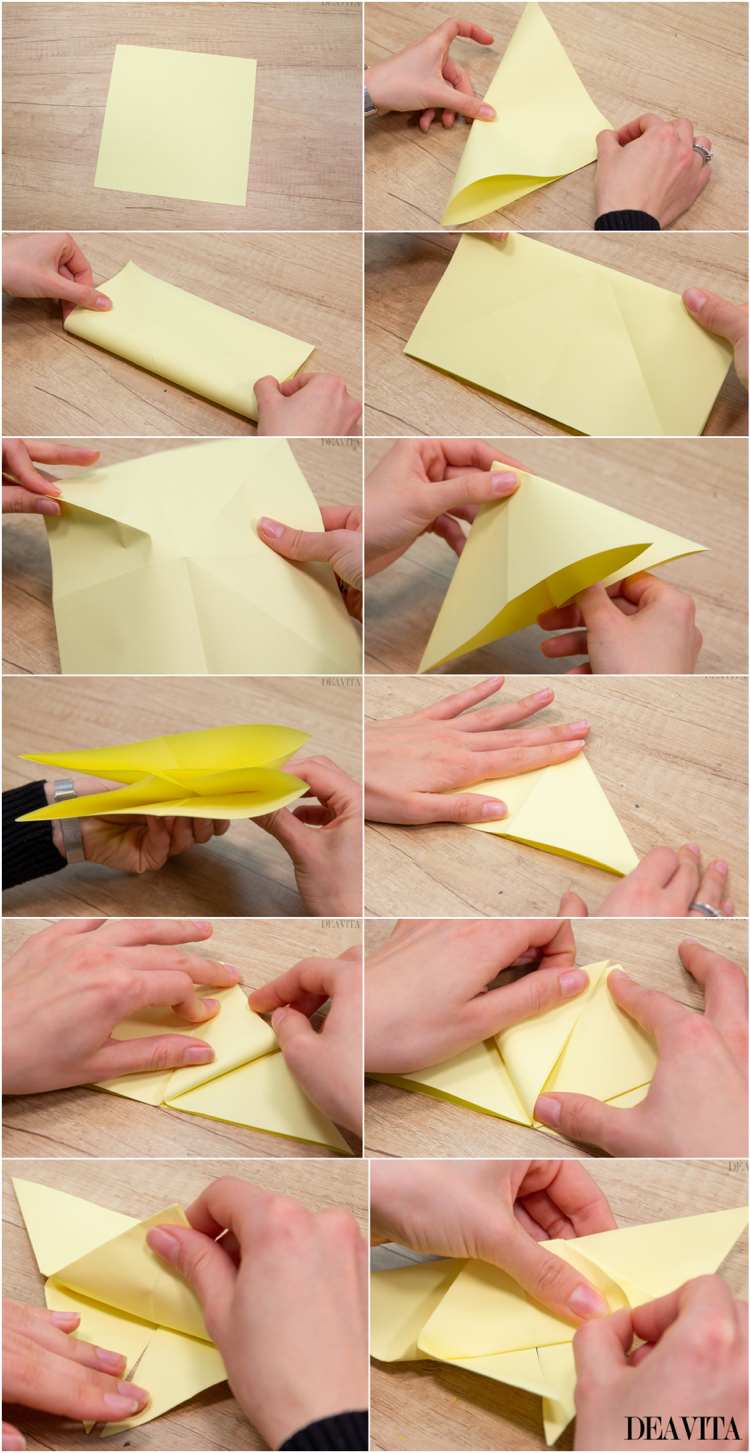
Fold the two diagonals of the sheet. Flip the sheet and fold the lower and upper sides in the middle.
All folds should cross in the center of the square. Open the sheet.
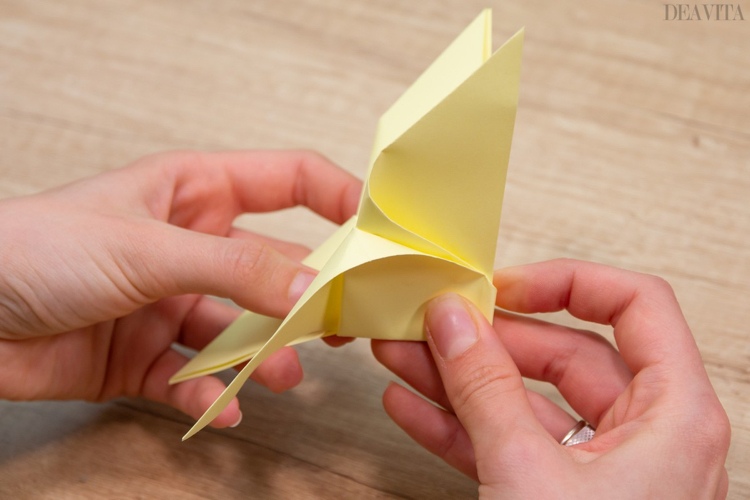
Now fold the paper into a triangle. To do this, lift the paper and make a point from the center point. Now fold the top two corners along the center line and toward the top. Fold the top of the triangle up and insert it into the open edge.
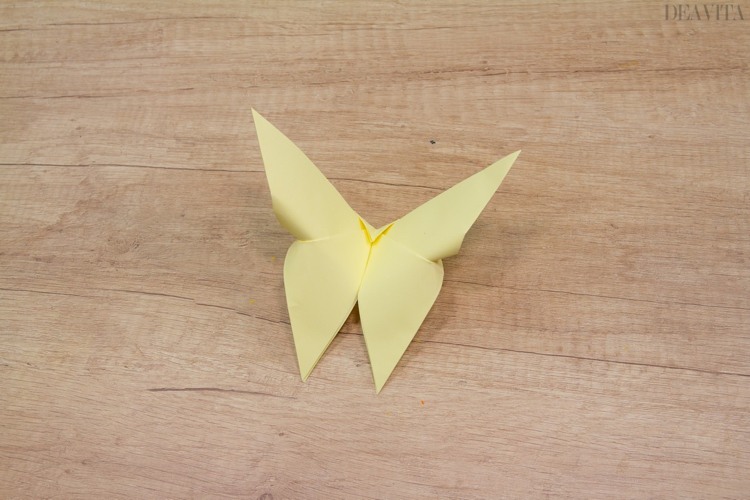
This folding gives the wings a light swing. The origami butterfly is finished!
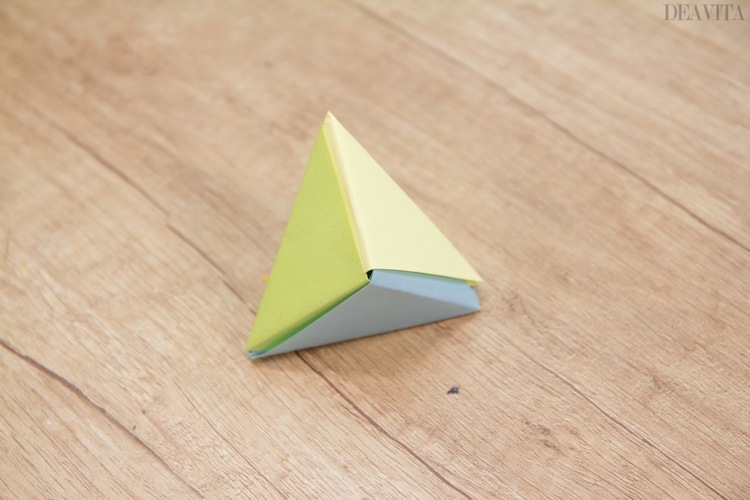
Origami Gift Box (modular origami – pyramid)
This origami pyramid can also be used as a gift box for something small, for example jewelry.
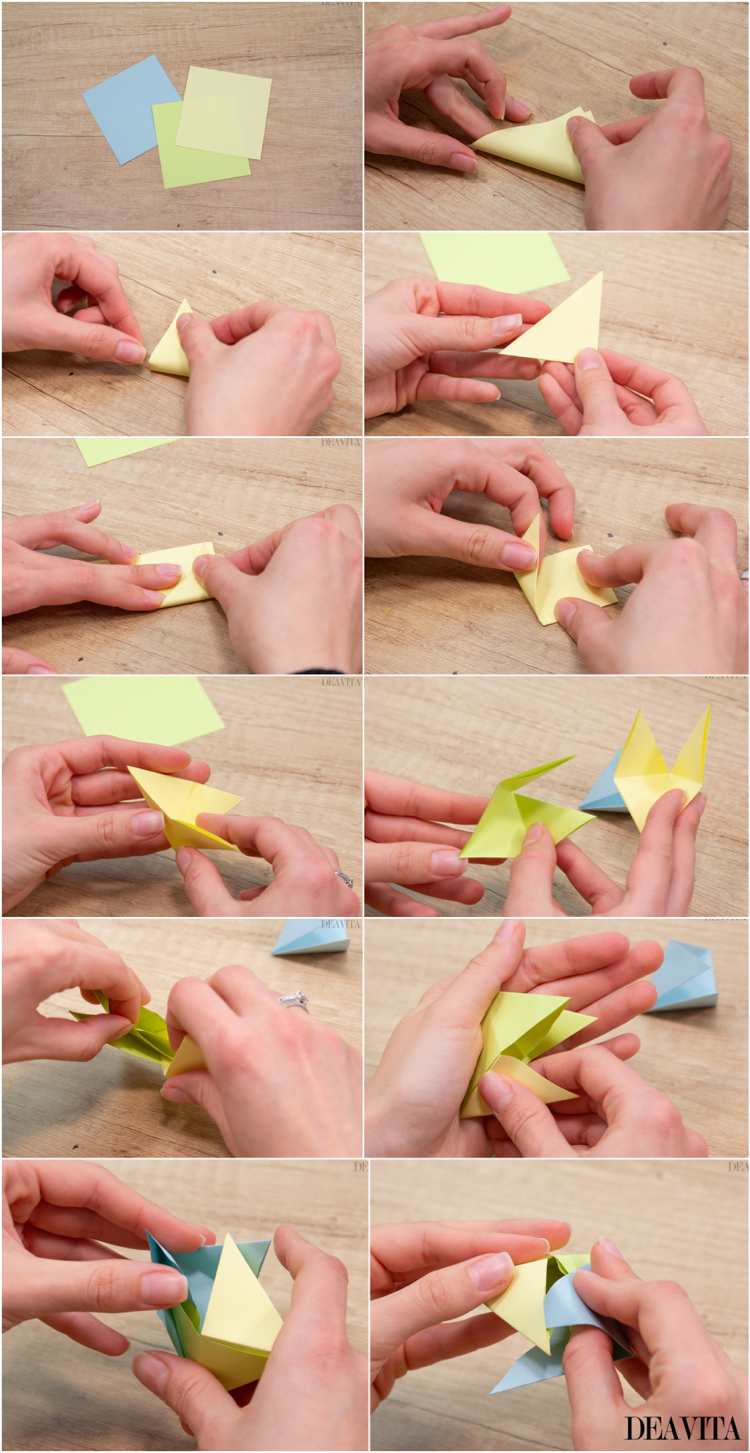
You need: 3 square sheets of paper, colored
Fold the square into a triangle. Now fold the right corner over the left. Then open the fold.
Fold the left and right outer edges to the center line. This results in a small square.
Now fold two more elements.
Fold the squares into triangles and glue them together.
How to make toilet paper roll bee
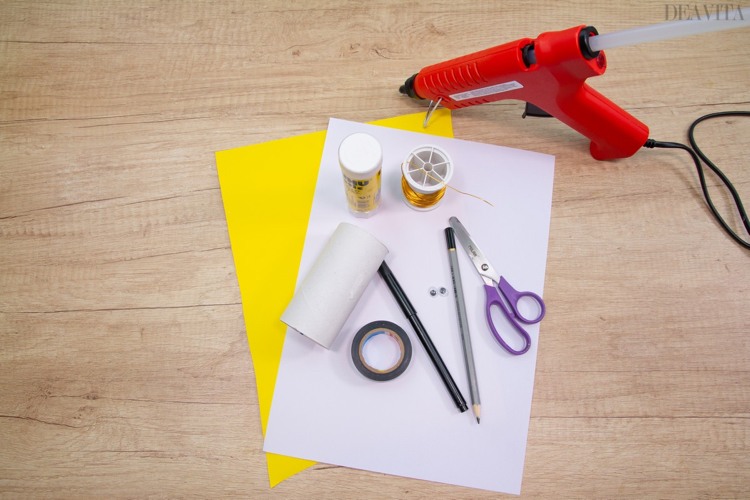
Materials:
Toilet Paper Roll
Yellow Cardstock Paper
Wiggly Eyes
Black Marker
Electric Tape
Wire
White Paper
Scissors
Glue
Hot Glue Gun
Pencil
Directions:
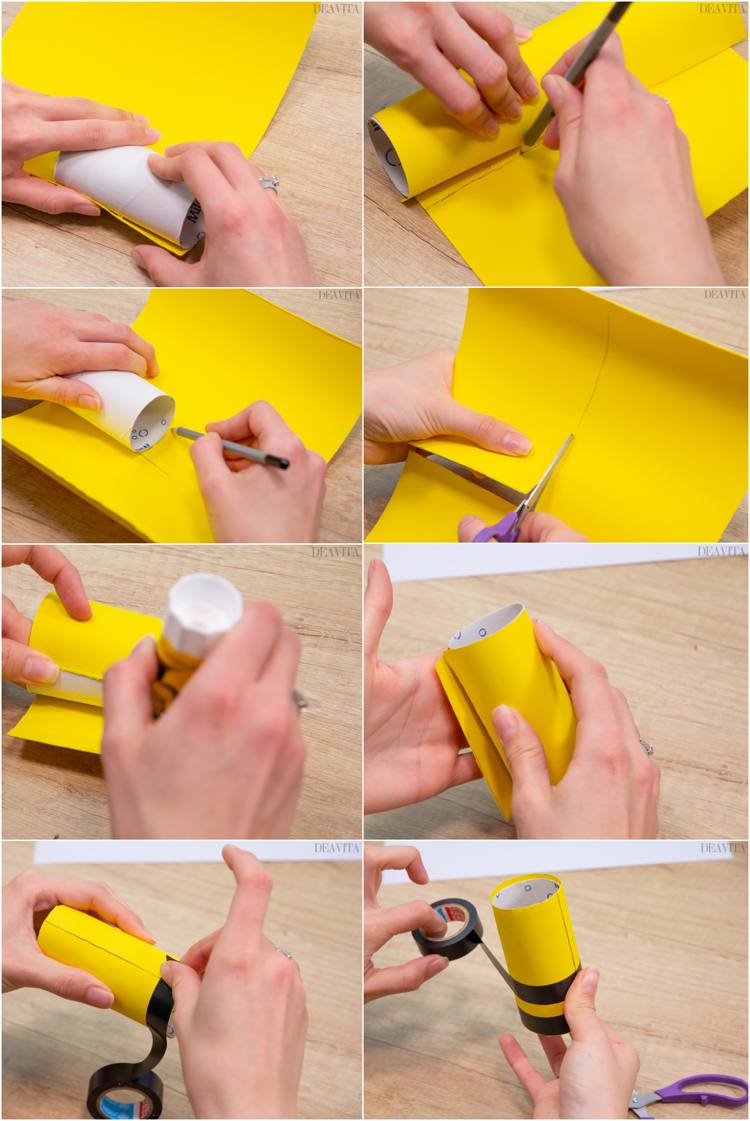
First, adjust the cardstock paper to the size of the toilet paper roll.
Then coat the toilet paper roll with glue and roll it into the paper.
Make the stripes of the bee with the black insulating tape.
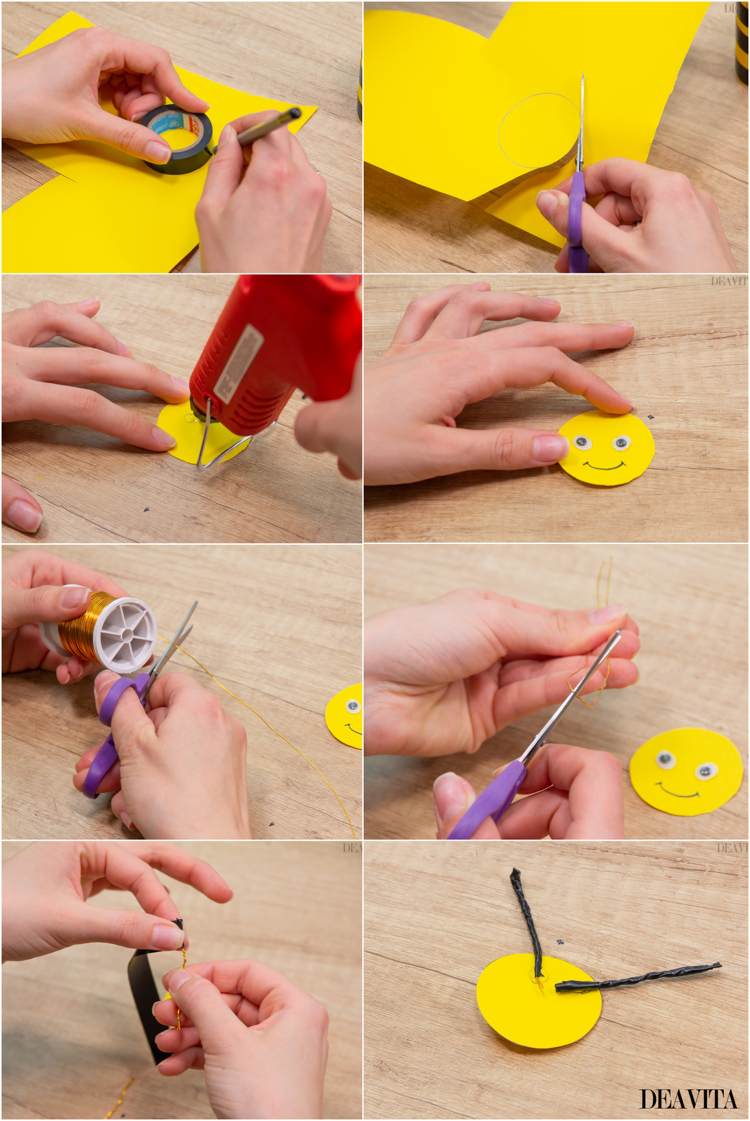
Cut out a circle from yellow cardstock paper. This would be the bee’s face.
Then glue 2 eyes and draw a mouth.
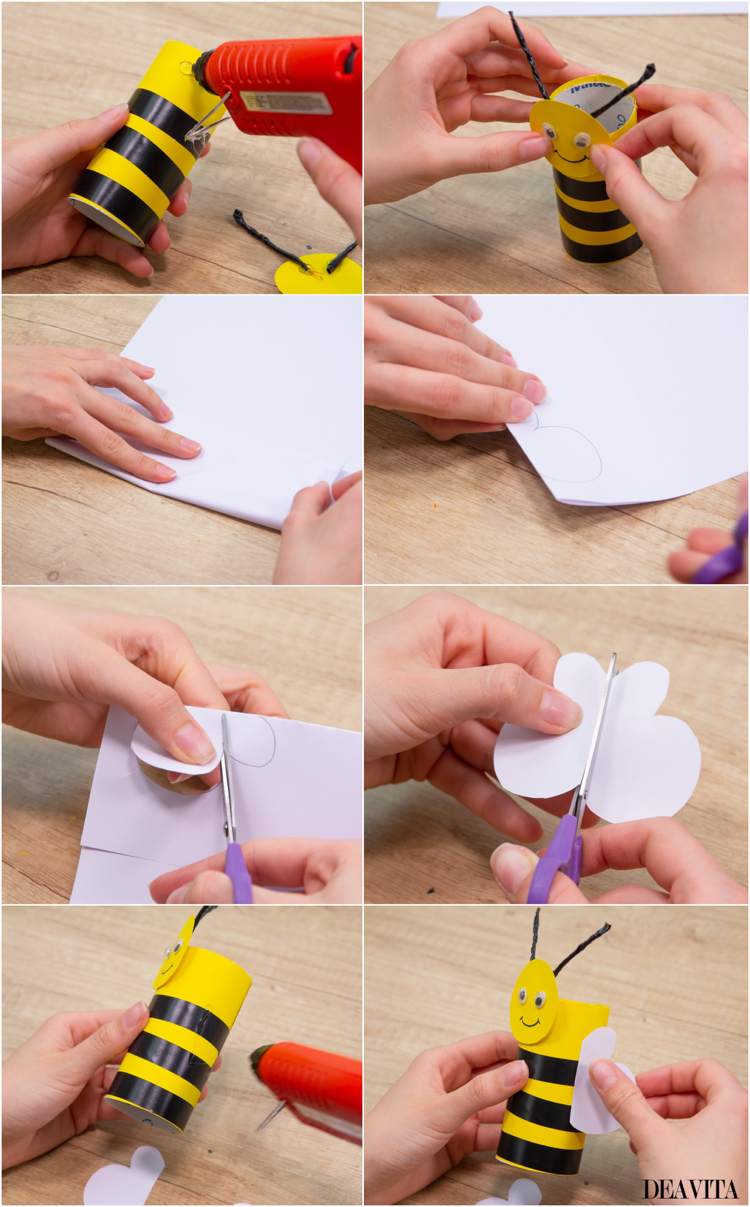
Cut two antennas from the craft wire and then wrap them with insulating tape. Fix the antennas to the back of the face.
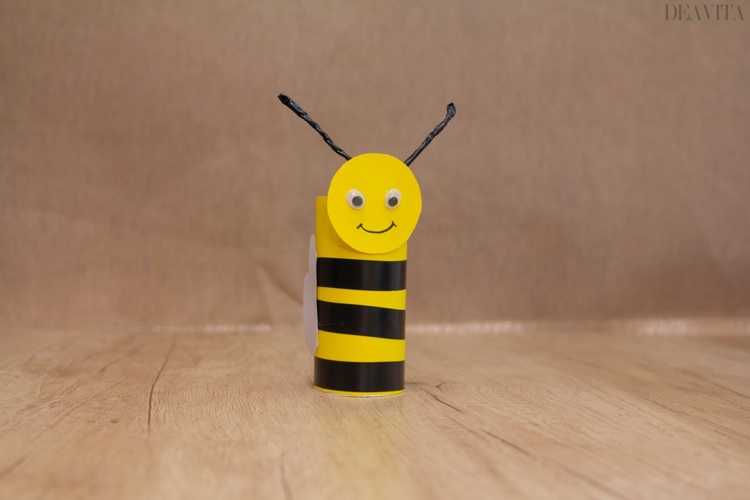
Glue the head onto the body. Make 2 wings from the white paper and glue them to the sides of the toilet paper roll.
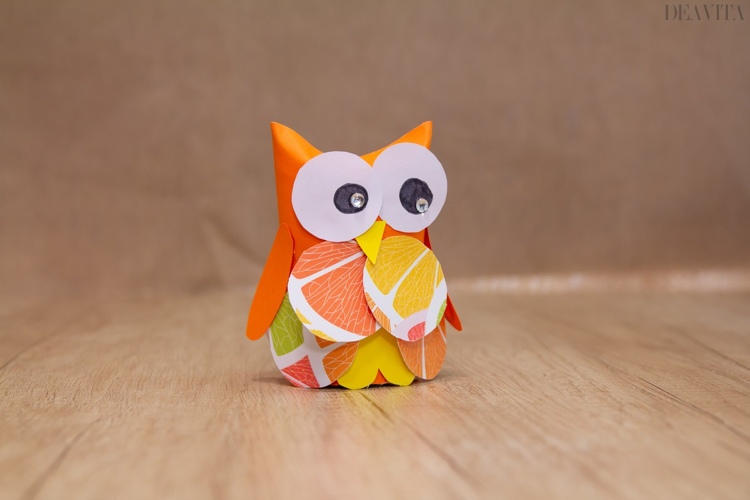
How to make an owl from toilet paper roll – fun crafts for kids
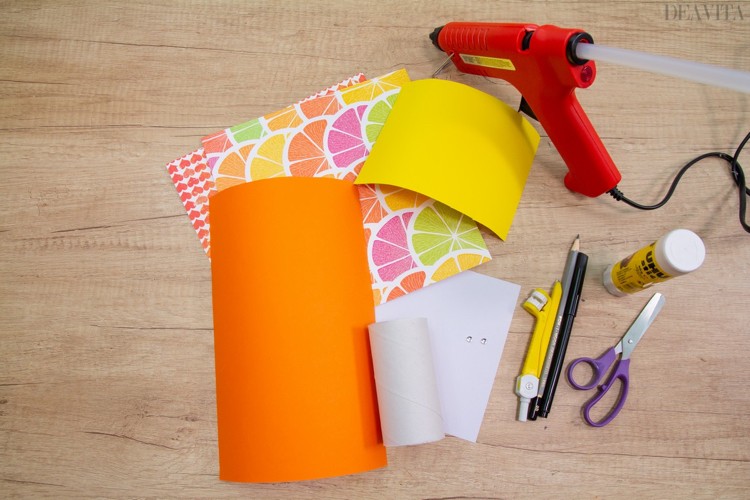
Required materials:
Toilet Paper Roll
Cardstock Paper (orange and yellow)
White Paper
Designer Paper
Scissors
Glue
Pencil
Hot Glue Gun
Bow Compass
2 Decorative Gemstones
Directions:
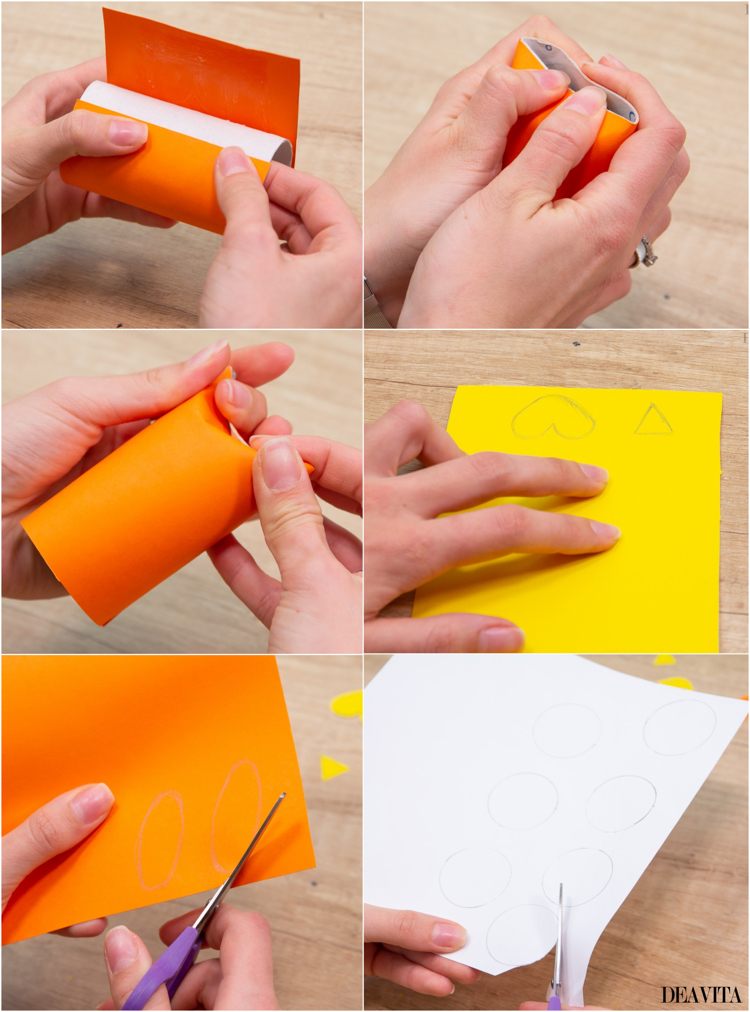
First, adjust the orange cardstock paper to the size of the toilet paper roll. Coat it with glue and roll it into the paper.
At the top, bend the roll first to one side a little, then the opposite, so that the end is closed.
Draw a heart for the feet and a triangle for the beak on the yellow cardstock paper. Then cut out the shapes.
Cut out two ovals as wings from the orange paper.
Turn the cardstock paper and draw many small circles on the back with the bow compass. Then cut out the circles.
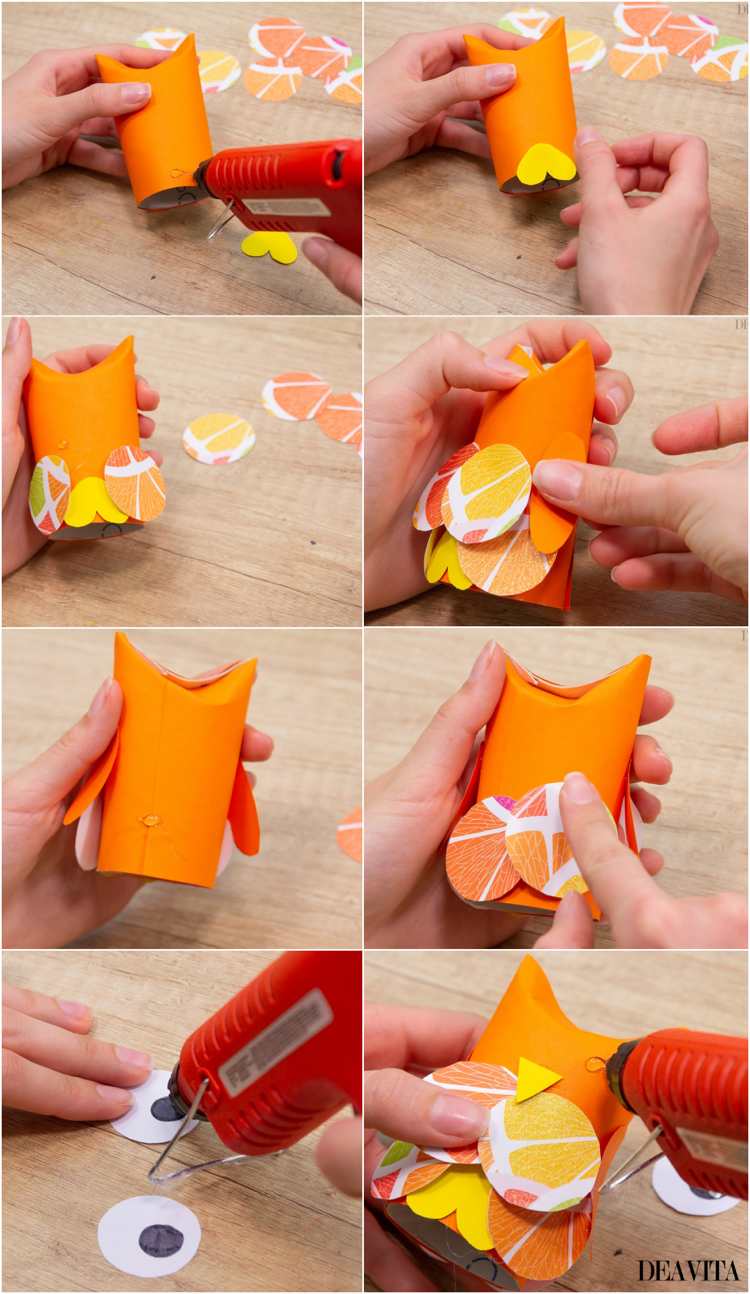
Now put the elements together. Glue the feet. Then glue the circles overlapping each other.
Fix the wings to the sides of the toilet paper roll.
Glue the beak and the eyes.
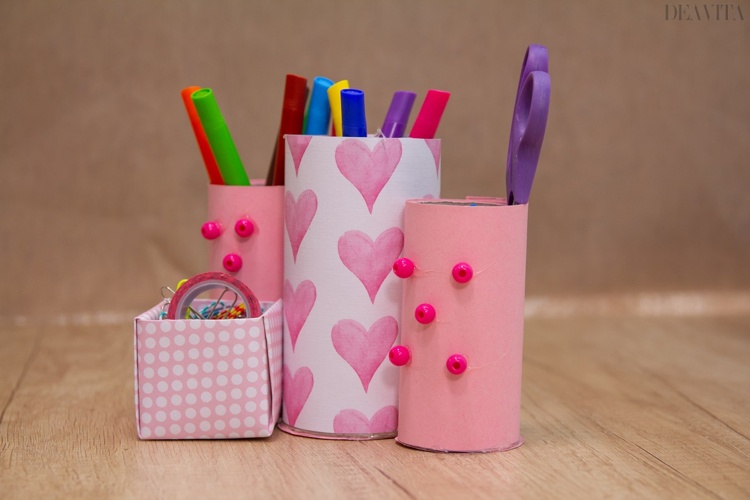
Fun paper craft ideas – DIY desk organizer
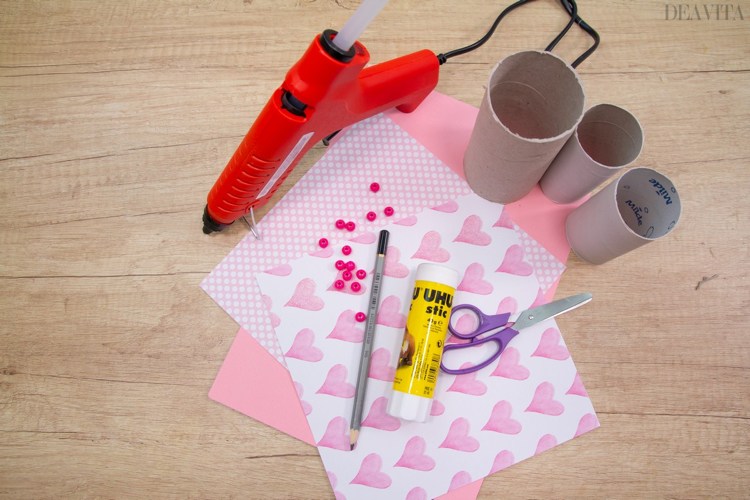
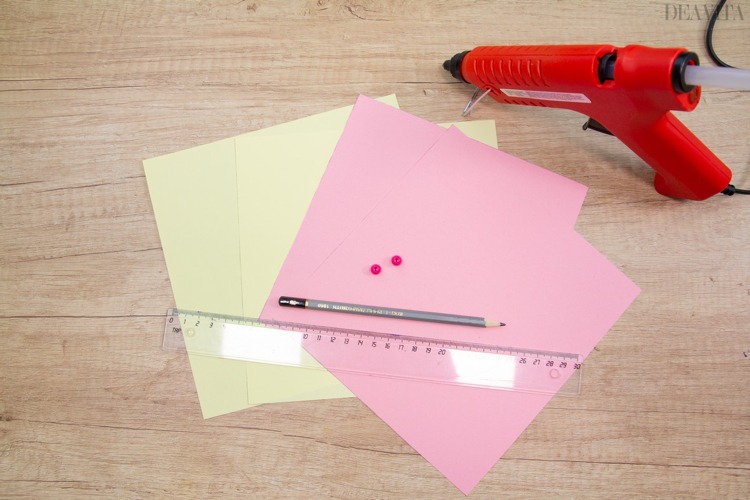
Required materials:
2 Toilet Paper Rolls
1 Kitchen paper roll
Cardstock Paper
Designer Paper (square sheet)
Glue
Hot Glue Gun
Scissors
Pencil
Beads
Directions:
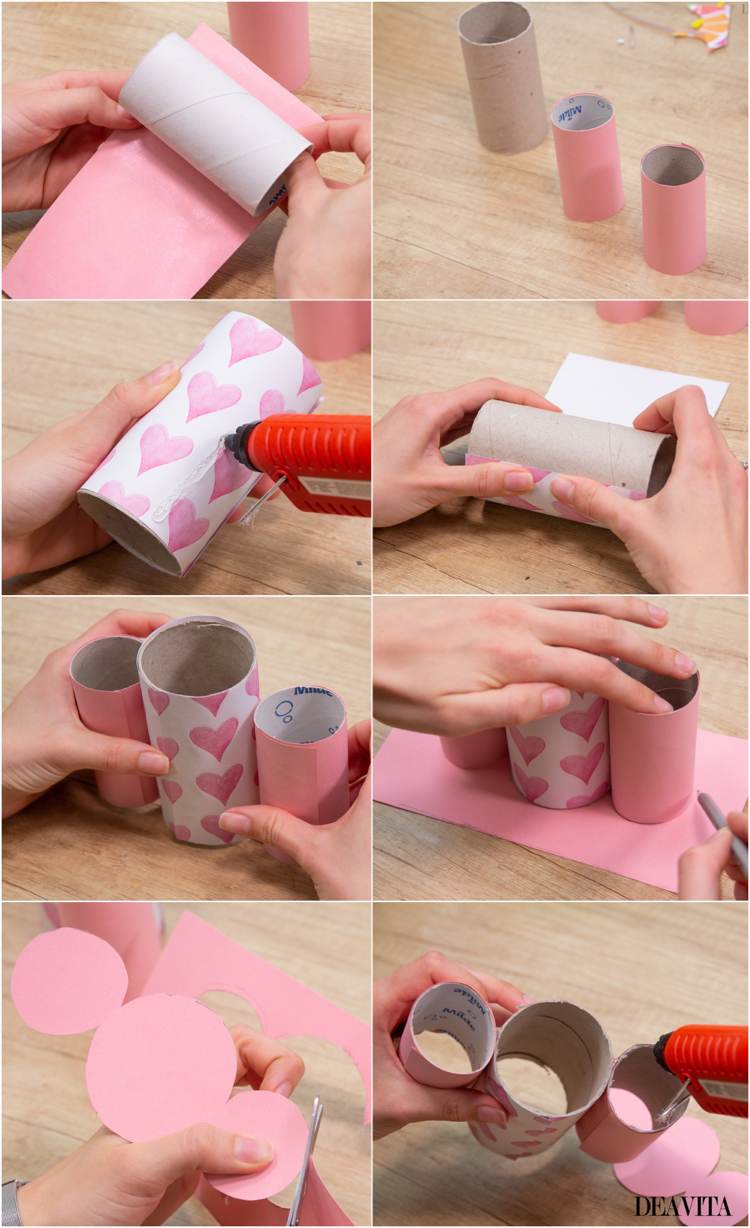
Adjust the pink cardstock paper to the size of the toilet paper rolls. Coat the rolls with glue and roll them into the paper.
Wrap the large kitchen paper roll in designer paper and fix the end with adhesive.
Glue the three paper rolls together.
Mark the bottom outlines on a piece of pink cardstock paper.
Cut out the bottom and glue it to the rolls.
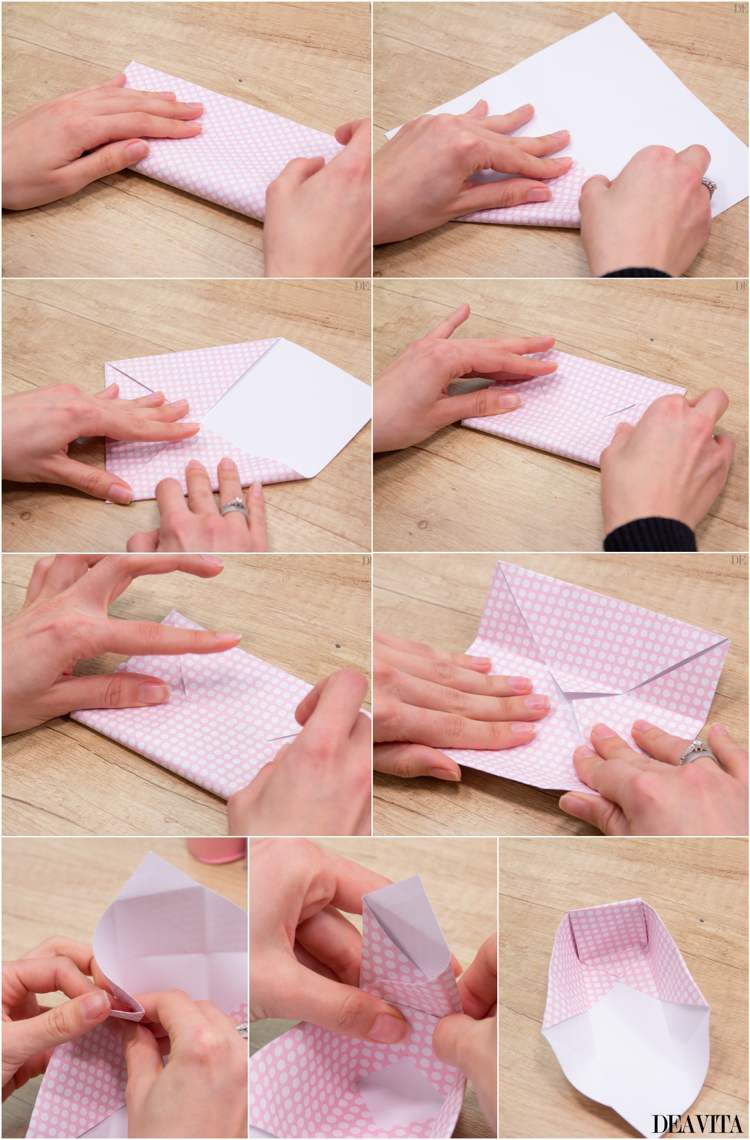
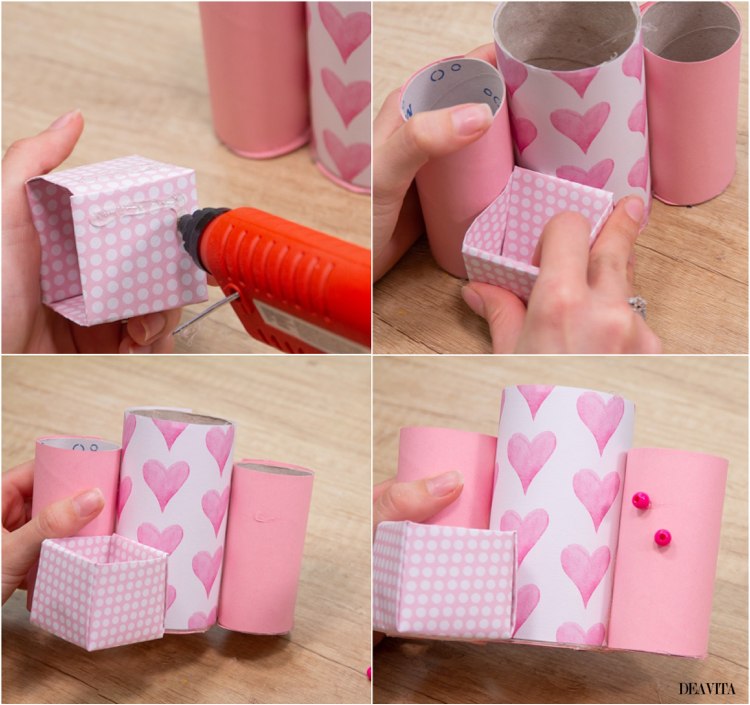
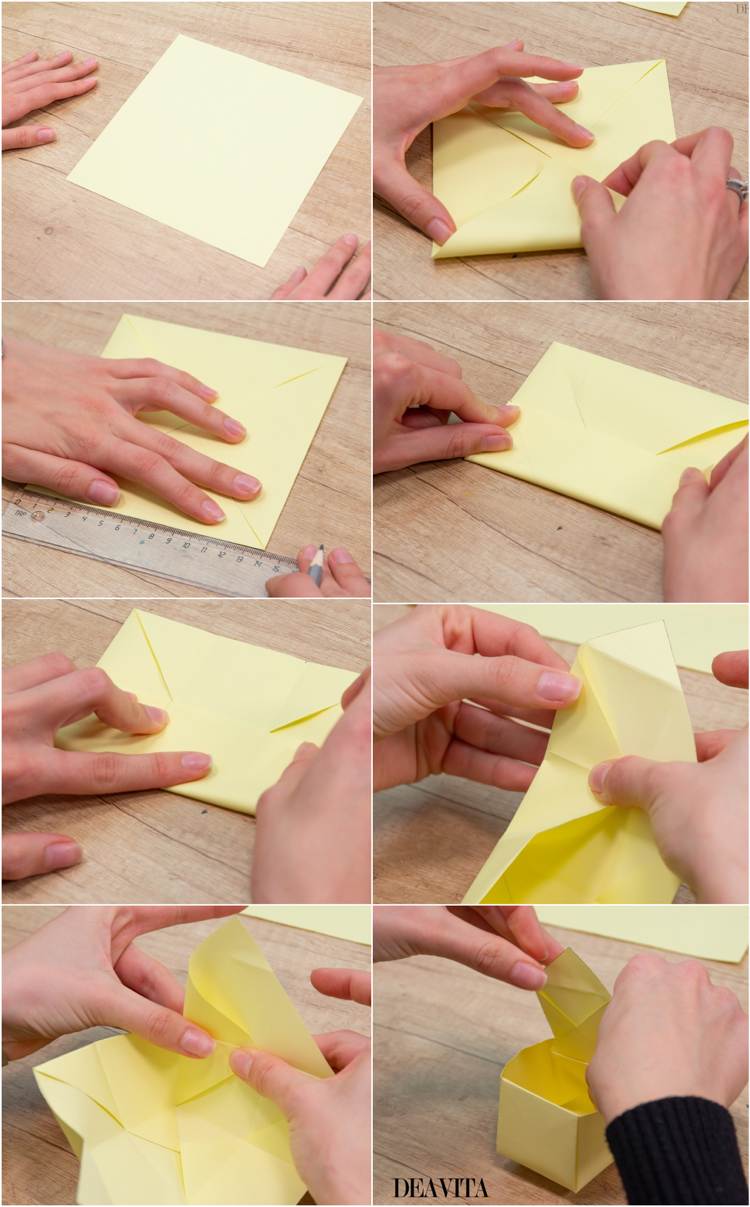
Fold a small box from a sheet of designer paper and glue it next to the paper rolls.
Decorate the finished desk organizer with a few beads.
DIY Origami pull out drawers
Required materials:
2 Square Sheets of Paper – 20 cm X 20 cm
2 Square Sheets of Paper – 19 cm X 19 cm
Glue
Hot Glue Gun
Beads
Ruler
Pencil
Directions:
Lay the larger square piece of paper in front of you. Fold horizontally and vertically in the middle.
Then fold all corners to the center.
Divide the square into three equal parts. Fold along the lines.
Fold the upper left corner to the center. This results in a box.
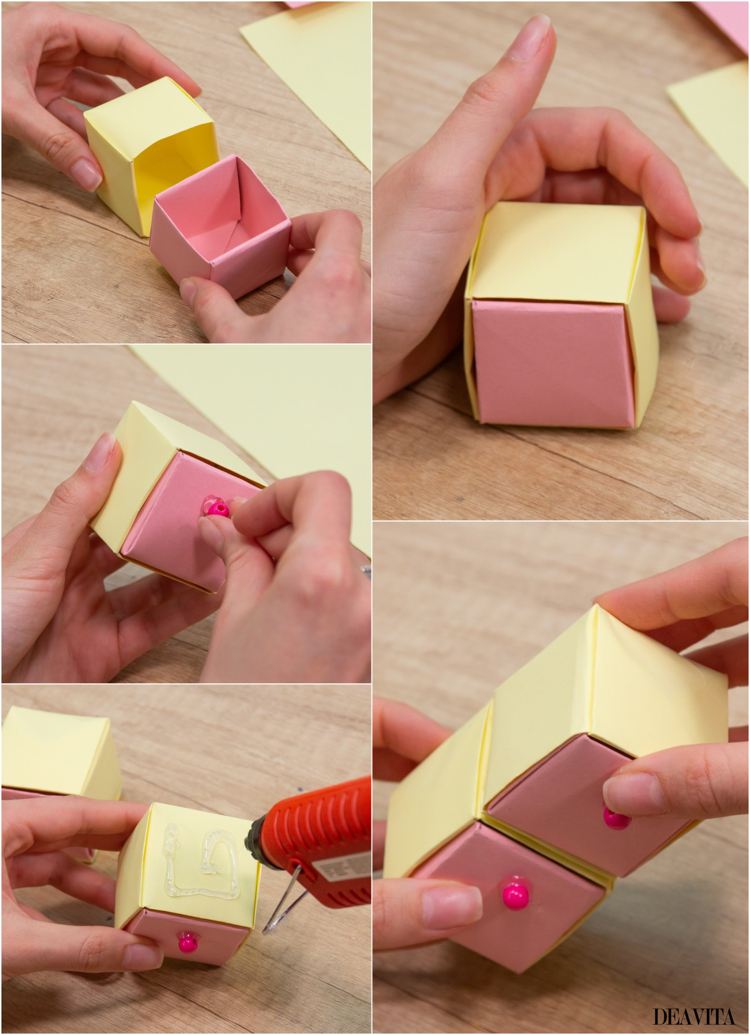
Now repeat the same with the small sheet of paper.
The finished origami drawers are glued together.

