If you, like me, are already in the Easter spirit and have your Pinterest filled with DIY decorations for the upcoming holiday – then you’ve come to the right place! One of the easiest and most satisfying things to do in preparation for Easter is the wreath! It’s a great little craft project that you can do with your children that will bring a festive mood to your house instantly! Whether you’re a master DIY craftsman or a beginner who just enjoys making things with your hands as a form of therapy, making your own Easter wreath is super easy and enjoyable, and you actually need very little in order to make something truly impressive. Whether you’re into traditional cross wreaths, floral arrangements, chic sophisticated designs, minimalist nature-inspired wreaths, or ones with colorful eggs and bunny ears – we’ve got you covered! Get inspired by our easy crafty DIY Easter wreath ideas to help you welcome Spring this 2023!
What Natural Materials Can You Use for a DIY Wreath?
You don’t need to invest in expensive craft materials in order to create a beautiful awe-inspiring Easter decoration. Instead of buying a ready-made wreath, you can pick some tree branches and twigs from your backyard to make your own, and use dry flowers and leaves for decoration – dried eucalyptus, catkins, and sea lavender – tie it all together with colorful jute, and voilà!
How to Make an Egg Wreath?
Credits: craftsbyamanda.com
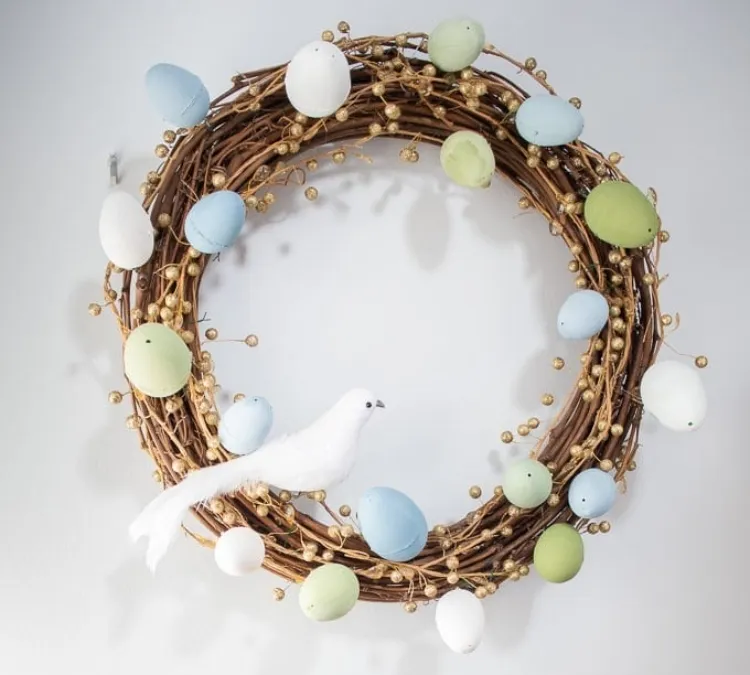
If you want to make something simple yet elegant that embodies the light and jolly spirit of Easter, this egg wreath in pastel colors might be just for you! Here’s how to make one of your own in a few easy steps.
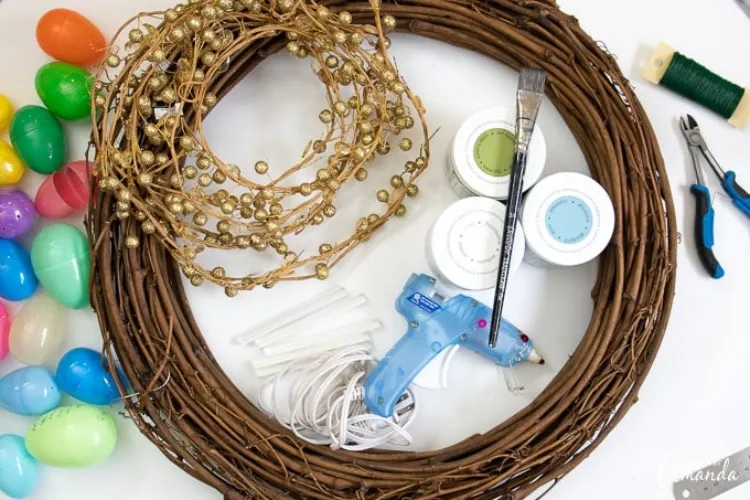
All you’re going to need for this DIY Easter wreath is:
- grapevines
- 2 dozen plastic eggs
- paint of choice with a chalky finish
- floral wire
- sharp scissors or wire cutters
- hot glue gun
- paintbrushes
- a decorative bird (or any other decoration of choice)
- garland (by choice)
How to Make the Grapevine Wreath?
Credits: hearthandvine.com
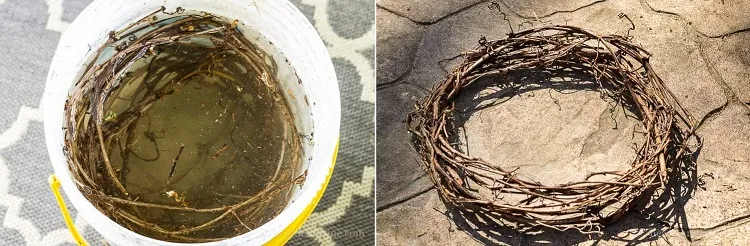
Since you’ve already jumped on the DIY train, why buy a ready-made grapevine wreath when you can make one yourself? Wild grapevine oftentimes grows freely in gardens and most people usually pull it out. If you still have some vines left from your last winter clean-up, you can easily recycle them by turning them into a beautiful nature-inspired wreath. All you have to do is fill a bucket with hot water and soak the vine in it for about an hour. When you take them out of the bucket they will be softer and easier to form into shape. Wrap the branches together in a circular coil and leave them to dry overnight.
Start Assembling the Easter Wreath
Credits: craftsbyamanda.com
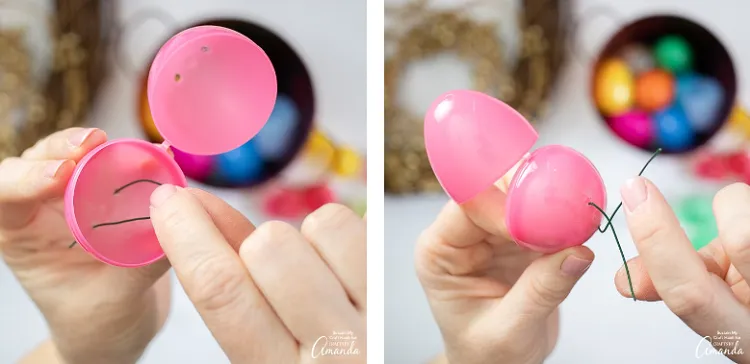
Prepare your eggs by making two symmetrical holes across the top and bottom of the egg big enough for the flower wire to go through. Cut 4 inches (10 cm) of wire and push it through the bottom holes of the plastic egg and twist it a few times so that it stays in place. Do the same thing with all eggs and once you’re done apply hot glue to the rim of the plastic egg and glue the top and bottom parts so that the egg stays closed.
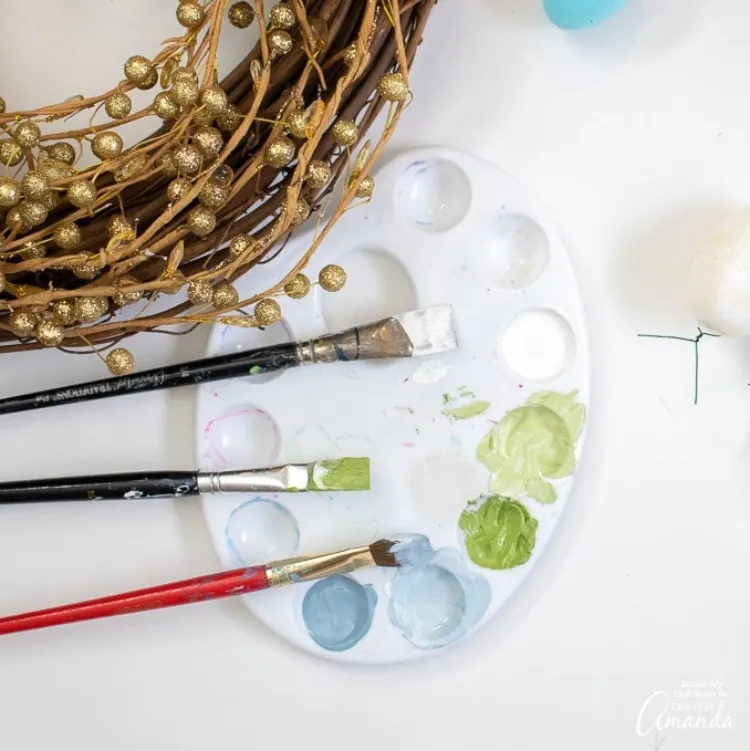
The next step is painting the eggs and the garland. One coat of paint should be enough to cover the eggs well. If you choose to add the garland to the wreath simply attach it by using the flower wire.
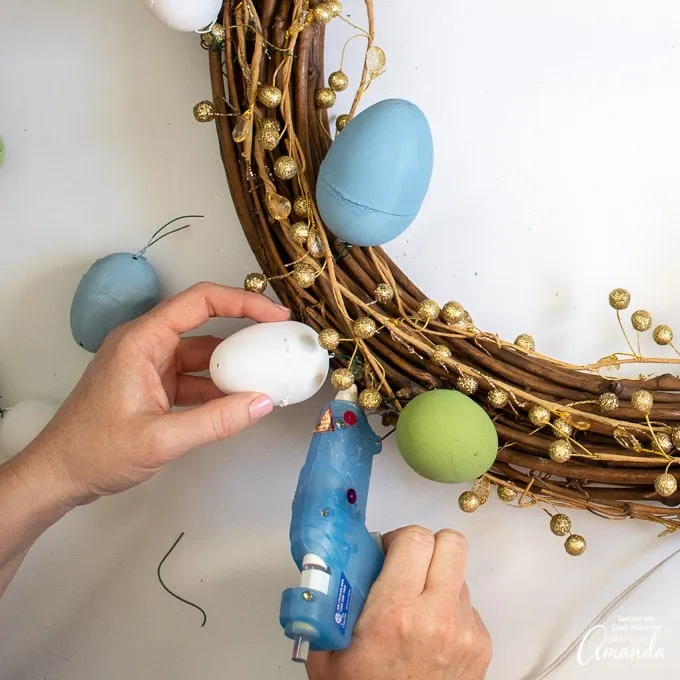
In order to attach the eggs to the vine wreath take a pencil and curl the ends of the flower wire that you put through the holes at the bottom of the plastic eggs in order to create a little hook. Hook the eggs to the wreath and secure them by adding some hot glue. You can do the same with the garland if needed and any other decoration you choose to attach to the Easter wreath.
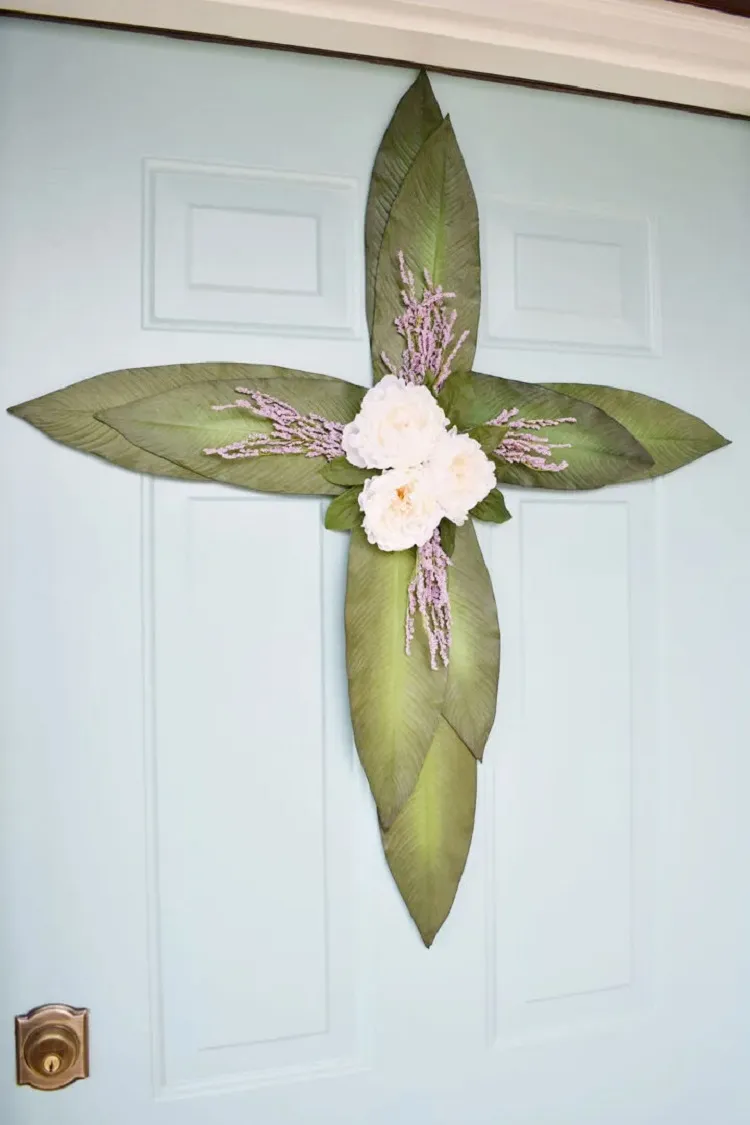
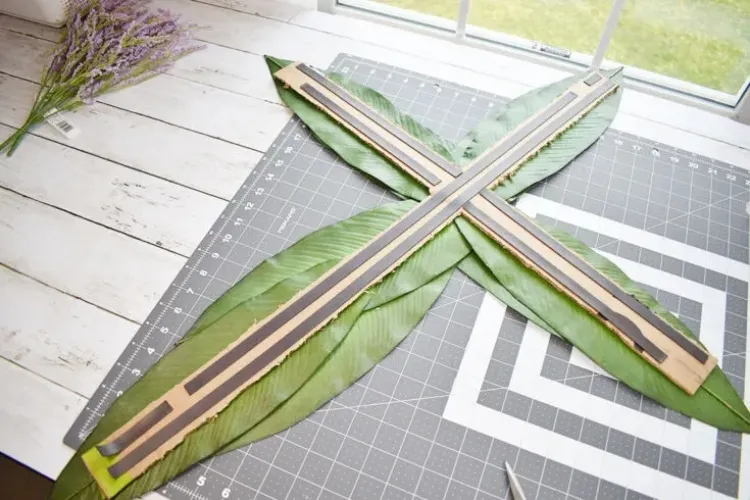
DIY Floral Easter Wreath with Cross
Credits: marymarthamama.com
This beautiful reimagining of a classic cross Easter wreath is a joyful floral interplay that’s guaranteed to bring the Spring spirit into your home. This is one of those wreaths that you can leave hanging on your front door long after Easter has passed because of its unpretentious seasonal appearance. Here’s what you’re going to need in order to make this beautiful Easter decoration:
- cardboard for the base
- faux flowers
- large leaf stems (large and medium size for layering)
- magnet tape
- hot glue gun
- sharp scissors
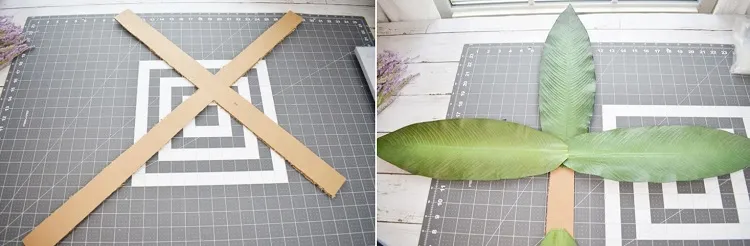
The first thing you need to do is cut the cross base out of cardboard. The optimal size is 30 inches (76 cm) vertically and 26 inches (66 cm) horizontally, however, you can alter those to your liking. Once the cross is cut you can start adding the leaves on top and gluing them down with the hot glue gun. Put the medium-sized leaves on top for a layered look.
Once you’ve done that flip the cross around and attach the magnetic strips to the back of the cardboard base.
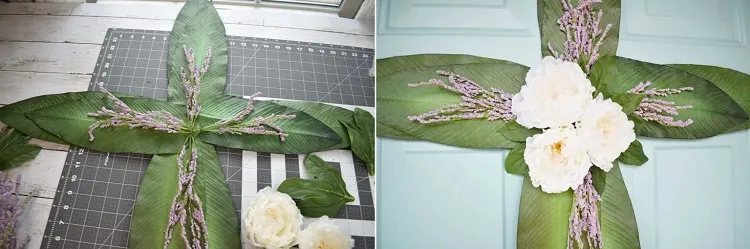
Finally, arrange your flowers of choice to your liking and hot glue them down.
DIY Easter Bunny Wreath
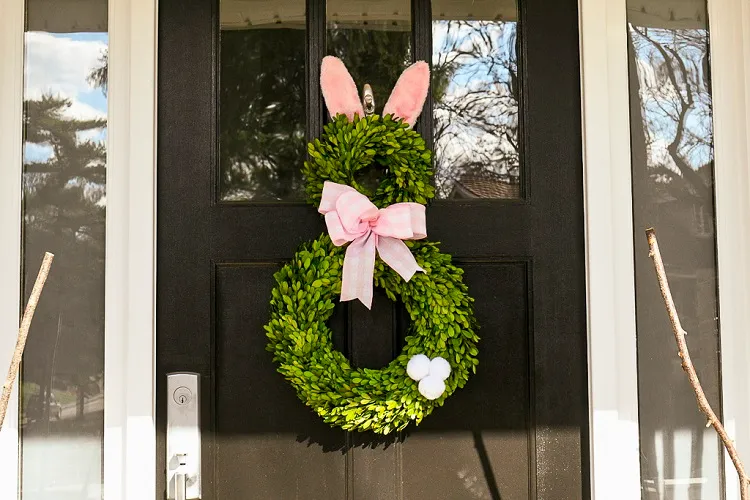
Credits: makeeverydayanevent.com
This DIY Easter Bunny Wreath is super fun and easy to make and will definitely catch the eye of every person who walks past your front door during the holidays. Here’s how to make this adorable and super affordable Easter decoration. All you’re going to need is:
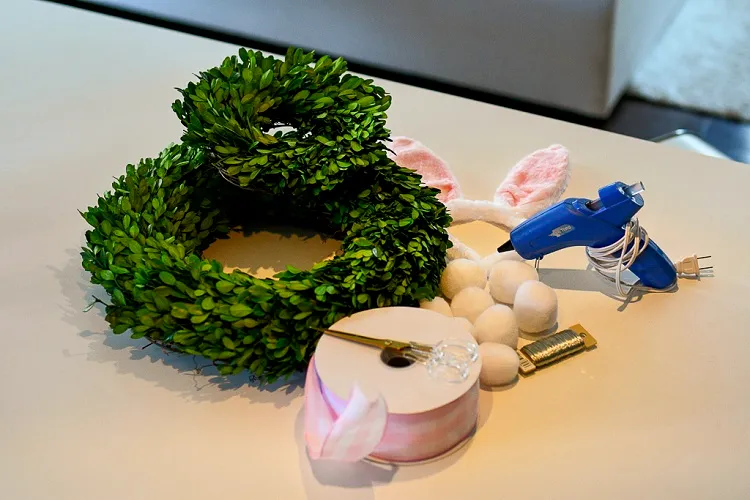
- a small and large boxwood store-bought wreath (or simply make your own vine wreath and glue some greenery on top to achieve a similar look)
- a thick accent ribbon of choice (the one used here is a white and pink gingham ribbon)
- white pom poms – around 2 inches (5 cm)
- headband with bunny ears
- floral wire
- sharp scissors or wire cutters
- hot glue gun
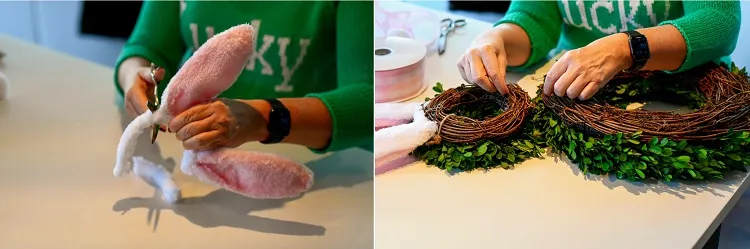
First thing you’re going to do is cut the ears off the bunny headband (leave the middle part of the headband in between the two ears for better support when attaching them to the wreath). Once you’ve done that cut some pieces of the floral wire and attach the ears to the smaller wreath. Repeat the same process to attach the small wreath on top of the larger one. Tie a tight knot to secure the two wreaths in place.
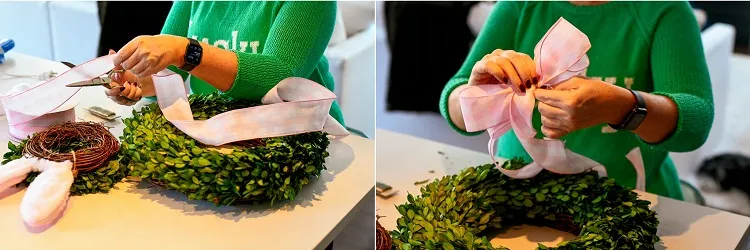
Cut about a meter off the ribbon roll and make a nice tight bow. Attach the bow to the center in between the two wreathes with either floral wire or hot glue. You can trim the edges of the ribbon for a more neat look.
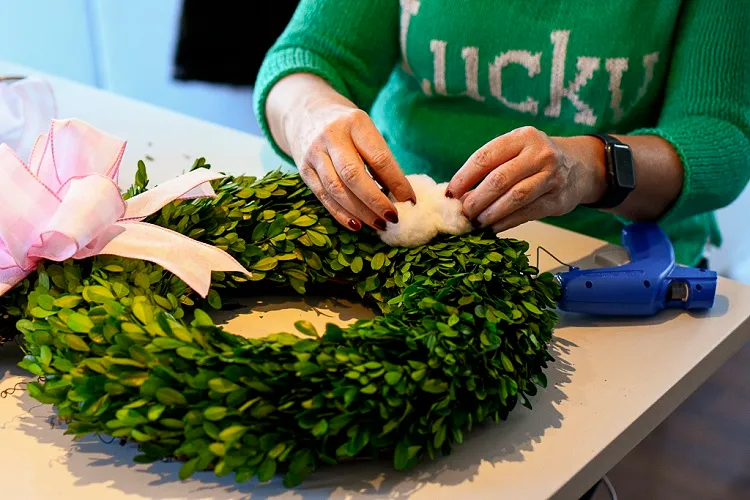
Finally, use the hot glue gun to attach the pom poms to the wreath. The pom poms represent the tail of the Easter bunny, so you want to put three together and glue them either at the low left or right corner of the big wreath, depending on which direction you want your Bunny wreath to be facing.