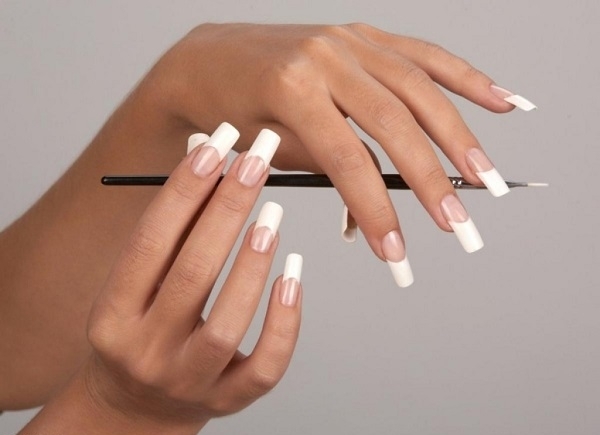
How to do acrylic nails at home? Nail extensions become more and more popular every year, because this makes the care of nails easier and allows you to hide a variety of imperfections. For a modern woman, beautiful nails are a must and a detail of the image. Beautiful well-groomed hands always attracted the looks of men, and help for the self-confidence. Healthy shiny nails are a sign of femininity but not every girl has the patience and time to visit a salon regularly or take care of her nails at home. In this case, acrylic nail extensions are an excellent choice.
What are acrylic nails?
This is the simplest and most affordable method of extending your nails. Acrylic itself is a powder with acrylic and methacrylic acid. With the help of a special liquid, the dissolved powder turns into a glue-like substance and can be evenly applied over the entire nail. Acryl for nail extensions is very durable and transparent. The technology has its advantages and disadvantages and we shall mention the most important ones:
Pros of acrylic nails:
- Strength;
- Acrylic nails are not thick and look natural;
- If a nail breaks it is very easy to fix it;
- Nails are flexible and elastic, very similar to the real ones;
- Acryl provides an opportunity for even the most ambitious design intentions as you can sculpt anything;
- Your own nail under the acrylic layer is not deformed and retains its original shape;
- Long life (about four months);
- The nails can be easily removed with the help of a special solvent without mechanical damage.
The disadvantages of acrylic nails include:
- Acryl has a sharp unpleasant odor, which disappears when it solidifies;
- The nails covered with acrylic substance do not get oxygen, water, nutrients;
- After removing the nails, the natural ones looks dull, but in due course the shine returns;
- Acryl is a strong allergen;
- There is a risk of developing fungal diseases;
- When designing and painting, do not use solvents with acetone, the entire shine disappears.
How to do acrylic nails at home – get a nail set
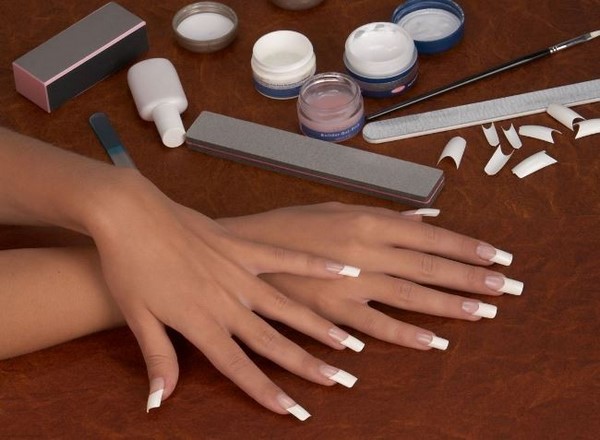
Acrylic technology is one of the most popular ones and it is possible to do all this at home. If it seems that it is too laborious and incredibly difficult, requiring considerable expenses but it is not quite true. The technology of acrylic nail extensions is very simple, and having certain skills, it can be easily performed at home. To do acrylic nails at home, you should have a kit containing acrylic paints, a fluid that increases the adhesion of a natural nail to an artificial nail, a solvent, a de-greasing fluid, a brush and a few nail tips. All materials can be purchased in specialized stores both in your city and on the Internet and many companies offer a wide range of products.
The list of necessary supplies in a nail set may differ depending on the manufacturer but its main elements are unchanged and should include:
- Acrylic powder (can be transparent, white, pink);
- Acrylic powder blush
- Monomer – check that it does not contain MMA (Methyl methacrylate) which is a dental acrylic. What you need is EMA – Ethyl Methacrylate, which is suitable for your nails.
- Degreaser
- Primer (for better coupling)
- Acryl brush
- Nail wipes
- Antifungal glue
- Nail file
- Nail cutter or clipper
- Acrylic nails
- Toothpick
- Top coat
How to do acrylic nails at home – step by step instructions
Many girls and women wonder how to do acrylic nails at home and those who are not experienced in nail art may find the procedure a bit long. However, with time and when you get more experienced you will be able to manage the steps quicker. Just take your time and do not try to do your nails in a hurry as the final result may be disappointing. Before beginning wash your nails and hands with an antibacterial liquid to prevent infections.
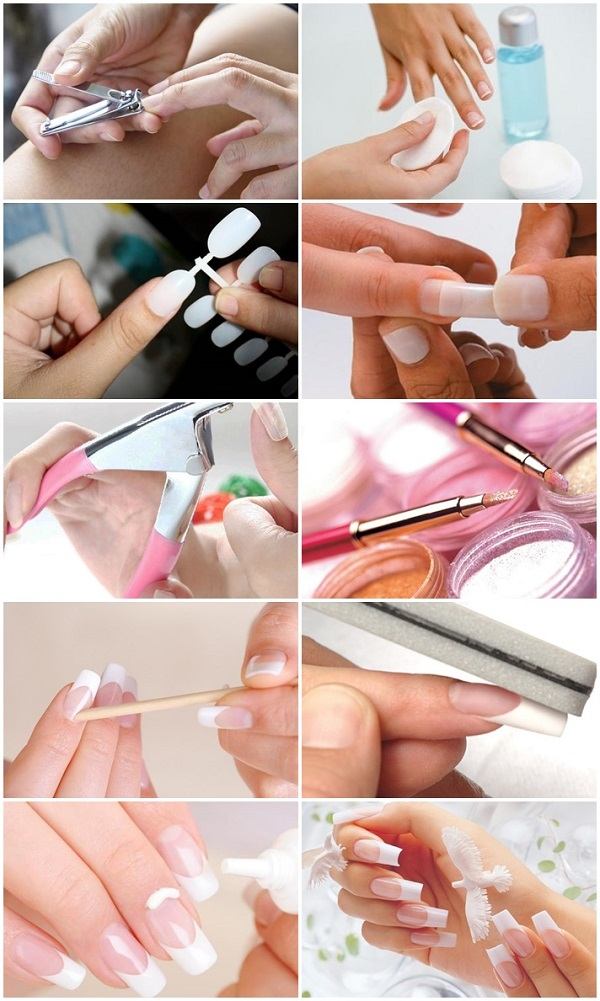
Step 1 – Remove any old nail polish using a nail file or nail polish remover. You need acetone-based nail polish remover.
Step 2 – Trim your nails. Cut them to a short and even length with nail scissors or nail clipper and even them with a nail file. Make sure you do not cut your nails too short. With the help of a nail file swipe the surface of your nails to make them slightly rougher as this will allow the acrylic nails to stick easier.
You need to push back (or trim) the cuticles as well. You can use a wooden or metal pusher and if you do not have one, you can use a wooden popsicle stick. Soak your fingers in warm water for a few minutes, as cuticles are easily pushed back when soft and wet.
Step 3 – Determine the size of the acrylic nail tip by choosing one from the set and see how it matches to the width of your natural nails. Most acrylic nails have a marking on the lower end (the inverted side) and you need to place the marking at the tip of your natural nail. Adjust the acrylic nail on top of your natural one.
Step 4 – Use cotton balls and nail primer to remove any moisture or oil from the nails. This is one of the most important steps if you want a good adhesion, so do not skip it! Remaining oil will not allow the acrylic stick.
Step 5 – Glue the acrylic nails. Apply glue on the bottom of the acrylic nail and stick the nail immediately so that the glue does not get dry. Hold the nail in place for about 10 seconds applying gentle pressure and allow the glue to dry. Be careful not to touch the area where the acrylic nails and natural nails meet to avoid accidental moving or sticky fingers. Repeat until you have done all 10 nails.
Step 6 – To prepare the acrylic mixture, pour some of the liquid in a glass bowl. Pour some powder into a separate bowl or dish. Dip the brush into the liquid and use a paper towel to wipe off any excess liquid. Then dip the brush into the acrylic powder. You have to see a small, moist ball formed at the end of the brush.
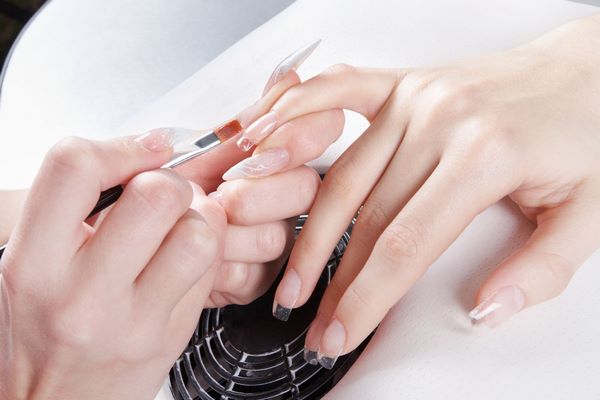
Step 7 – Apply the acrylic mixture to your nails. It is advisable to apply the mixture at the middle of the nails and spread it with a dabbing motion. Work quickly and do not forget to wipe the brush on a paper towel every time between dipping it into the monomer liquid. Be careful not to apply the mixture to the cuticle. Repeat on all nails. It takes about 10 minutes for the acrylic liquid to get completely set and dry.
It is important to remember that it is necessary to perform this procedure quickly enough because acrylic solidifies quickly. The number of layers varies depending on what thickness of the nail you want to have. Be careful not to overdo it!
Step 8 – Cut the acrylic nails carefully to the size and shape that you prefer. You can use a file to shape the tips and remove any uneven edges.
Step 9 – Finish the nails by applying a coat of smooth and glossy finish with a special acrylic gel top coat. Once the top coat has dried, you are ready to apply nail polish. It is important that you choose non-acetone nail polish as acetone affects the strength of acrylic nails.
How to maintain your acrylic nail extensions? Your nails will grow out in about two weeks so you can choose to remove the acrylic completely or reapply acrylic nails. In case you notice that your natural nails look yellow or green, do not apply acrylic as your nails will need treatment. Keep in mind that nails fungus is highly contagious!

