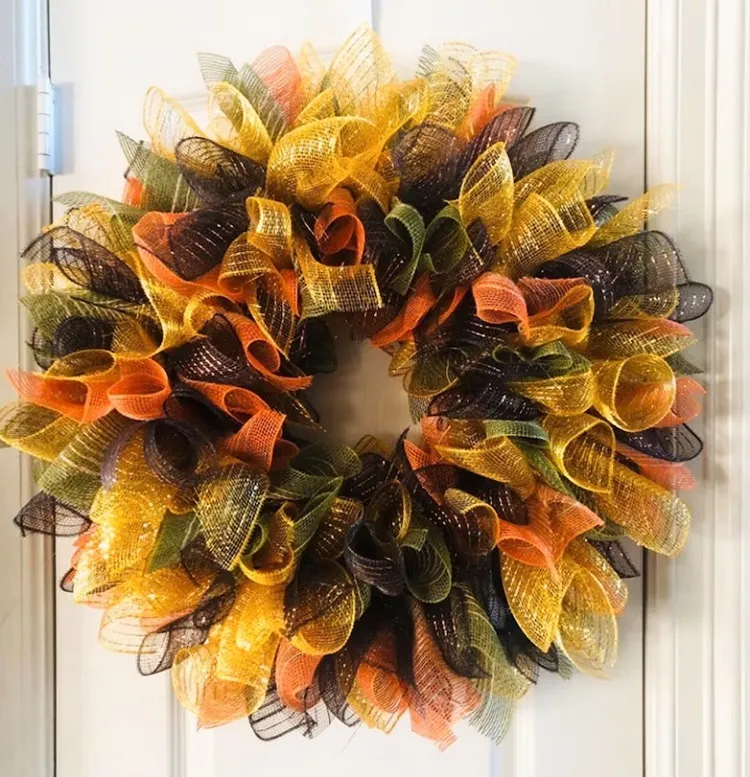
Fall is one of the most inspiring times of the year for arts and crafts. We’re not only starting to decorate our homes in a more cozy way but also getting ready for the spookiest holiday of the year – Halloween! It’s fair to say that you’ll be having a lot of people knocking on your front door this month, so why not give it a little seasonal makeover to make it more welcoming? Follow our super quick and simple step-by-step guide on how to make a deco mesh wreath for beginners!
How to Make a Deco Mesh Wreath for the Fall?
The reason why I love this type of wreath is because it’s incredibly easy and quick to make! All you need is 3 supplies, and before you know it you’re going to end up with a stunning decoration that you can proudly hang on your front door! The materials you’re going to need to make this cute seasonal accessory for your home are:
- 10″ of deco mesh in a color of choice
- 21″ of another deco mesh in a color of choice
- 18 pipe cleaners
- a wreath frame
- rotating blade or sharp scissors
Read also: 4 Simple DIY Modern Fall Wreath Ideas to Celebrate Harvest Season With!
Step 1: Choose the Colors of Your Deco Mesh
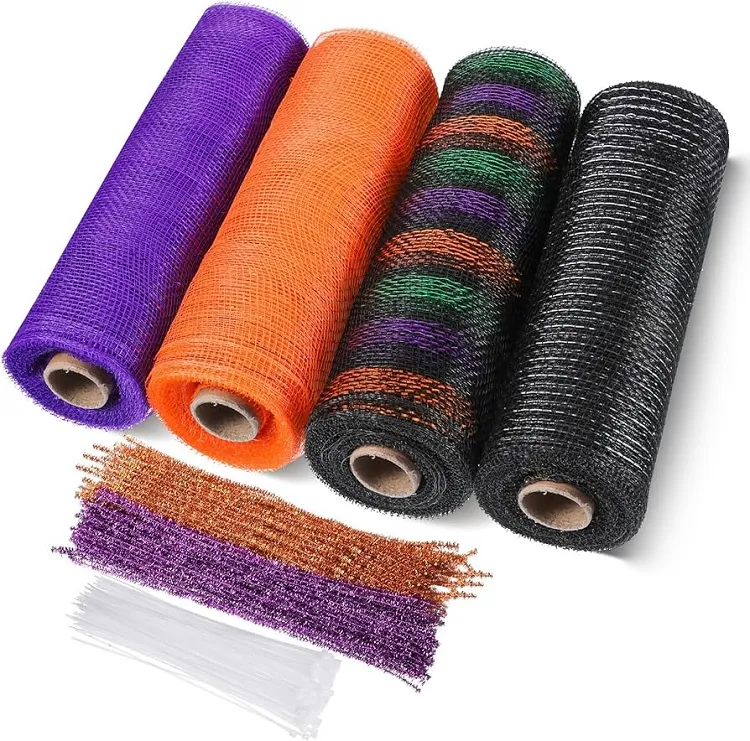
For this particular mesh wreath pattern, you’re going to need a minimum of two colors. Because there are so many mesh colors on the market you can easily make this wreath for any occasion simply by switching up the color scheme! You can choose earthy shades of brown for fall, bold orange, violet, and black for Halloween, and green and red for Thanksgiving!
Read also: How to make a magnolia wreath – festive home decorating ideas
Step 2: Get a Dollar Store Wreath Frame
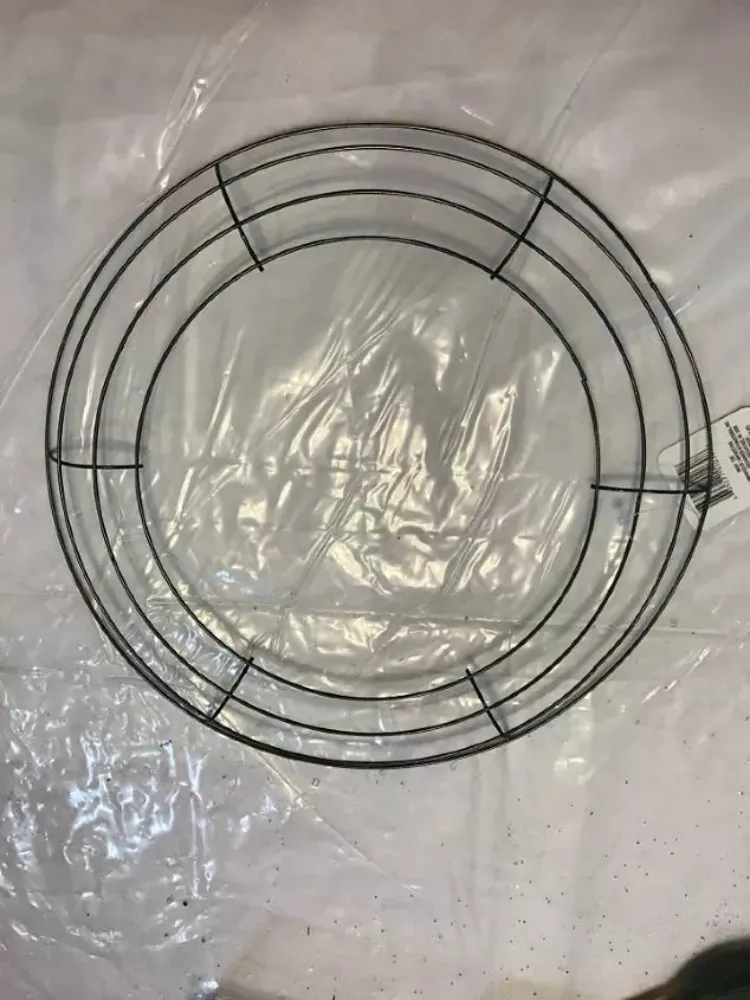
This metal frame is going to serve as a base for your wreath. You can easily find one in any dollar store. Keep in mind that the wider the frame is, the bigger your wreath will be, hence you will need more mesh to cover it, and vice versa. This frame in particular is 14″ which is an optimal size for a regular front door.
Read also: How to make a wreath from tree trimmings? Step-by-step instructions!
Step 3: Add the Pipe Cleaners Onto the Wreath Frame
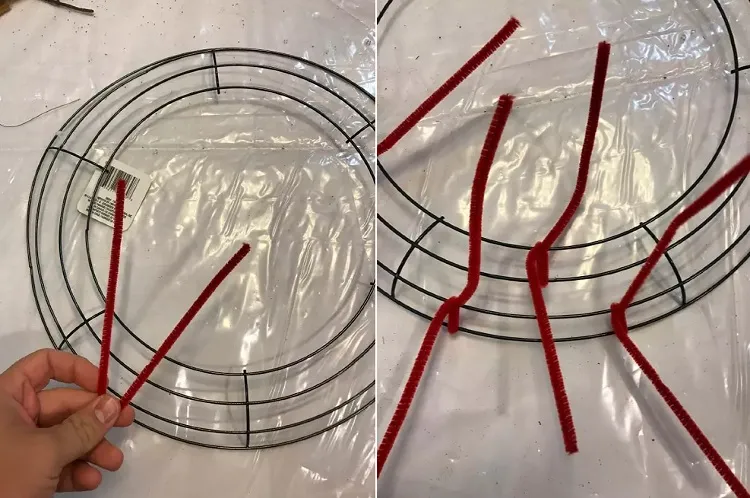
We suggest you choose the color of the pipe cleaners based on the color of the mesh, so they can blend in as seamlessly as possible. Because we decided to use red and green mesh for our wreath, we’ve also picked red pipe cleaners. For a 14″ wreath frame you’re going to need a total of 16 pipe cleaners. Here’s how to attach them:
- Take one pipe cleaner and fold it in half.
- Wrap that pipe cleaner around two of the inner wires right in the middle of 1 of the 6 sections.
- Then, take two more pipe cleaners and wrap them the same way around the outer two wires, evenly spaced on both sides of the first pipe cleaner.
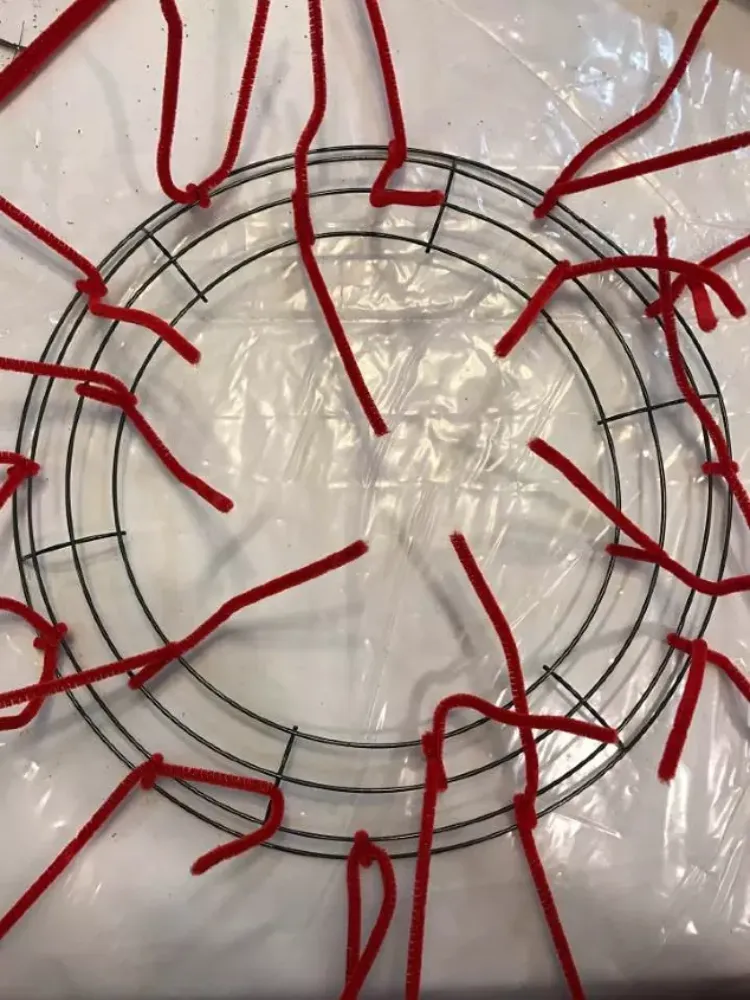
- Each section of the frame should have 3 pipe cleaners in total.
- Repeat the same process until each section is complete.
Step 4: Cut the Mesh
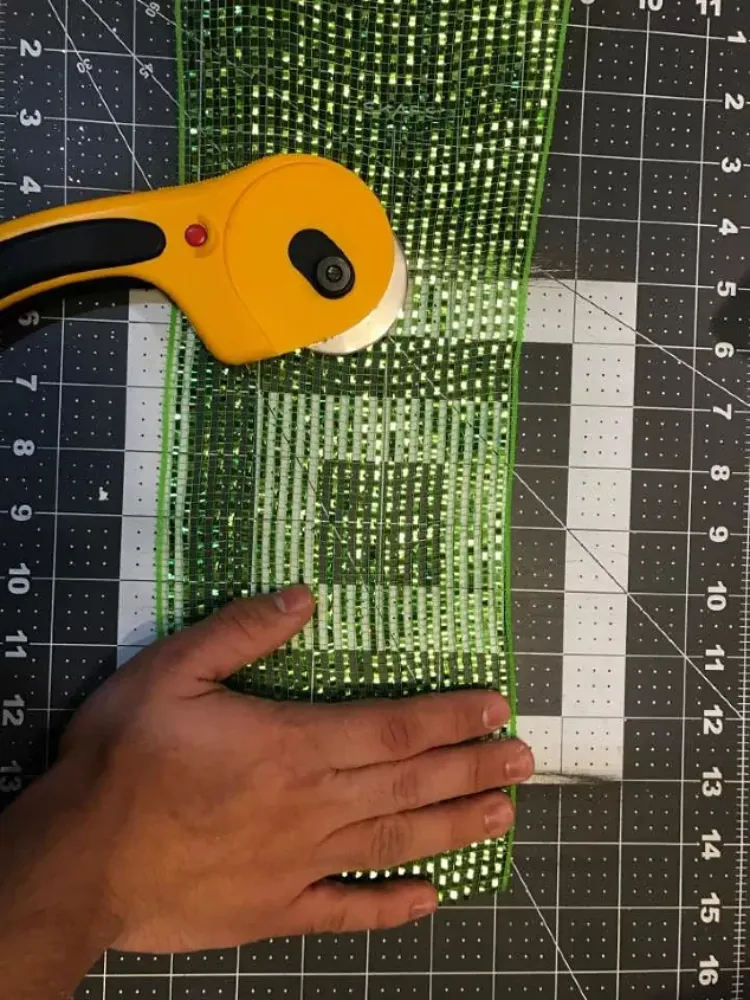
- First, we’re going to create small mesh bows made of 3 pieces of mesh.
- You’re going to need 18 pieces of evenly cut mesh pieces in the color that you’ve chosen to place in the middle of the bow.
- Then, you’ll have to cut 36 pieces in the same size from the second deco mesh color.
- Each piece is approximately 8–10 inches.
- To get smooth edges it’s best to cut the mesh with a rotating blade. If you don’t have one at your disposal, use sharp scissors.
Read also: Beautiful fall wreath ideas – rich colors to welcome the autumn season
Step 5: Make the Bows
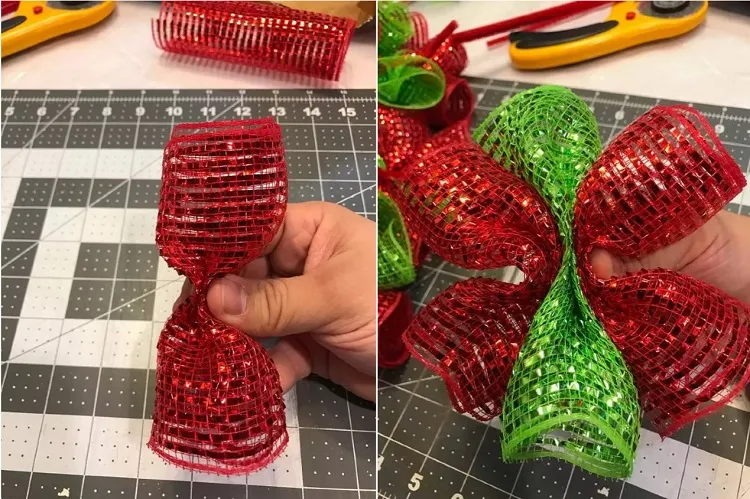
- Roll each piece of mesh into a small tube and pinch it right in the middle.
- Sandwich 3 pieces of mesh together.
- Hold them tightly and place them on top of one of the pipe cleaners on the wreath frame.
- Secure the bow in place by wrapping the pipe cleaner around it.
- Repeat the process with the rest of the mesh pieces until there are no free pipe cleaners left on the frame.
Step 6: Final Touches
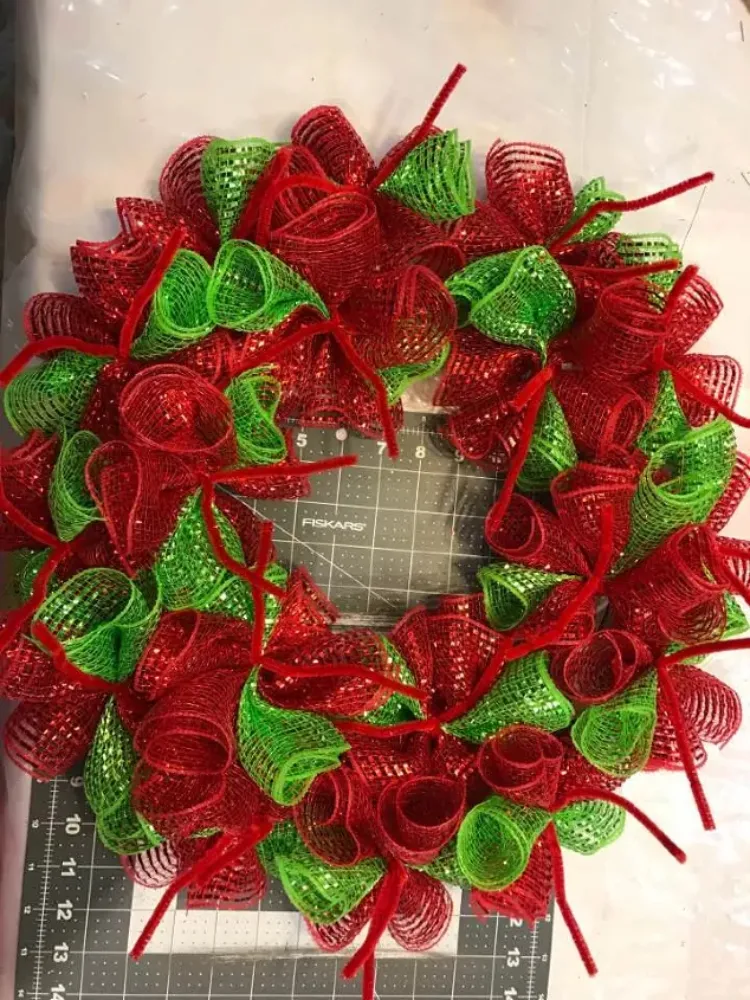
This is what the final outcome should be! As you can see the pipe cleaners are sticking out which kind of ruins the aesthetic appeal of the wreath. Take the scissors and cut them as close to the bows as possible, so you can conceal them. If you want, you can add other elements such as small plastic pumpkins, leaves, faux flowers, a small sign in the center of the wreath, or other decorations. Once you’ve done that, your wreath will be ready for hanging!
Read also: How to make a simple Halloween wreath? Photo Gallery and DIY ideas for October decorations