Making a meal at your home can be a tricky task if your space is not well-organized. Pantries are a really practical addition to your kitchen and can definitely help you get everything in order. Read on to find out how to organize a pantry in the most functional way so that you will enjoy every second spent cooking!
Tips on how to organize a pantry
In order to have quick access to everything and reduce the time preparing meals, the space should indeed be arranged in a smart way! Here are a few tips on how to organize a pantry, starting from the most vital ones:
Tip 1: Create zones to keep your pantry organized
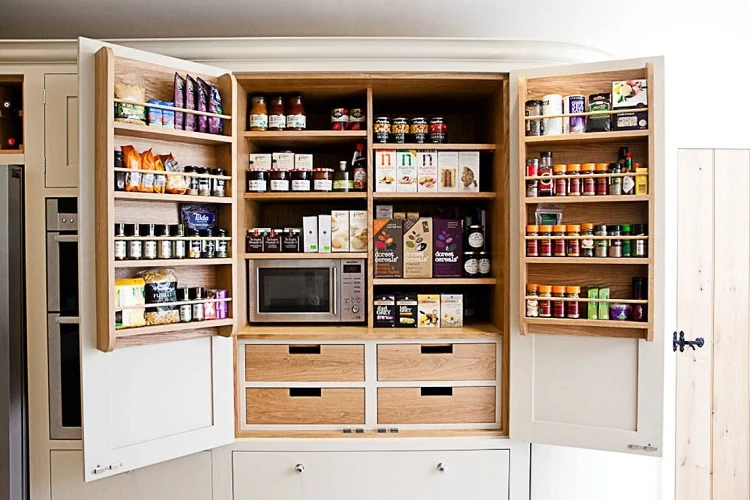
You can start organizing your pantry by taking account of the most essential zones you’d like to create. Thus, it will take little time to find what you need. Dividing your pantry into sections will also help you keep track of food’s expiration date and freshness.
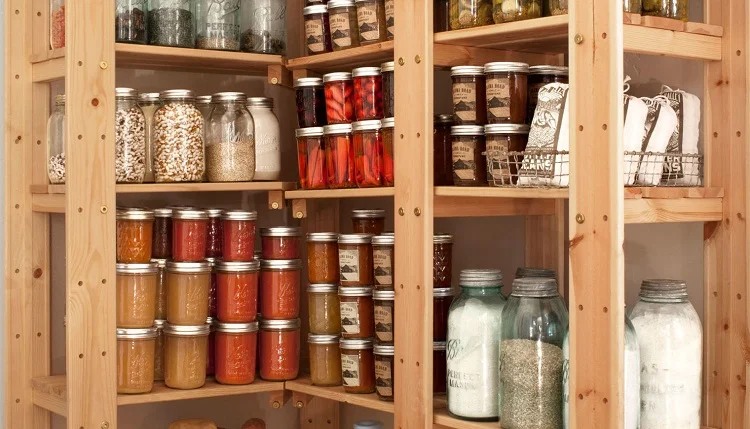
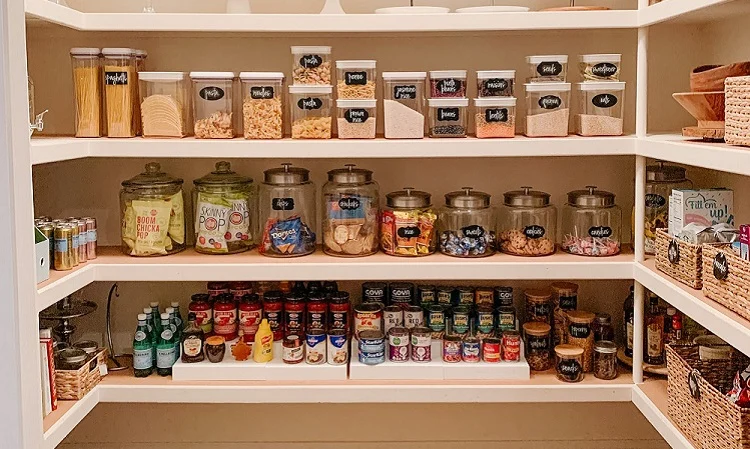
Model distribution of pantry zones
You will have to make the most room, as regards food and cooking:
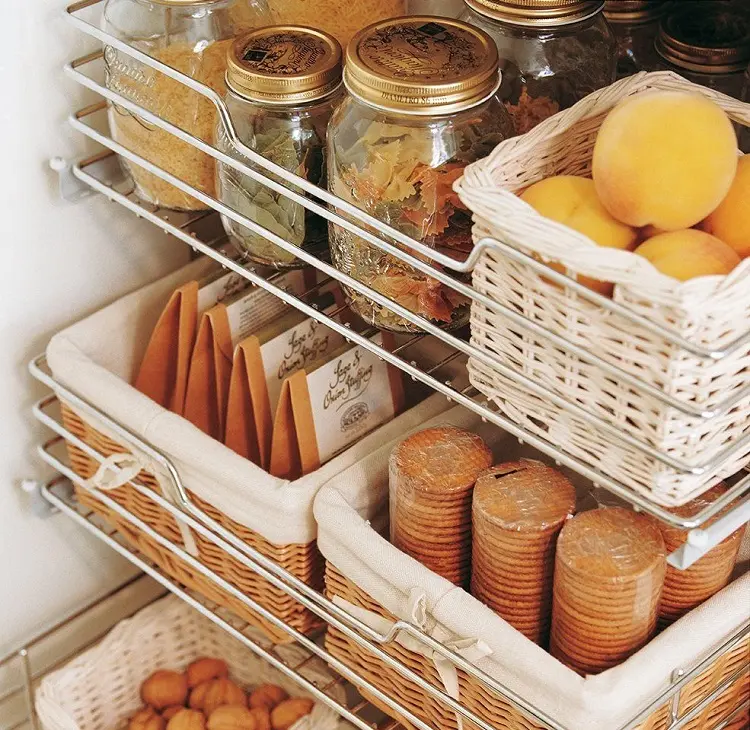
- Herbs and spices – make sure to place them in an area that is as easily accessible as possible.
- Dry ingredients – such as flour, salt, baking powder, yeast, etc. They should also be within reach, and it’s best to keep them in clear air-tight containers.
- Wet ingredients – such as vinegar and oils should be placed low as they may spill over other important items.
- Pasta and legumes – you can put them in jars, or other clear containers so that you will know the right amount that’s left of them whenever you need.
- Canned food – find a specific space for your canned goods, so you don’t waste time looking for them.
- Breakfast section – make your morning routine easier and faster by gathering all of your most frequently used items (coffee, tea, cereals) in one place.
- Cheat Day treats – if you enjoy pleasing your palate from time to time, maybe it’s best to find room for your favorite treats, too.
You can place tools, appliances and cookware in the pantry too, separately from the zones which are food-related.
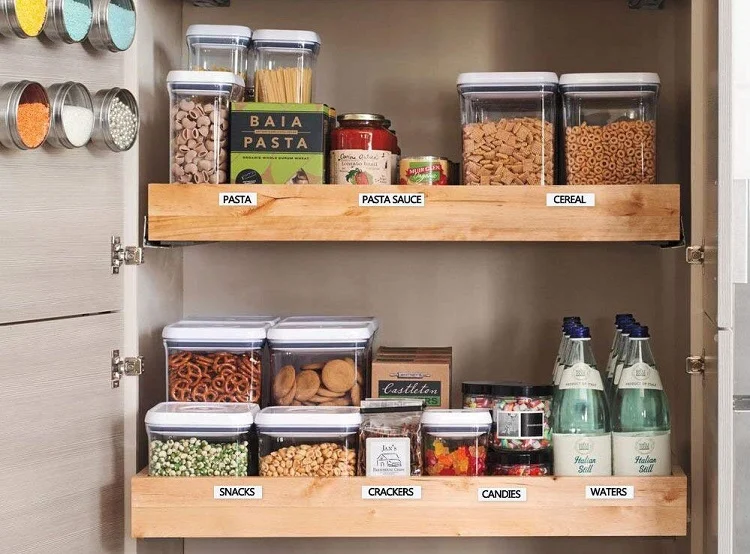
Tip 2: Label everything and keep the organization simple
Once you’ve finished distributing the zones, it’s time to put everything in order! One of the easiest ways to do so is by labelling all the containers, or find pre-labeled ones. You will never hesitate and will know exactly what is what.
Tip 3: Optimize the space
Last but not least, you should keep in mind how to make the space functional, even if it’s a small pantry. Think of all the necessary storage furniture you’ll need, like pantry shelves or shelf units, pull-out cabinets, drawer separators, clip-on baskets, pegboards, etc. Speaking of storage, if you want to save up some money, check our DIY storage ideas for pantries below and get inspired!
DIY storage ideas for your pantry
You can organize your pantry by using different types of containers – basically, anything you can think of that you can put products in. But if you seek for some inspiration, feel free to use some of our DIY storage ideas!
1. DIY pantry crates idea
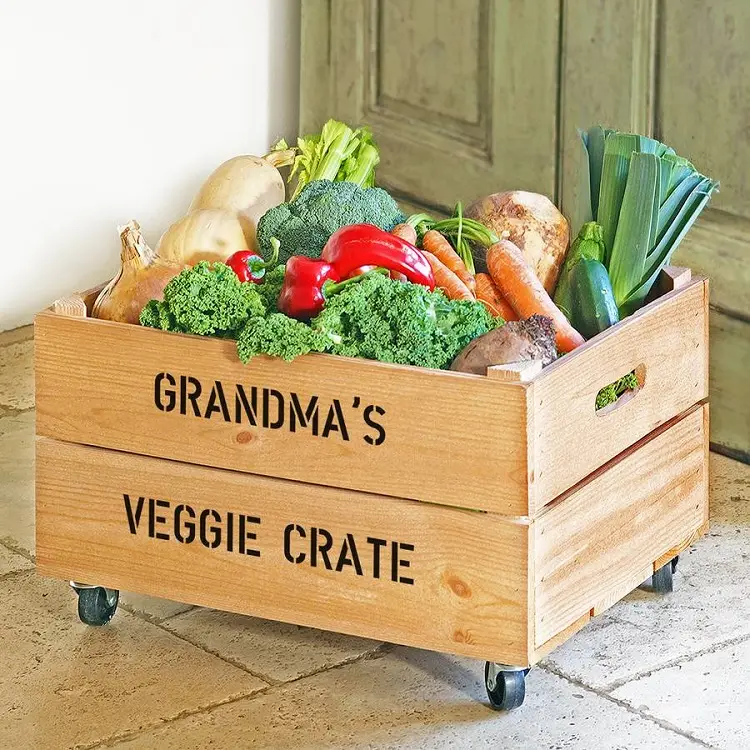
If you happen to have some old wooden crates, they can do miracles as they can turn out a great storage space for some of your items. What is more, you can not only experiment with giving them a whole new renovated look, but it is also a good idea to attach casters at each crate’s bottom. This way the crates will not scratch the floor, and they will be easy to move around the place.
Instructions for making pantry crates
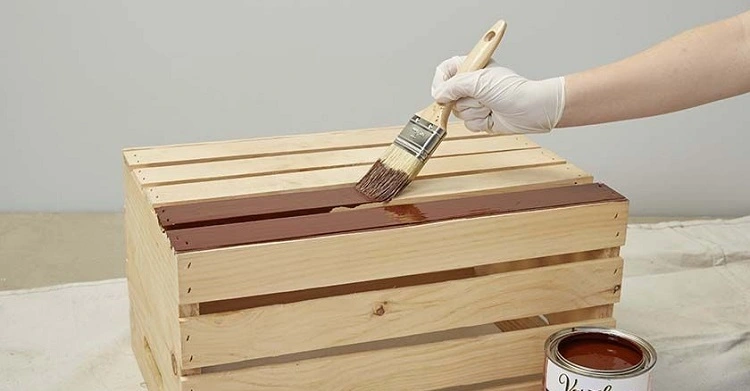
- Depending on the condition of your crates, you may find it best to start with sanding the surface – you may use sandpaper sheets or a scrub sponge.
- Then you will need to apply a few coats of wood impregnator as it provides good protection of the wood. Make sure to follow the manufacturer’s exact recommendations for mixing, applying and drying time.
- Finally, it is up to you to choose between varnish and paint – either way, you’ll end up with nice new crates for your pantry!
- If you want to upgrade them a little more, you can attach casters at the bottom!
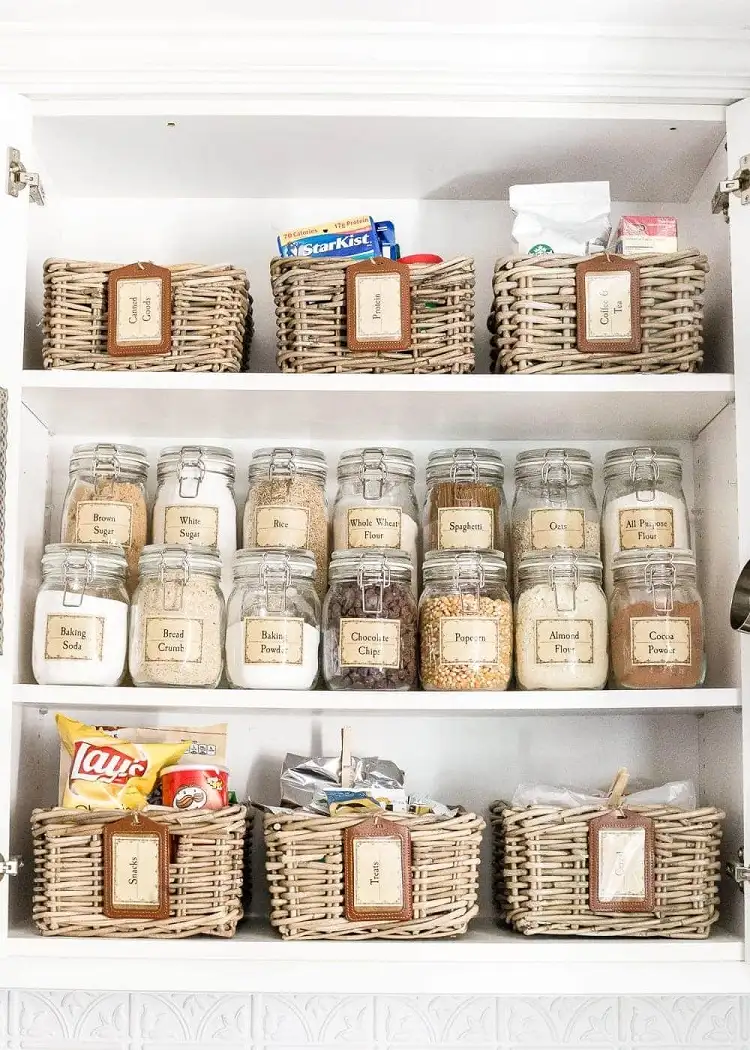
2. DIY pantry labeled containers
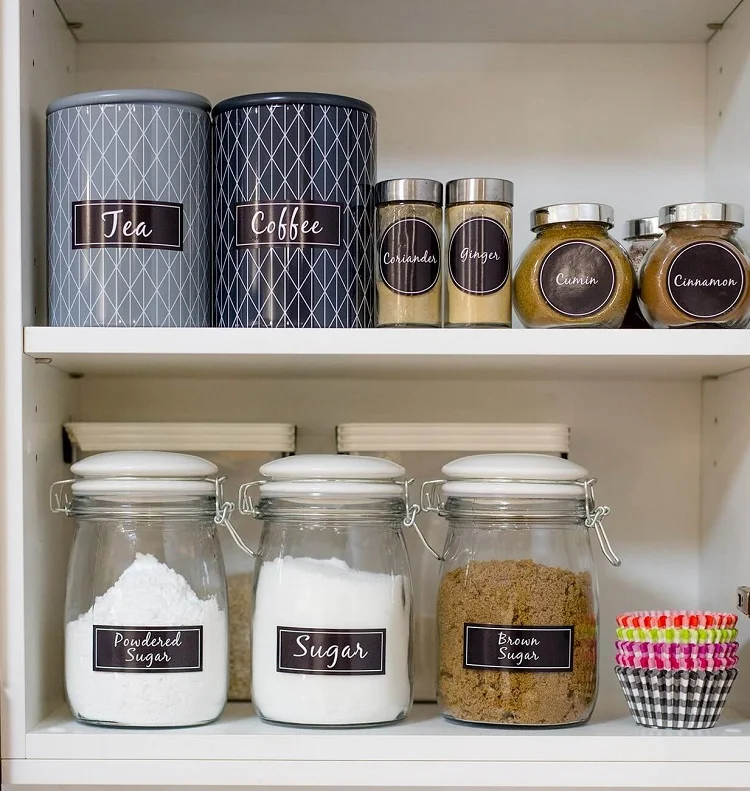
Use your creativity and save lots of money by organizing the single pantry items in containers of your choice! Visiting the dollar store may sound like a great idea since there you can find various items such as jars, storage containers, baskets, canisters and so on. You may also use old ones, if you have any. It is important to label each of the containers because you will find everything in a matter of seconds!
Ways to label your pantry storage containers
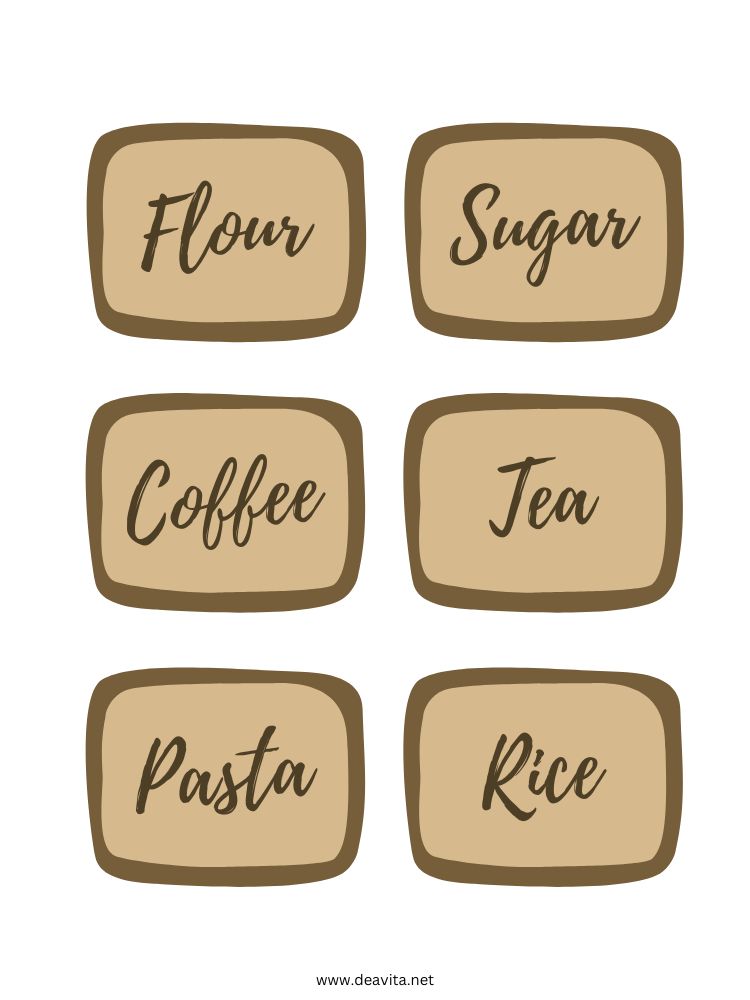
If you are good at some graphic design software, you can make your own design for the labels or use an easy online tool. Another idea is to find some ready-made ones or download our free printable jar labels you see above. You can then print them on a sticky photo paper, if you have a color printer at home, or simply go to your local print shop!