There’s something about the Holiday spirit that always awakens a creative spark in me. Many of us try to spend as much quality time with our families as possible during the Christmas season, and what better way to do that than to bury yourselves in glue and craft paper? It’s messy, but the kids love it and that’s what makes it worth it! The fun thing about DIY projects is that you can repurpose pretty much everything and create something brand-new. Today, we’ll be making popsicle sticks Christmas crafts!
Popsicle Sticks Christmas Crafts
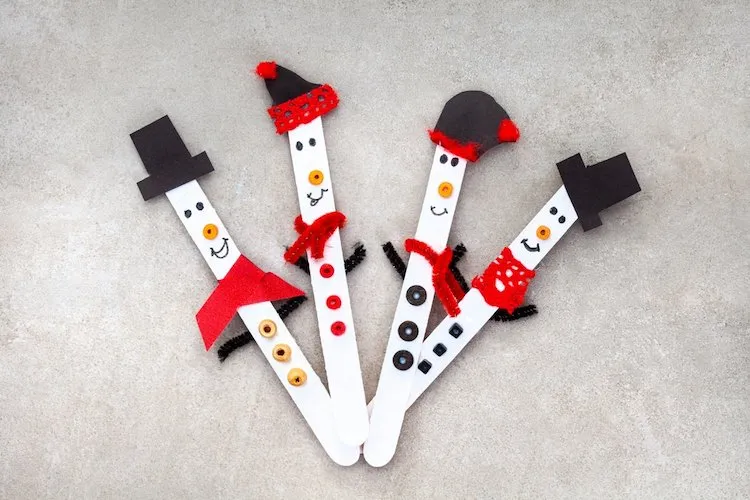
Credits: Shutterstock/Aninka Bongers
Wait, do you expect us to eat 50 popsicles for some silly DIY crafts? Absolutely NOT! We’re going to use special craft sticks that you can buy from any art supplies store. Since we are going to paint on them, it would be best to get a pack without wood knots. Here are 5 fun ideas you can make with your kids (or alone)!
Christmas Characters
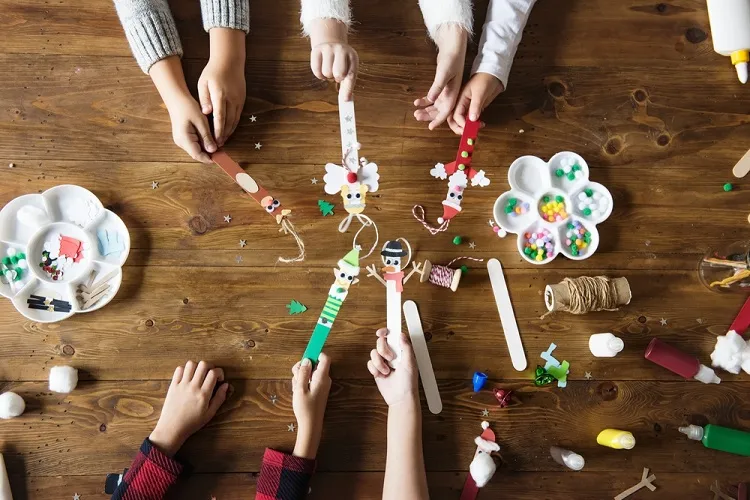
Credits: Shuttesrtock/Rawpixel.com
Kids love playing with dolls, but let’s be real for a moment – they have gotten VERY expensive! And it’s not like we wouldn’t do anything to get them the toy they’ve been dreaming about for… a week, but it would be much more meaningful to them if they made it themselves! Now, if you want these little stick characters to actually look nice, you’ll have to help them out with a thing or two. You’re going to need the following things:
- wooden popsicle stick
- small googly eyes
- paper glue stick
- acrylic paint
- paintbrushes
- twine
- colorful craft paper
Credits: Shuttesrtock/Rawpixel.com
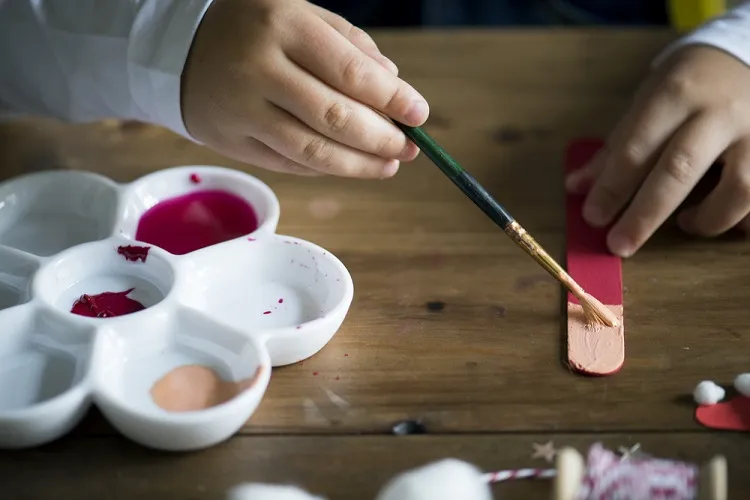
Start by painting the “outfit” of the character. You can take some inspiration from the first image. Once you’re done, allow the paint to dry before you move onto the next step.
Credits: Shuttesrtock/Rawpixel.com
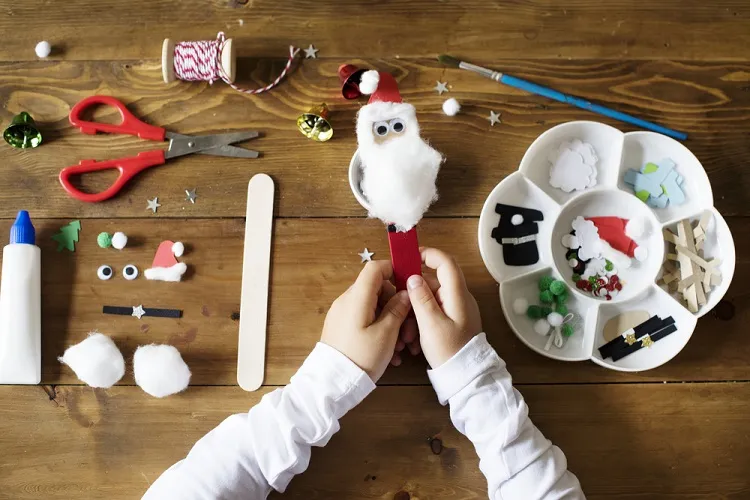
To make this adorable Santa Claus, you’re going to need to first cut out the shape of the hat out of red craft paper. Then, use a little bit of cotton to make the pompom and the brim of the hat. Use a larger piece for the beard and the hair. Glue them on the stick, then add the googly eyes and the hat. Make a belt out of a tin black craft paper strip and place it right where the beard ends.
Credits: Shuttesrtock/Rawpixel.com
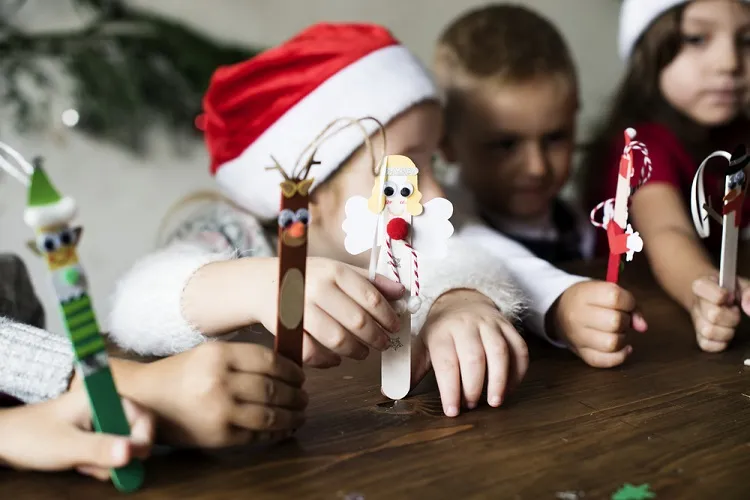
Here are some more fun characters you can create with your kids. If you want to hand the toys on your Christmas tree, simply attach a piece of twine on the back with tape.
A Reindeer Ornament
Credits: Shutterstock/Irina Starikova1811
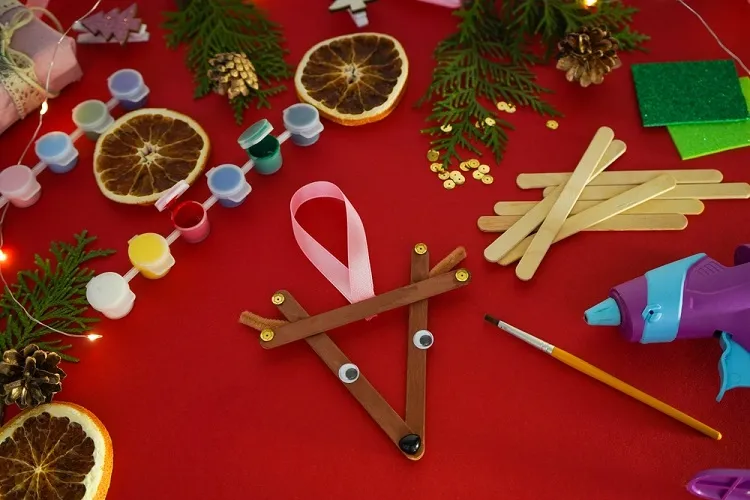
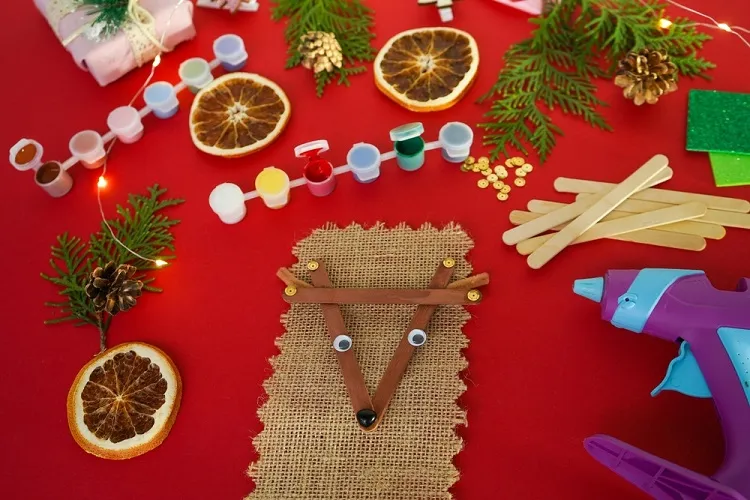
This cute reindeer ornament is super easy and quick to make! All you need is:
- 3 popsicle sticks
- googly eyes
- a ribbon
- brown and black acrylic paint
- a paintbrush
- hot glue gun
Credits: Shutterstock/Irina Starikova1811
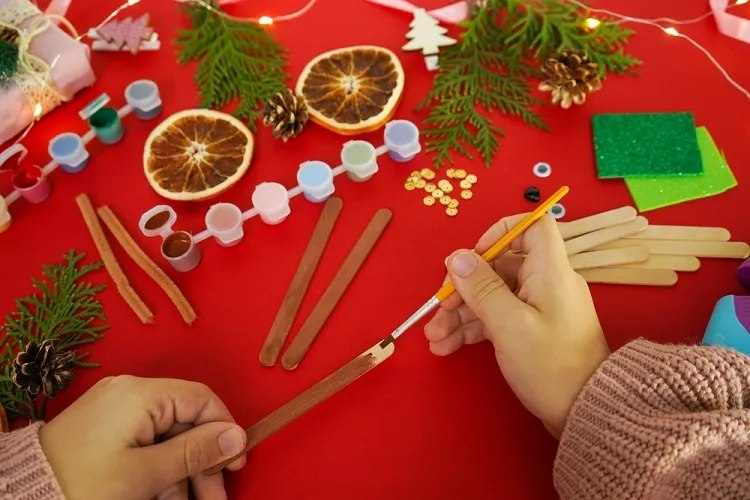
You start by painting each stick brown on both sides. Wait for the paint to dry completely before you flip it on the other side.
Credits: Shutterstock/Irina Starikova1811
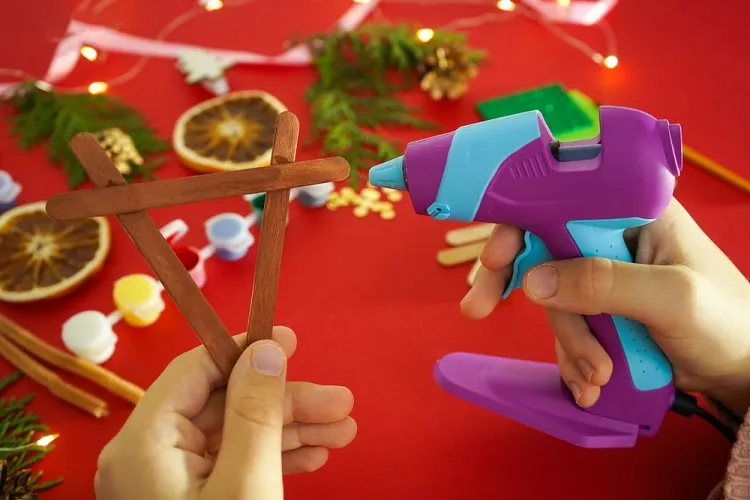
Use the hot glue gun to attach two of the sticks in a V-shape. Then, place the third stick a little above the midsection of the other two, leaving a bit of space at the top, enough to create little V-shapes on both ends.
Credits: Shutterstock/Irina Starikova1811
Finally, place the googly eyes across the middle of the ornament and paint a little black dot at the bottom for the nose of the reindeer. Use the hot glue gun to attach the ribbon to the back of the vertical stick, and you’re done!
Fun Christmas Tree
Credits: Shutterstock/FamStudio
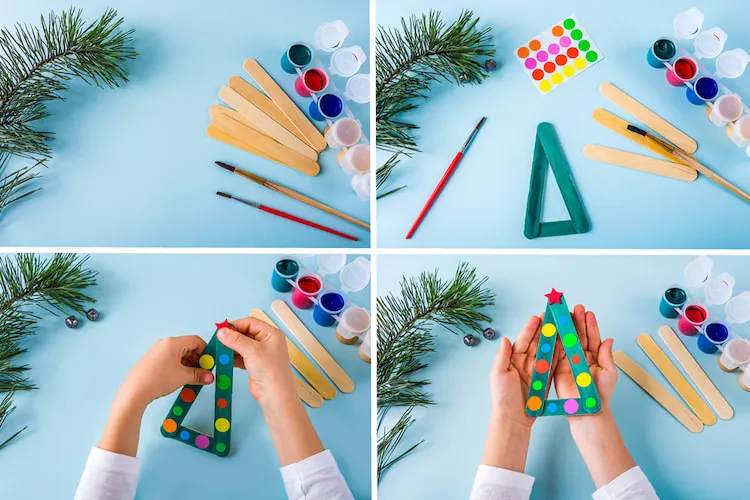
What’s Christmas without a Christmas tree? Here’s how to make a fun little pocket version in under 5 minutes! For the task, you’ll need:
- 3 popsicle sticks
- Green paint or marker
- colored dot stickers
- hot glue gun
The first thing you need to do is to break one of the sticks in half, as you can see, the base of the tree is much shorter than its sides. Use acrylic paint or a colored marker to paint the sticks green on both sides, and wait for them to dry. Then, arrange them as shown in the second image and glue them in place with the silicone gun. Finally, go wild with the colored dot stickers and decorate your ornament. For the tree topper, you can draw a little star on a piece of red paper, cut it out, and glue it with a small amount of hot glue!
Read also: DIY Christmas Decorations with Yarn – Quick and Easy Craft Ideas for Kids to Try This Year
Santa Stick Puppet
Credits: Shutterstock/Elena Hramova
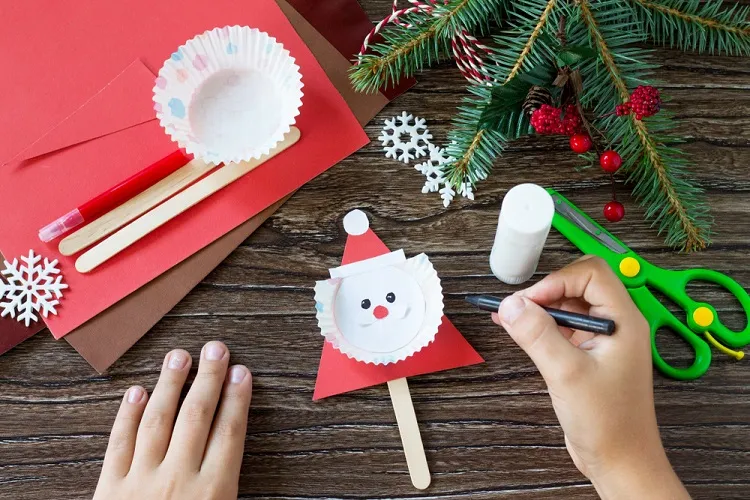
Another Santa puppet, because, why not? He’s the main character of Christmas, after all. This charming project requires the following materials:
- one wooden stick
- a triangular piece of red paper
- one red and one white paper circles
- a thin white paper strip
- paper cupcake liner
- paper glue stick
- scissors
- a black marker
Credits: Shutterstock/Elena Hramova
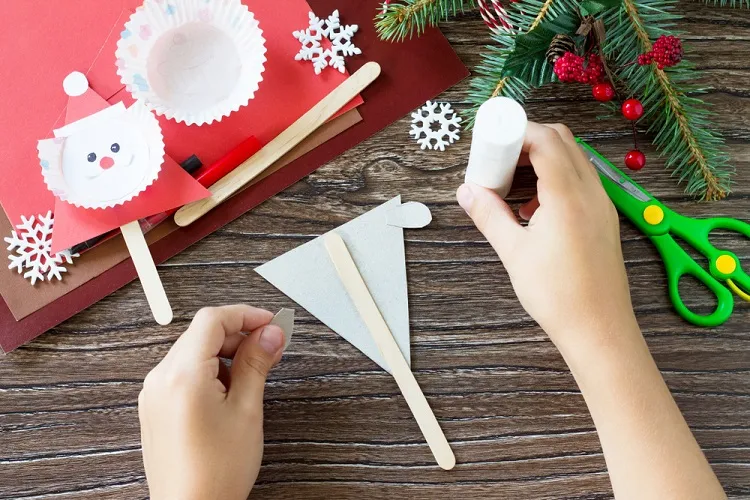
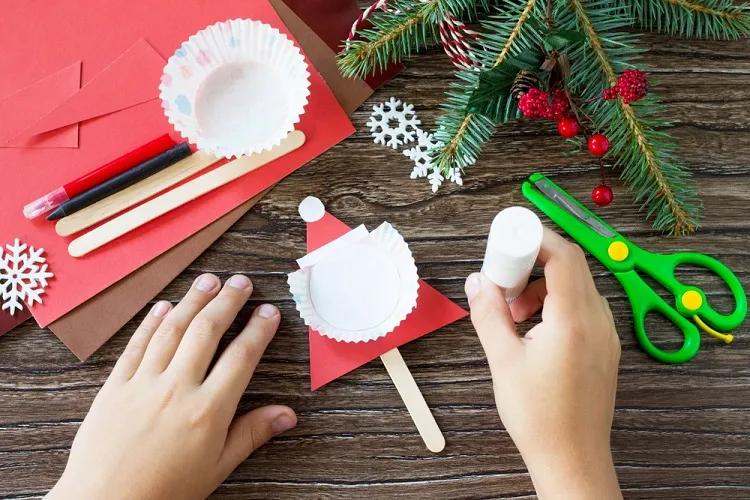
Start by gluing the stick to the back of the triangle. (It’s flipped upside down on the image above – this is a mistake.)
Credits: Shutterstock/Elena Hramova
Then, glue the white circle to the tip of the triangle and the white strip half an inch below it. This is going to represent the hat of Santa Claus.
Cut a little piece off the cupcake liner and glue it on the triangle, with the flat side right underneath the brim of the hat. Glue the red circle right in the middle of the liner, draw the eyes above with the black marker, and your Santa is done!
Beautiful Snowflakes
Credits: Shutterstock/Aninka Bongers-Sutherland
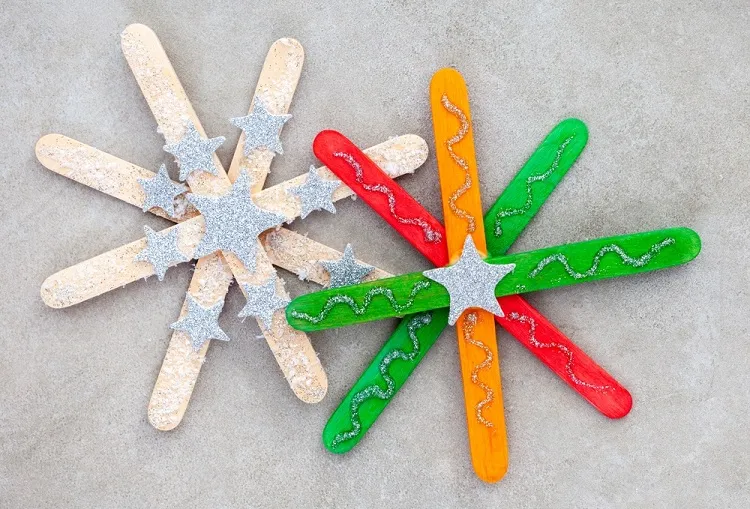
Snowflakes are incredibly easy to make! You’re going to need 4 sticks for each. If you want the snowflakes to be colorful, it’s best to paint the sticks before you glue them, otherwise, the color won’t appear seamless. To create this shape, first, you need to make two X’s. Then, glue them on top of each other using a hot glue gun in a crisscross pattern, and you’re done! All that’s left is to decorate them to your liking.
Read also: 5 Ideas for DIY Painted Christmas Ornaments You Can Make with the Whole Family!
