If you’re someone who likes to shop online, you probably have a bunch of empty cardboard boxes lying around the house that you’re wondering what to do with. Do NOT throw these away because this is the best material to use for DIY art projects! Fall is such a good time to engage your kids in creative activities because there are also so many things you can find in nature that you can use as art supplies! In this article, I’m going to share with you a few really simple DIY cardboard art ideas fit for kids (and adults) at any age!

Why do Kids Like Cardboard Boxes?
Have you noticed the odd fascination with cardboard boxes that kids have? This is, in fact, very common and there is a psychological explanation behind it. Young children are drawn to everyday objects and, contrary to what we may think, those in neutral colors stand out to them more than their colorful toys. Cardboard boxes in particular are an object that awakens their creativity as it serves as a blank canvas that they can reimagine in any way they wish. Children see the potential in this material, which makes it really easy and enjoyable for them to work with it and create unique arts and crafts projects.
If you’re interested in learning more about the way children perceive the cardboard box, take a look at this article from the Michigan State University. It explains not only the fun aspect of it but also dives into its educational purposes.
DIY Fall Cardboard Art Ideas for Kids
There are so many reasons to love cardboard art – it’s cheap, easy, fun, and best of all – helps you to recycle the mountains of delivery boxes that just keep piling up! It’s important that we encourage our kids to experiment with different techniques to create art. It’s not only entertaining for them, but it also aids the development of their motor and sensory skills! Scroll down to find 4 super easy cardboard art ideas with step-by-step guides on how to do them yourself with ease!
Read also: Crafts with Chestnuts, Acorns and Other Natural Materials: 5 Cute Animals and Figures!
Easy Wool and Cardboard Pumpkins
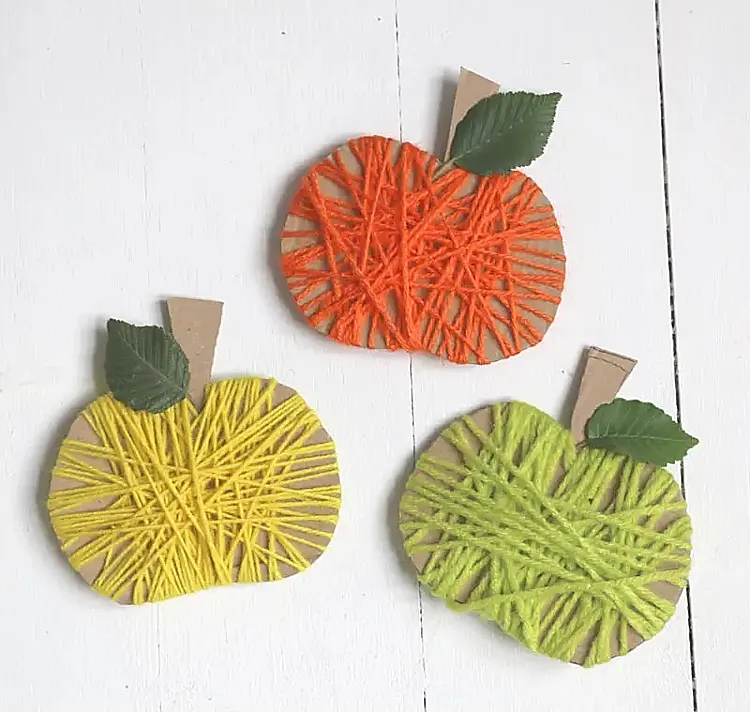
What’s fall without pumpkins? Decorating my home for the fall might be one of my favorite activities, especially when I can engage my kid in the process. If you want to spark their creativity and keep them busy for a little, these really simple wool and cardboard pumpkins are a great quick art project to try! Here’s a list of the materials and steps you need to follow to recreate them yourself!
Materials
- recycled cardboard
- a pencil
- an eraser
- scissors
- hot glue gun
- a tree leaf
- wool (red, orange, green, yellow)
Instructions
- First, print out the pumpkin template.
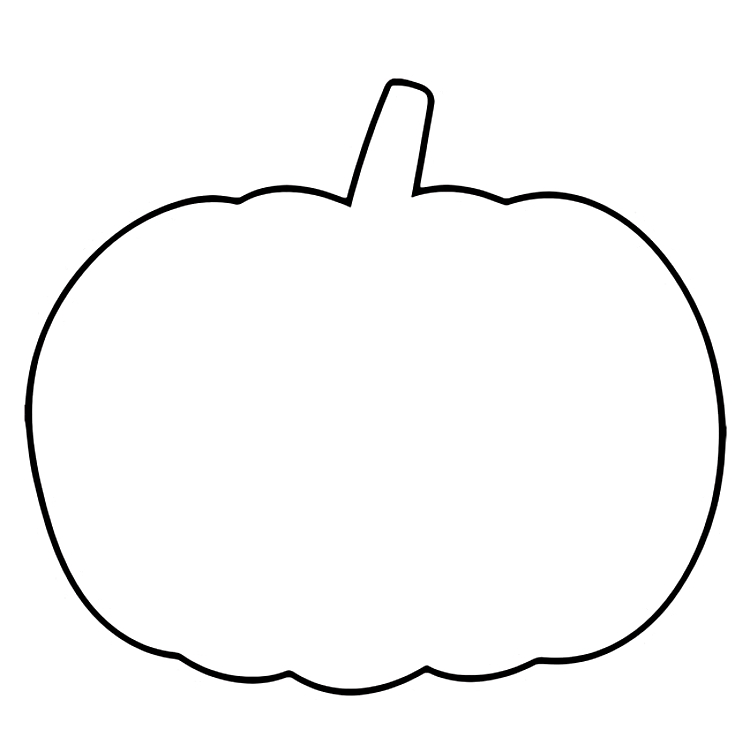
- Use the scissors to cut out the template.
- Place the template onto the cardboard and use a pencil to outline it as many times as you wish.
- Then, cut out the outlined pumpkins from the cardboard.
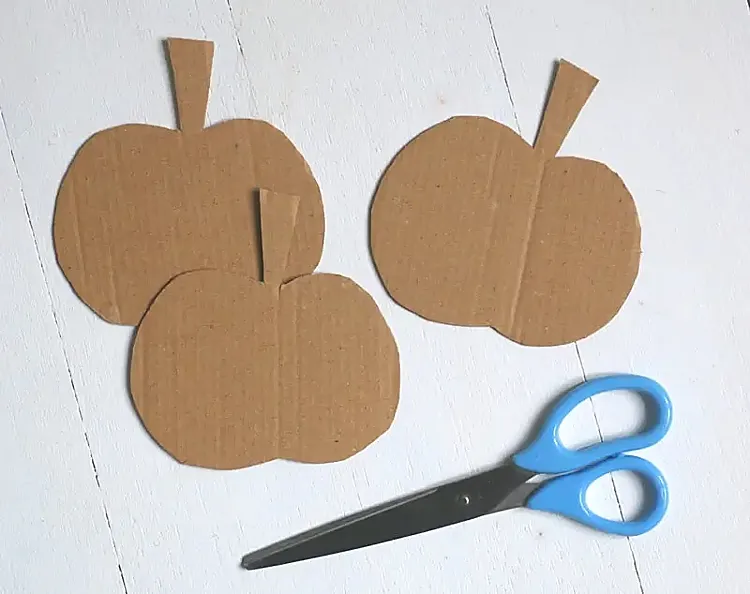
- Use the scissors to cut a tiny slit right next to the stem.
- Take the wool in your color of choice and place its end in the slit. This allows the kids to wrap the wool around the pumpkin more easily.
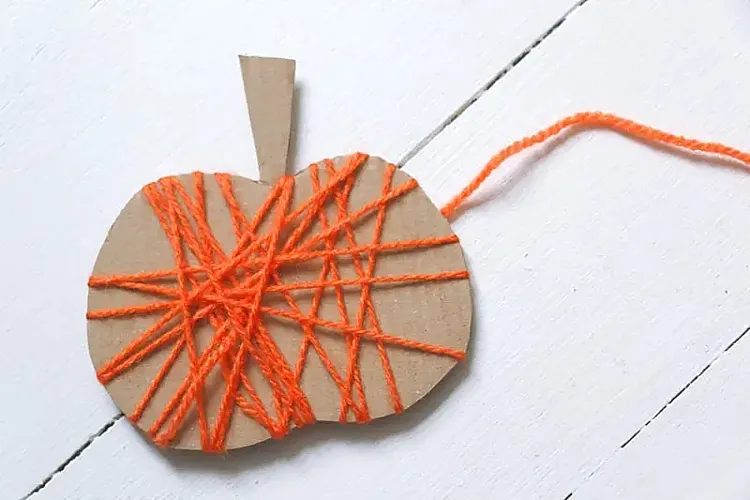
- Make sure you tell your kids to turn around the pumpkin while they’re wrapping it in wool, otherwise, it will end up clustered in one place.
- Once they’re done you can assist them with tying a little knot on the back, so the wool doesn’t unravel.
- Use a hot glue gun to attach a leaf next to the stem.
- Depending on the size of the pumpkins, you can tie them on a string and make a festive garland.
Read also: Squirrel Craft Ideas (+Template): 3 Fall Crafts with Toilet Rolls, Natural Materials & Paper
Cardboard Acorns
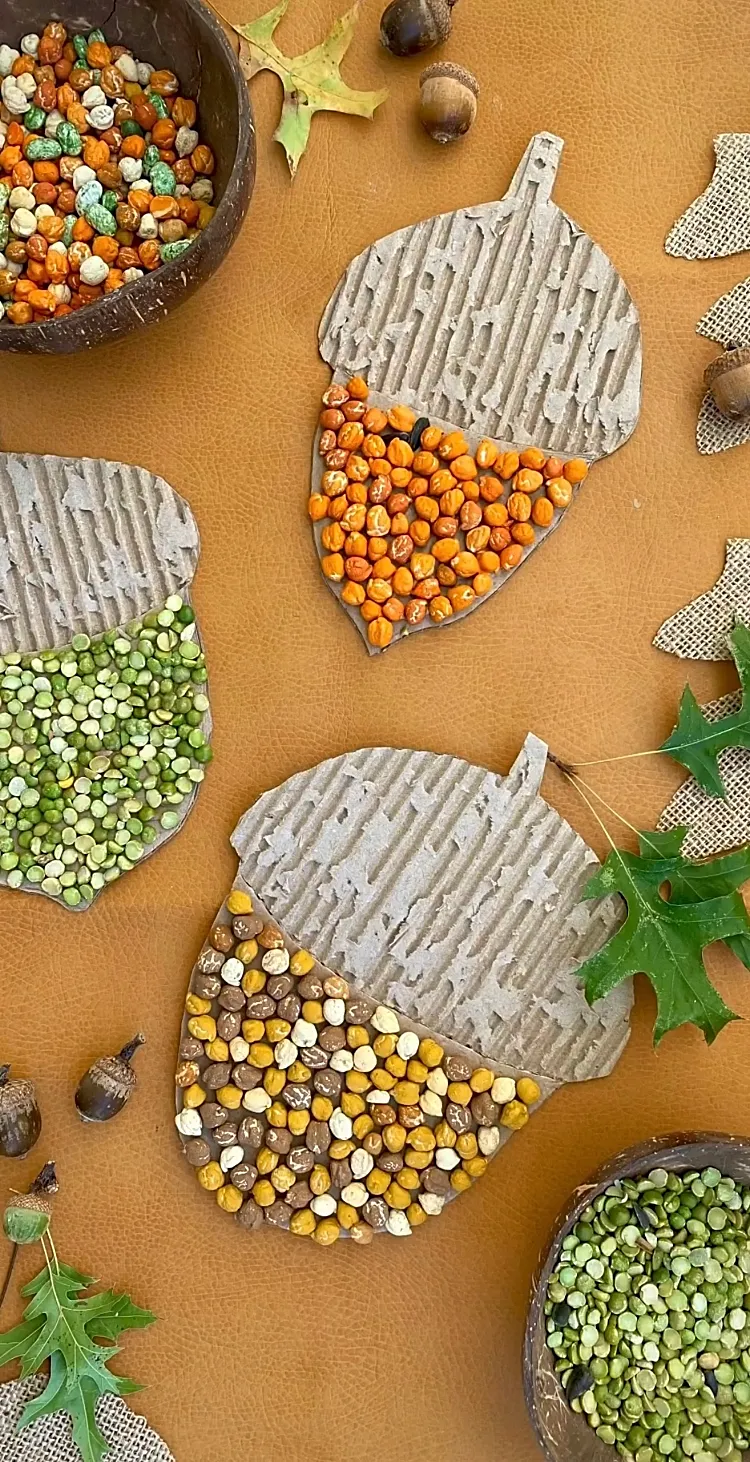
Credits: playful.petals
Acorns are such a sweet symbol of fall that always gives me a grounding and comforting sense. If you have some spare cardboard boxes that are taking up too much space, we’re going to recycle them right away! Gather your little ones around and let’s make some cute cardboard acorns!
Materials
- recycled cardboard
- liquid glue
- a pencil
- dried beans
- split peas
- a scalpel, sharp scissors, or a knife
Instructions
- Print out the acorn template.
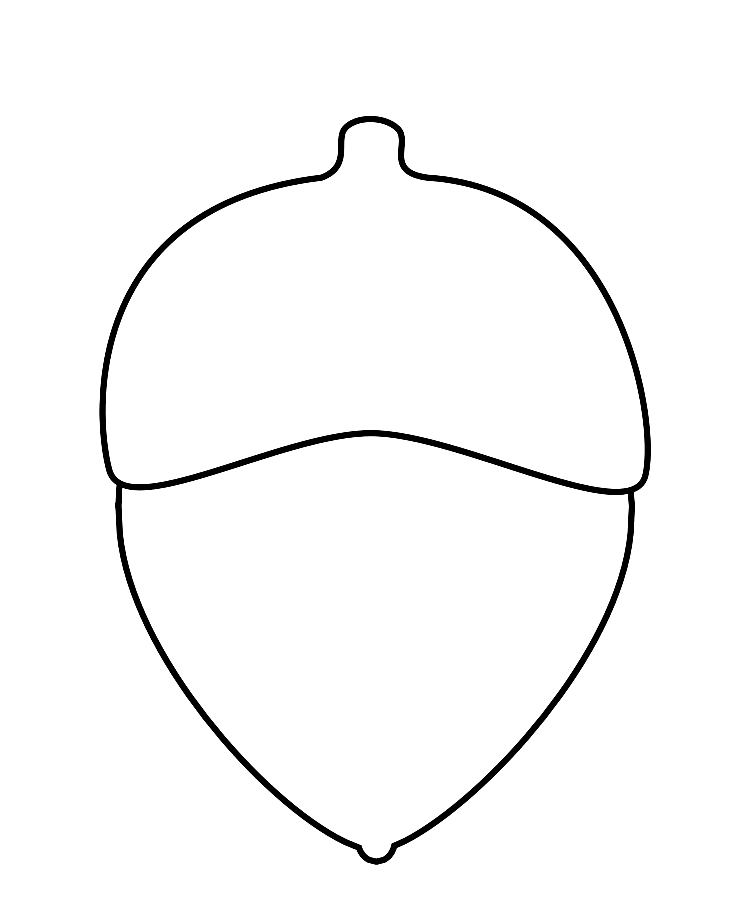
- Cut out the outline using scissors.
- Place it on top of the piece of cardboard and outline it with a pencil.
- Use the scalpel or scissors to cut out the acorn from the cardboard.
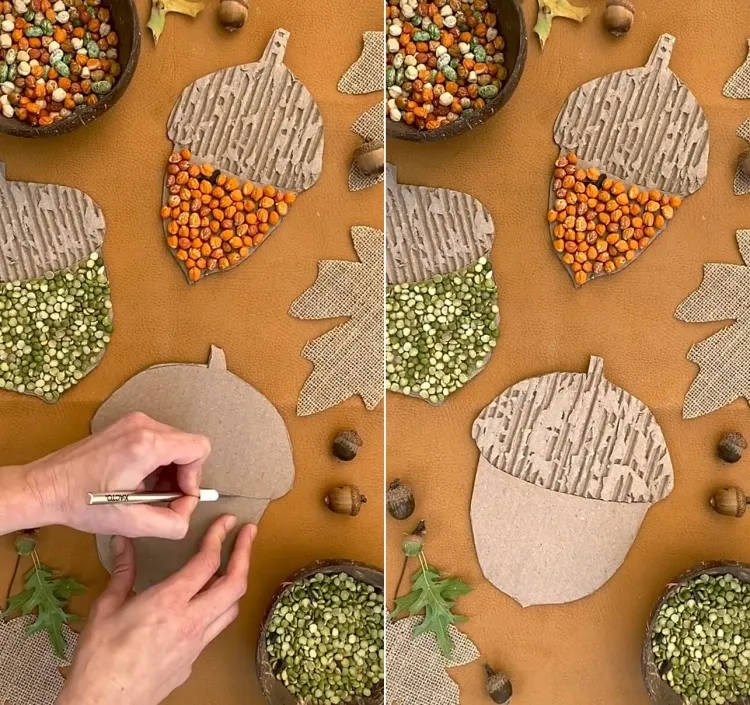
- Take the scalpel again and carefully cut across the outline, then peel off the top layer of the cardboard at the top of the acorn.
- Once you’re done with the more tricky steps, you can ask the kids to join you and help you decorate them.
- Take the glue and apply it generously on the flat bottom part of the cardboard acorn.
- Then, take your peas and beans and arrange them on the glued area.
- Once they’re dry you can take a string and make a beautiful fall garland.
Wooden Clothespins and Cardboard Spiders
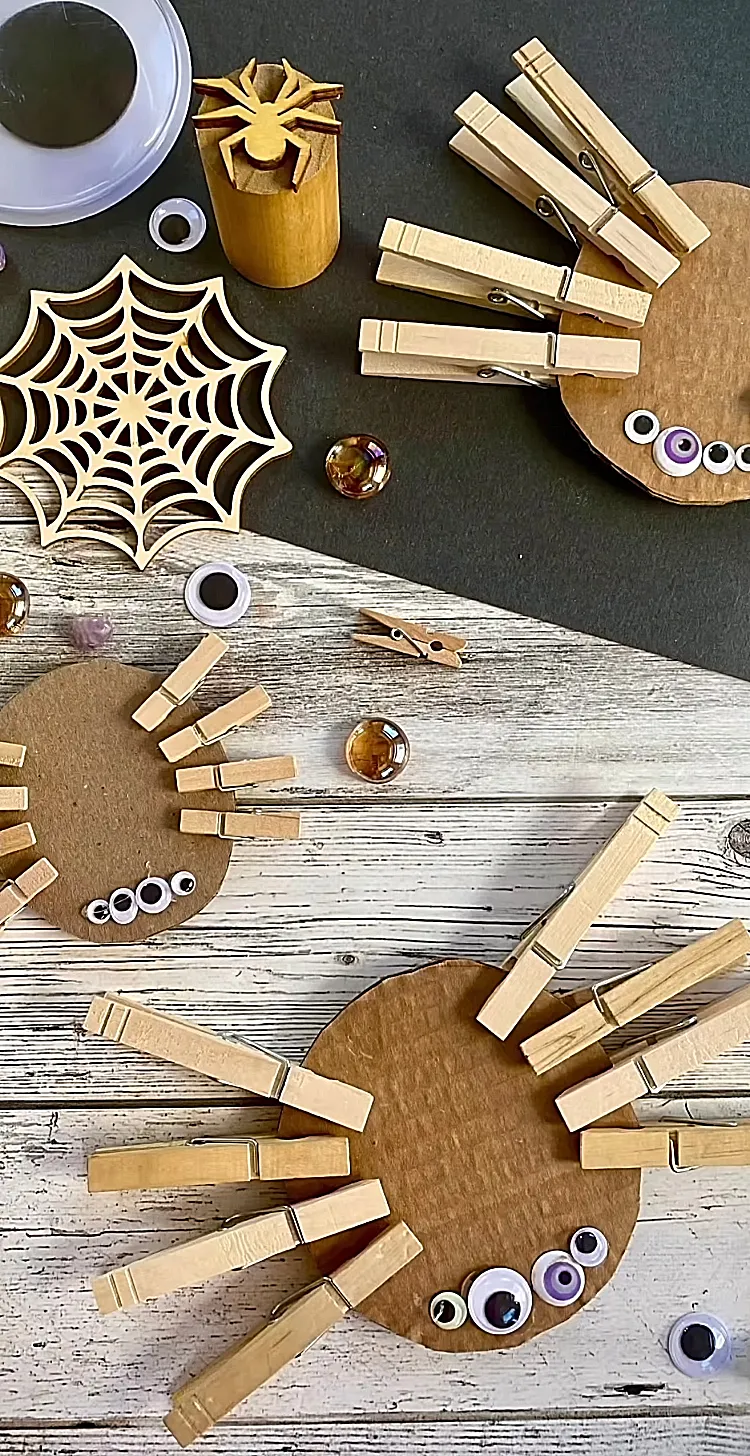
Credits: playful.petals
The 31st is slowly approaching, which means that it’s time to start dipping our toes into the Halloween arts and crafts! I really love these little spiders because they are a super quick project to make, and the kids love the fact that they can do it on their own! This is also a really fun way for them to practice counting without even noticing! Here’s what you’re going to need:
Materials
- wooden clothespins (8 per spider)
- recycled cardboard
- googly eyes in different sizes
- hot glue
- scissors
Instructions
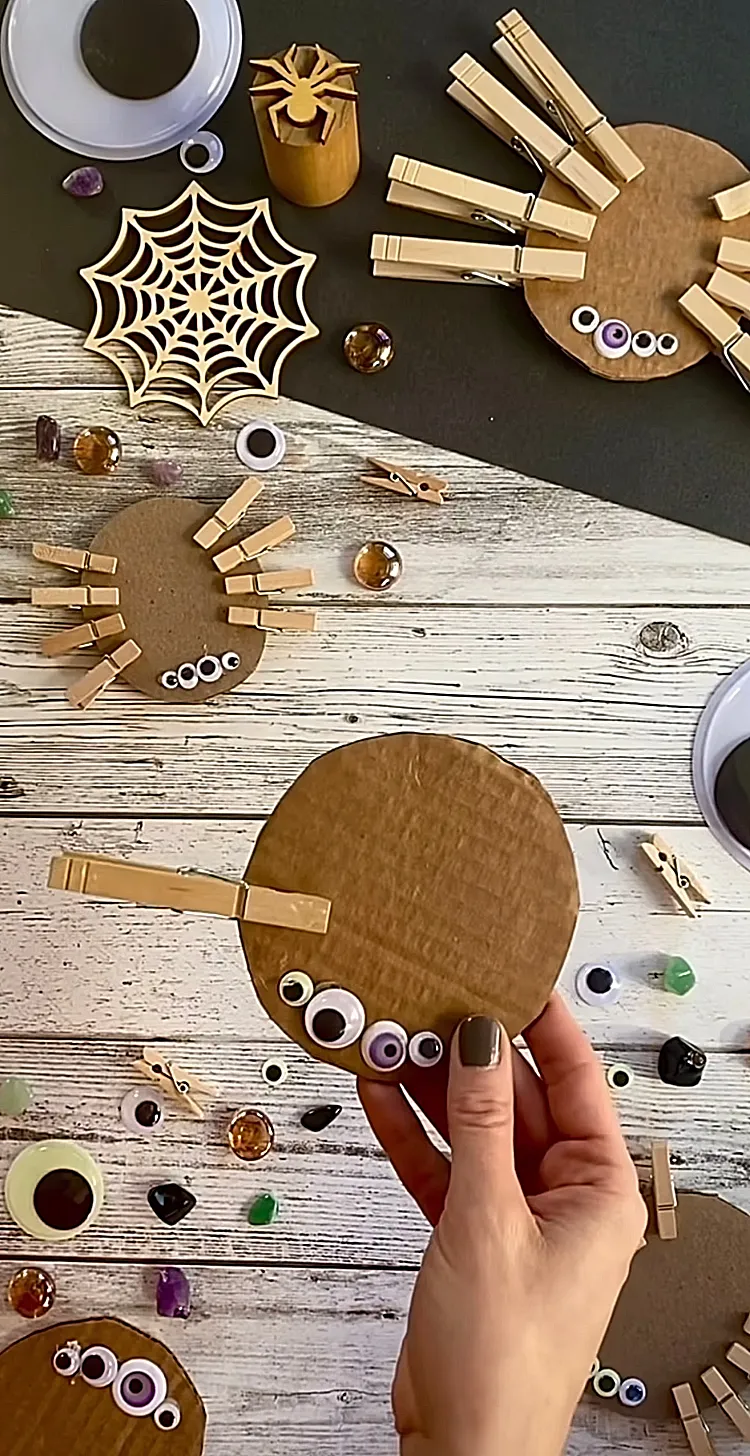
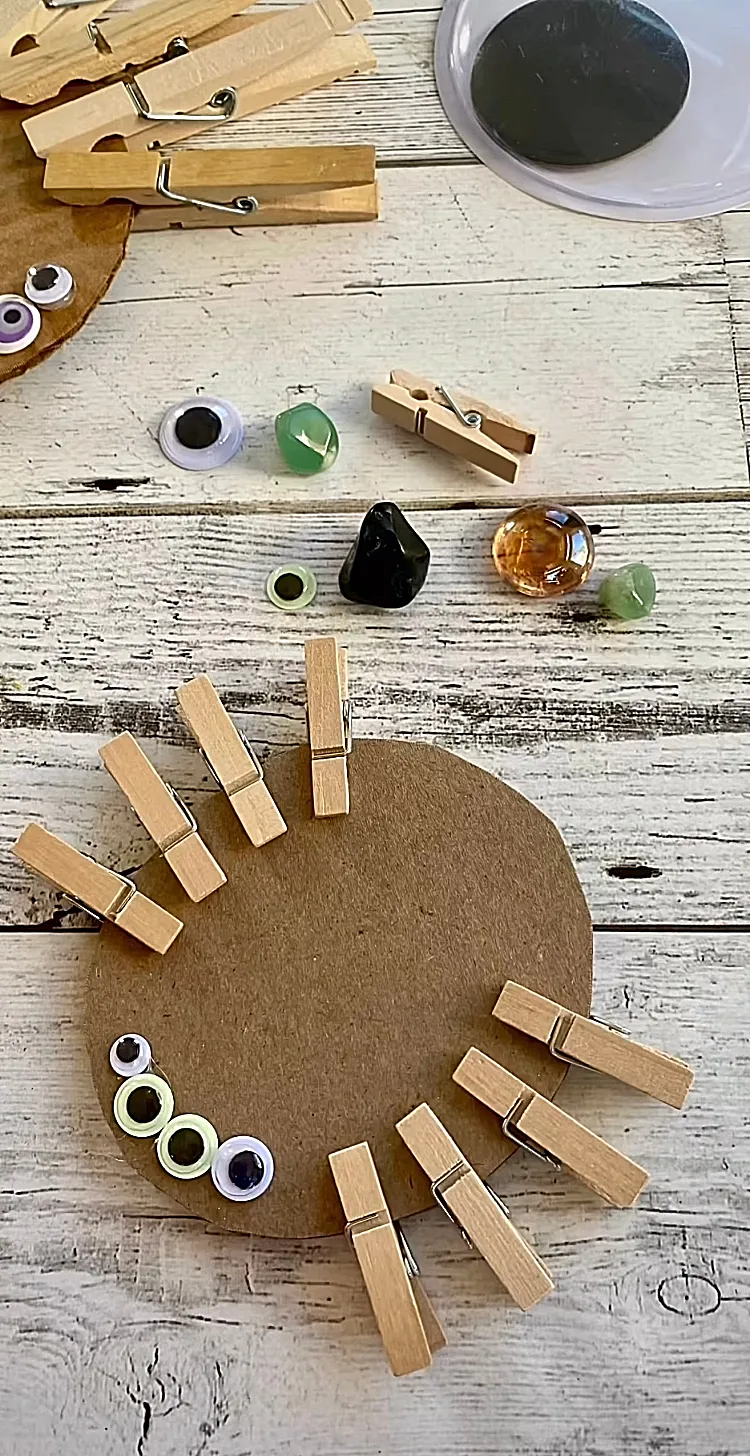
- Using the scissors, cut oval shapes out of the cardboard.
- Ask the kids to pick out 4 googly eyes – 2 big and 2 small ones.
- Apply glue on the eyes and arrange them in the following order – 2 big ones in the middle and 1 small eye on each side.
- Then, prepare 8 wooden clothespins for each spider.
- Clip 4 clothespins on the left side, and 4 on the right side at even spacing.
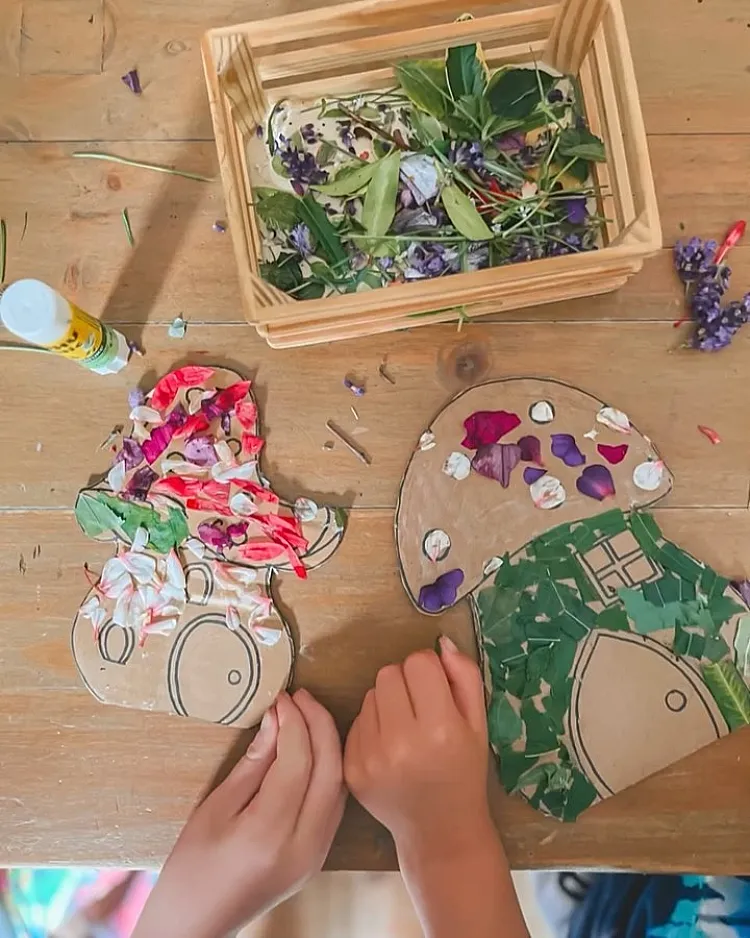
Lion Cub made of Cardboard and Fall Leaves
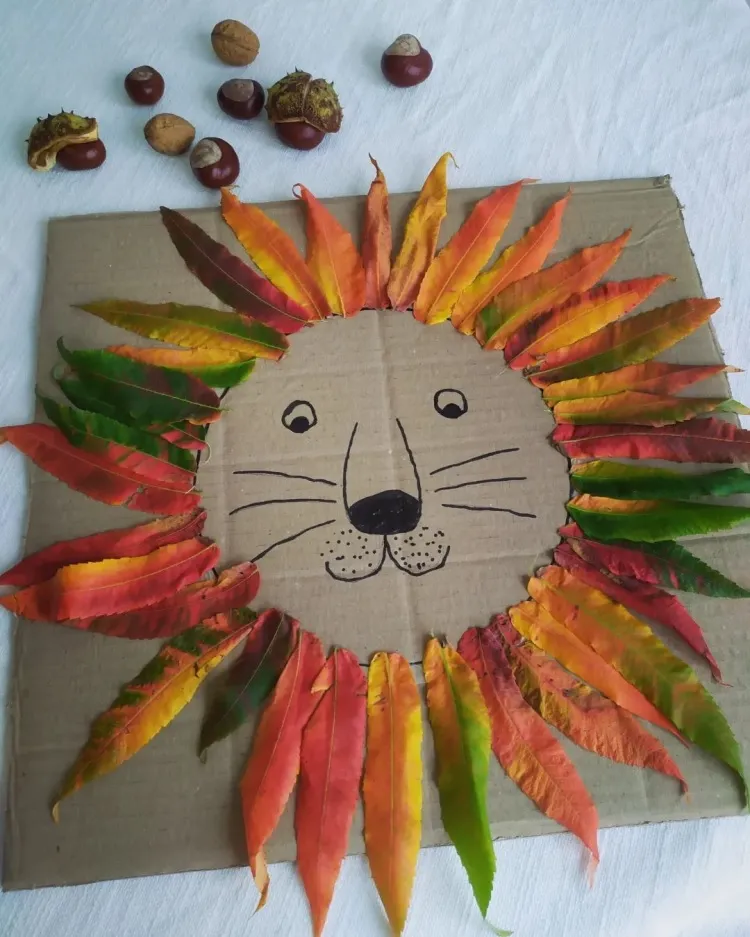
Isn’t this lion adorable? Go on a hunt for fallen leaves with your little one this weekend and recreate this beautiful art piece together! It’s so quick and fun and your kids will be beyond proud of themselves when they see the final result! Follow the instructions below to recreate it:
Materials
- a large square piece of recycled cardboard
- 40 long fallen leaves
- a black marker
- a brush
- liquid glue
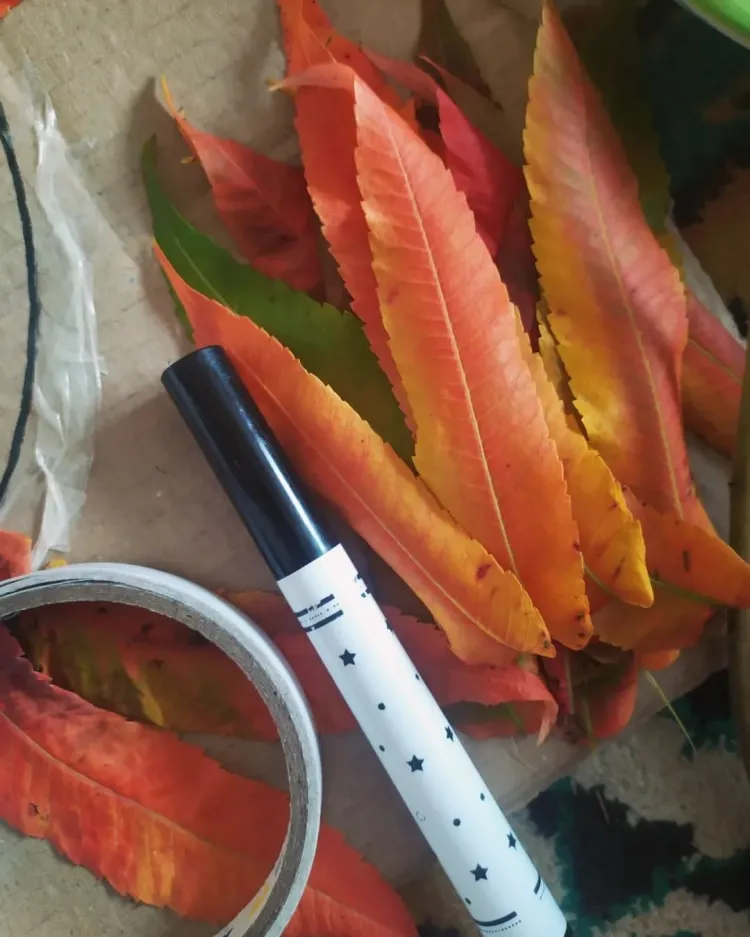
Instructions
- Start by drawing the face of the lion with a black marker.
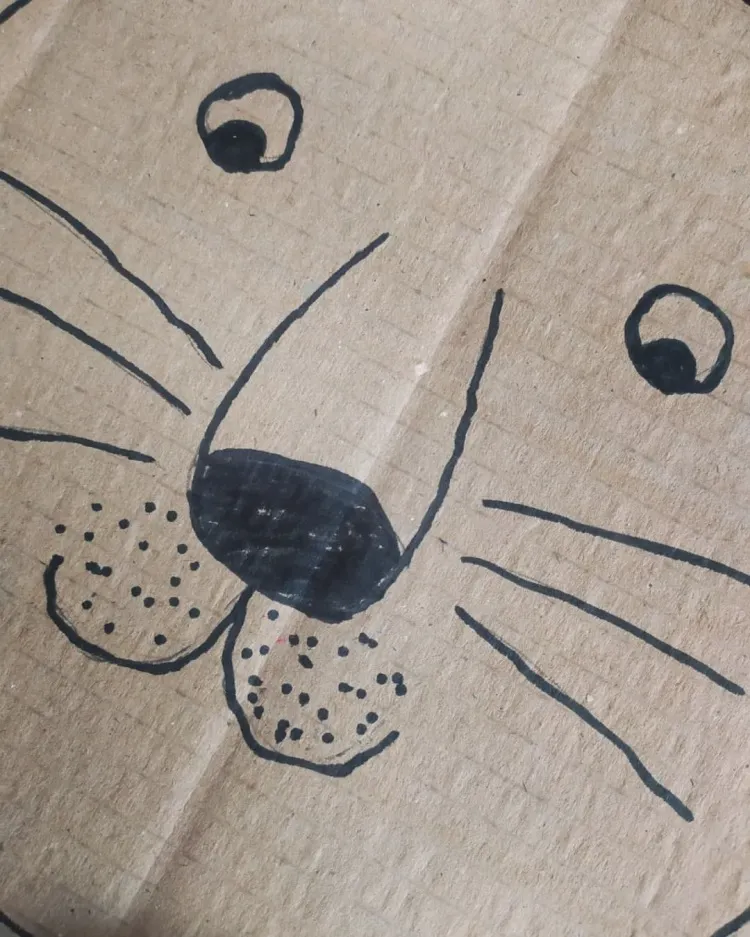
- Then, draw a circle around the face that’s going to act as a frame for the leaves.
- Use a brush to apply the liquid glue around the whole frame.
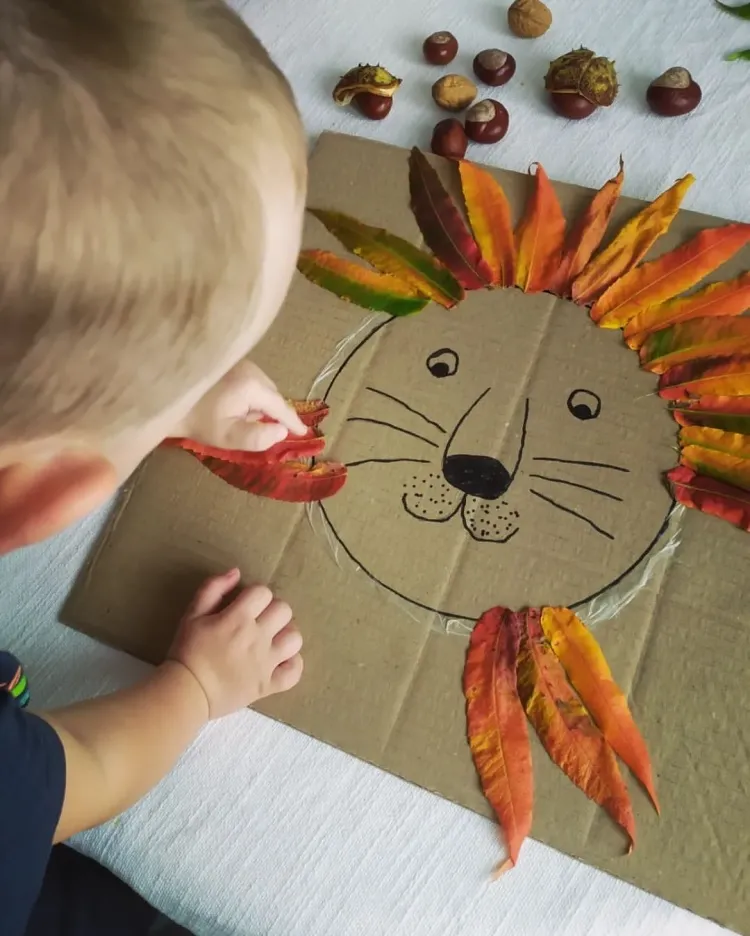
- Invite your kid to help you glue the leaves onto the cardboard and make the lion’s mane.