Preparing and decorating for Christmas and all the excitement around the holiday is a magical time of year enjoyed by young and old alike. Apart from home, children love to decorate their classroom for the festive season – a moment that brings all the pupils in the class together, getting them to create and work as a team. However, the greatest guidance and organization of the process comes from the class teacher, and since you clicked on the article, we assume that you are a teacher. We’ve prepared some Christmas classroom door decorations ideas for you and your students to impress everyone at school!
Christmas classroom door decorations ideas
As mentioned before, there are no age restrictions on who can and can’t decorate their classroom and door for the holiday, so all students at school can participate, if they want to! Just keep in mind that easier and simple decorations are appropriate for younger children, and more elaborate crafts and decor are suitable for older ones. What we have prepared are easy Christmas classroom door decorations that will appeal to students of all age! Let’s get started!
1. Door decoration with paper snowflakes and a snowman
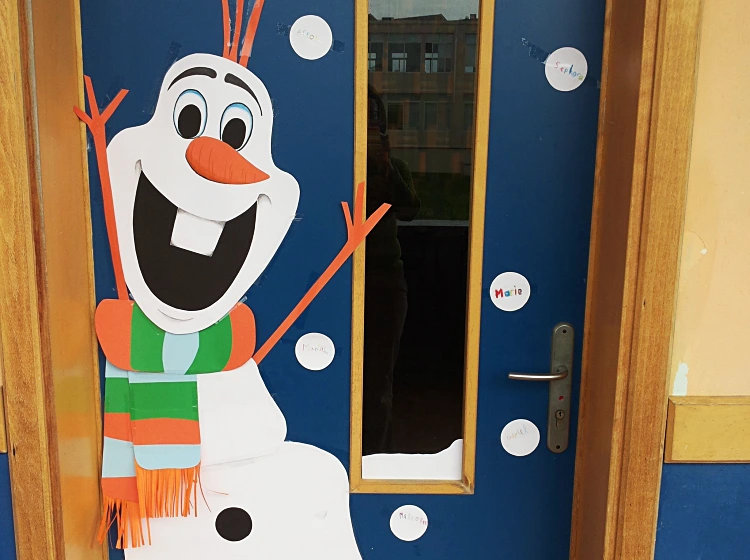
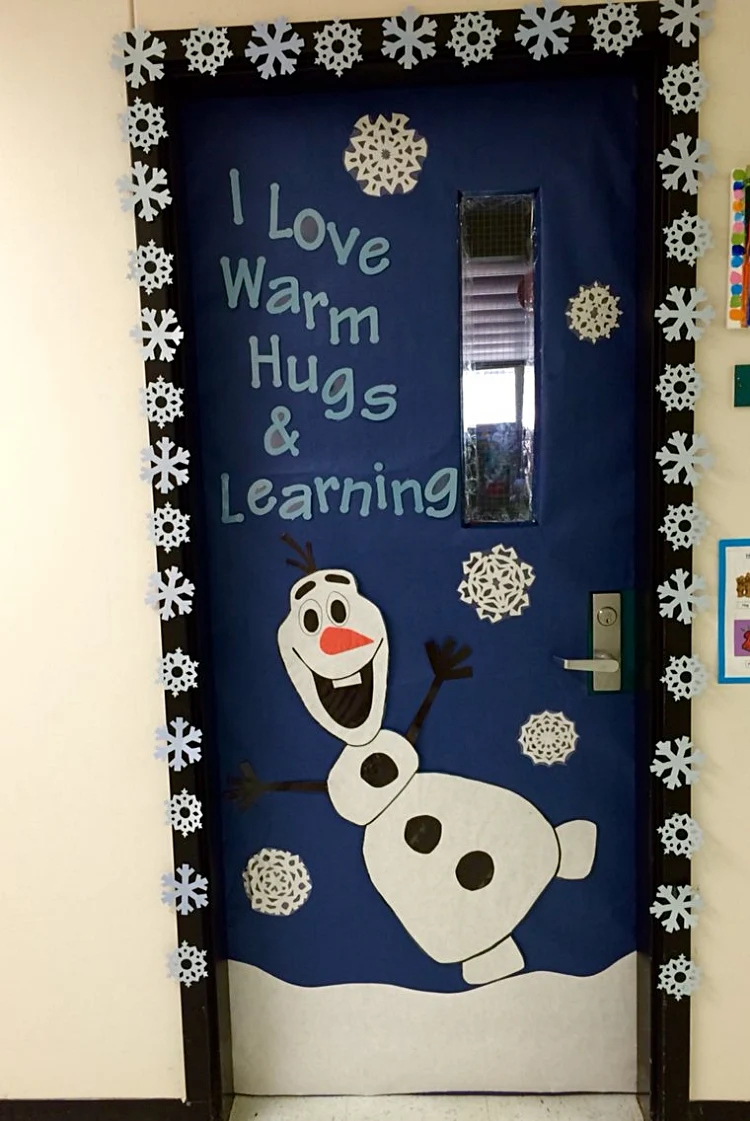
Our first idea for decorating the classroom door is a classic one – making paper snowflakes and a cute snowman, which are glued onto a big, thick sheet of paper that covers the whole door. Who does not think with joy and nostalgia about their childhood years, when they made snowflakes with the help of scissors and a piece of paper? Something so simple, yet so delightful! Best of all, all students can participate in preparing the door decoration. Make sure each child’s snowflake is on the door! And now let’s remember how to make paper snowflakes!
What you will need:
- a sheet of A4 paper
- a pair of scissors
Instructions:
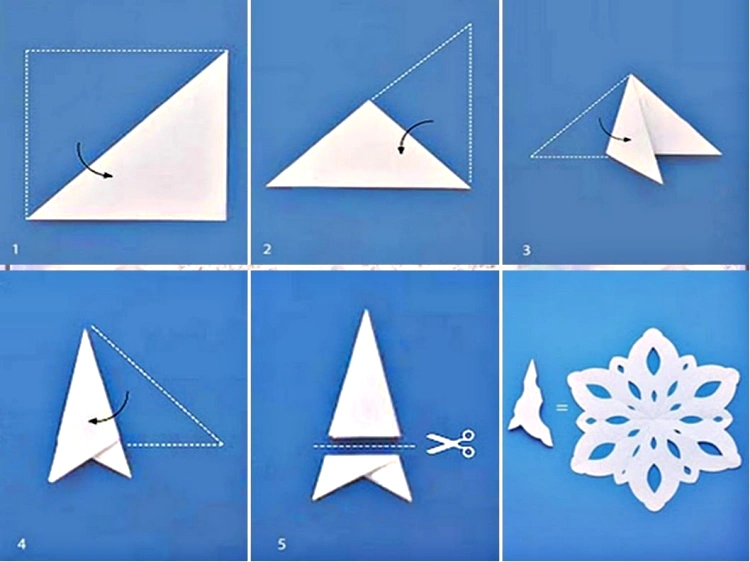
- Take a piece of A4 paper and fold it to make a square. Then cut off the excess.
- Fold the resulting triangle in half to make a triangle again, but smaller.
- Divide the bottom side into 3 equal parts.
- Fold the corners to match the marks.
- Draw the desired pattern and cut it out with scissors according to the outline.
How to make paper snowflakes
The snowman can be made from white and colored sheets of paper, scissors and glue. You can show them some pictures of snowmen to inspire them! Let the kids create it themselves to have fun! Keep an eye on them though if they need advice or help! You can print a text of their choice and stick it on the classroom door as well. Once the kids are done with the snowflakes and the snowman, and you are done with the text – glue everything on a big sheet of thick paper the size of the door (to make it easier to remove afterwards). Have fun all together as you craft and create beauty and spirit!
2. Paper Hands Christmas Tree
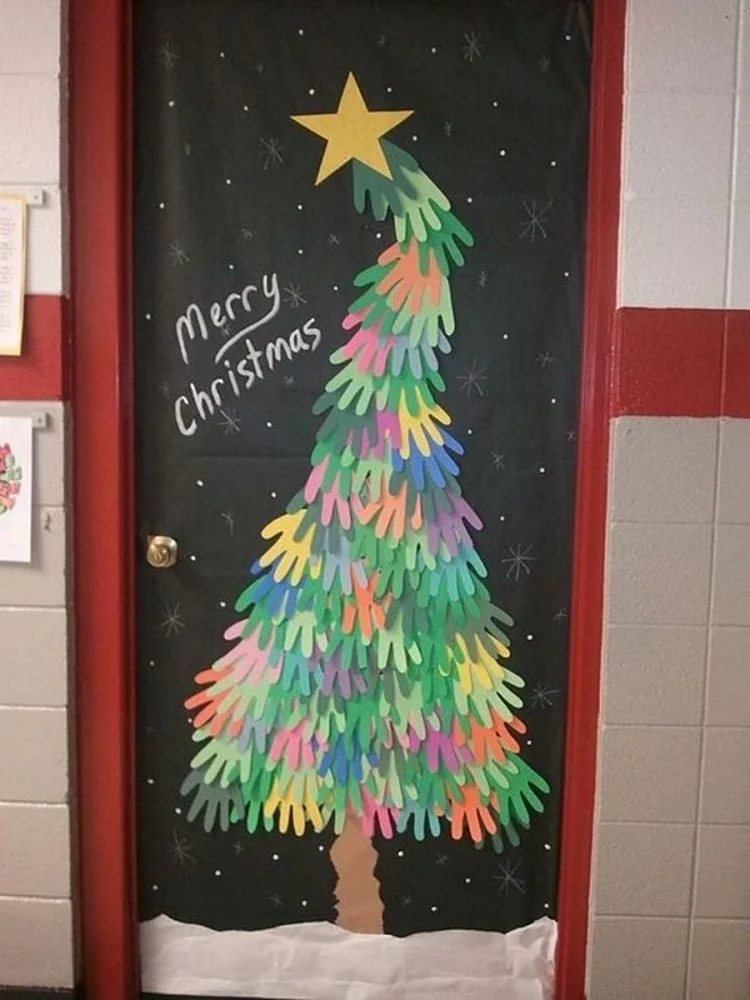
Our next idea involves all students in the classroom again! Make a Christmas tree out of paper with the help of lots of little hands! Literally! Have each child put something of themselves into making the decoration by tracing their palm on a piece of paper, then cutting out the outline. Gather them all up and shape them into a Christmas tree. Here are detailed instructions!
- You can make a simple and spectacular Christmas tree from thick paper in different shades of green. Ask the children to trace their palms on it. The youngest ones can be helped by adults or older children.
- Cut out the pieces of paper together. Don’t worry if their edges are not very neat. Cut a large piece of thick paper the size of the door in the color of your choice. Draw the base of the tree, as well as snow and snowflakes. Write a nice wish such as “Merry Christmas” or anything else the children want.
- Starting at the bottom, at the base of the tree, glue palms together, mixing different colors. Carefully glue the top of the palms, the “fingers” should stick out, so it creates a 3D effect. You can even slightly fold the fingers outwards for even more effect.
- The finished paper tree can be decorated with toys, just like the real one. You can also make toys with your own hands out of paper, for example. Or you can leave it as it is. The important thing is that you all like it and are proud of your creation!
3. Cute door decoration with a deer
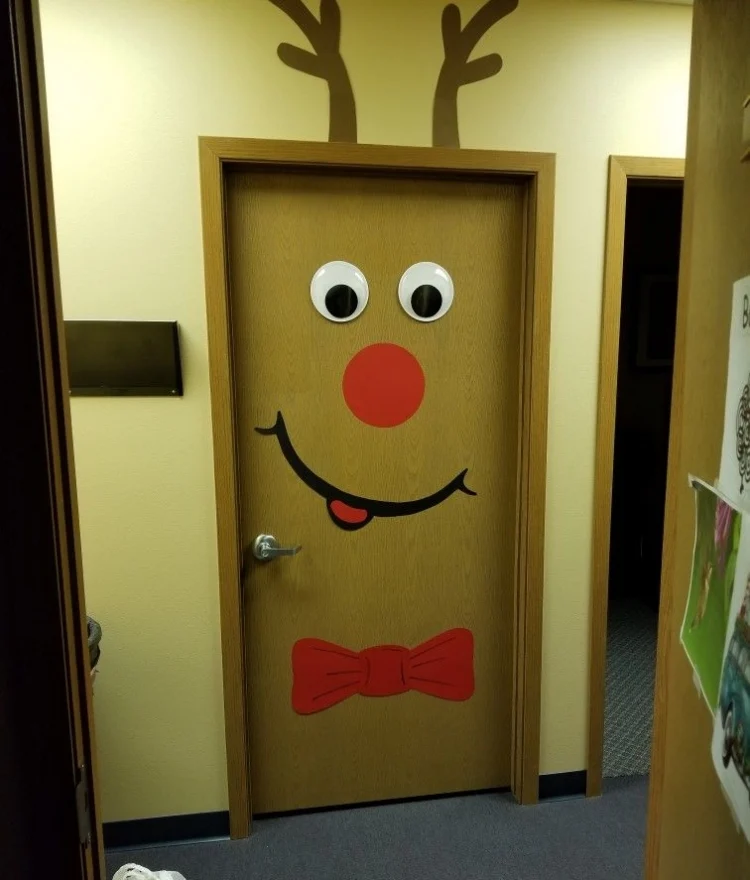
The reindeer is one of the symbols of Christmas, the coming New Year and all winter holidays in general. The closer they get, the more decorations in the form of cute reindeer appear everywhere. They bring joy to children and create a good mood in everyone. That’s why we suggest you make a very easy and catchy Christmas door decoration with a deer. Surely everyone who passes by and catches a glimpse of it will smile! Most importantly, the kids will have a lot of fun while preparing the door decoration! Here are some tips we can give you!
- Again, all you need to make this reindeer neck decoration are a few sheets of thick paper – white, black, red, brown, scissors and tape.
- We’ll start with the easiest part, the deer’s nose. Take the red paper and cut out an 8 inch (20 cm) circle. Leave it aside, you are done with the nose.
- Moving on to the next level of difficulty – the eyes. In the picture we see wiggly eyes, but if you can’t find big enough, you can just make them out of paper too. Cut two circles from the white paper 6 inches (15 cm) in diameter and 2 more circles from the black paper 3 inches (8 cm) in diameter. Glue the black circles onto each of the white circles (preferably at the bottom, as in the picture).
- Take the red paper again and use a pencil to outline a large bow tie, about 20 inches (50 cm) long. Then use a marker or felt-tip pen to draw the darker areas of the bow tie (its folds). You can do it with just a few lines, as in the picture.
- From the black paper, cut out the deer’s mouth following the shape given in the picture. Keep in mind that you can make it any size you want, it would look good since we are not aiming for anything realistic. Cut a small piece from the red paper and glue it onto the black paper to accent the mouth.
- Finally, take the brown paper and outline the antlers. You can do it once, cut out a contour and then use the finished antler and outline another one using it (so they will become the same). At the end just turn them in opposite directions.
- Stick everything to the door using packing tape and enjoy the result. We’re sure you’ll all want to take lots of photos of your cute deer!
4. Personalized Christmas tree ball ornaments
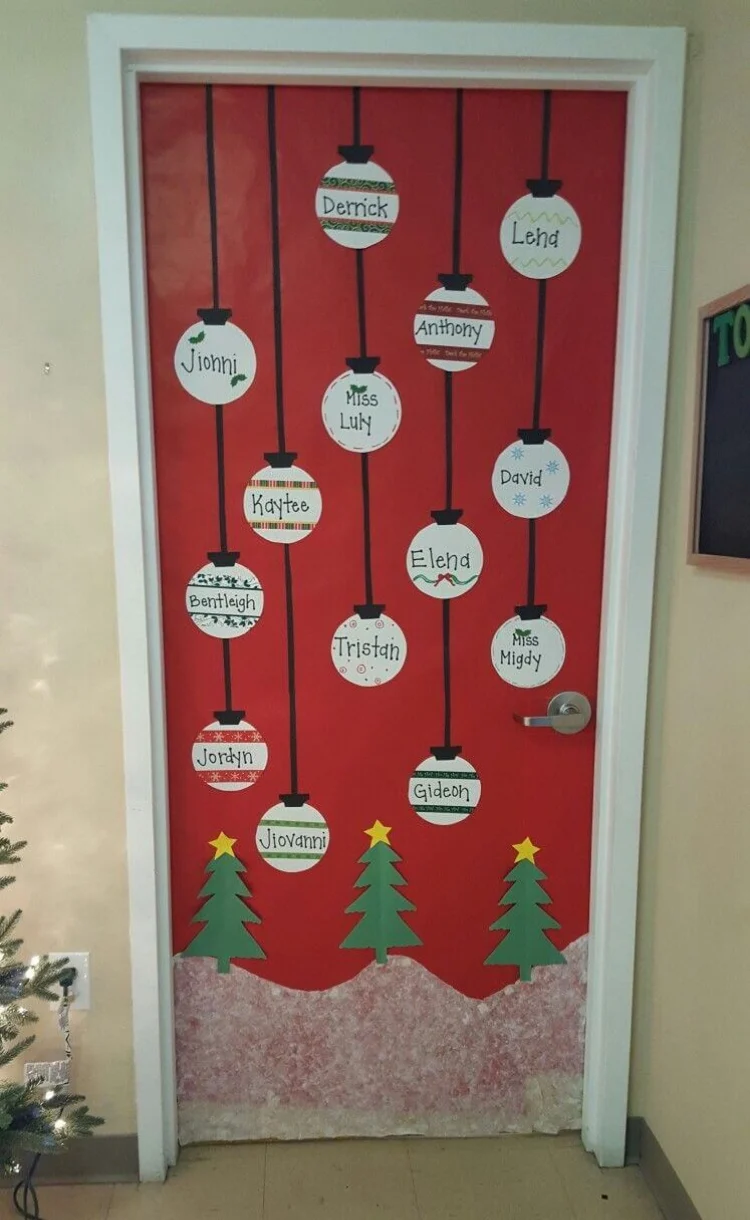
Our last creative idea is to make beautiful paper Christmas tree ornaments to stick to the door. Learn how to make this door decoration!
- Have each student cut their own circle out of paper, decide how big it should be in diameter according to the number of students that are in the class. For example, somewhere in the range of 4-6 inches (10-15 cm) in diameter. The important thing is that the circle is not too small, so that the child can then write his name inside and draw something tiny and festive in the space around the name.
- Once you’re done with that, cut out a large sheet of thick paper the size of the door in the color of your choice (pictured is red). Glue the name balls onto the paper, not aiming for complete symmetry, but making sure they almost fill the entire space of the door.
- Then cut thin strips of the black paper and glue each one on, judging the distance from the top edge of the door to each ball. Create the illusion that they are hanging.
- Finally, you can further decorate the door as you wish – by making paper Christmas trees to glue at the bottom, or choose other elements. Trust the children’s taste, too. They are often much more inventive than we are!
Hope you enjoy our Christmas classroom door decorations!

