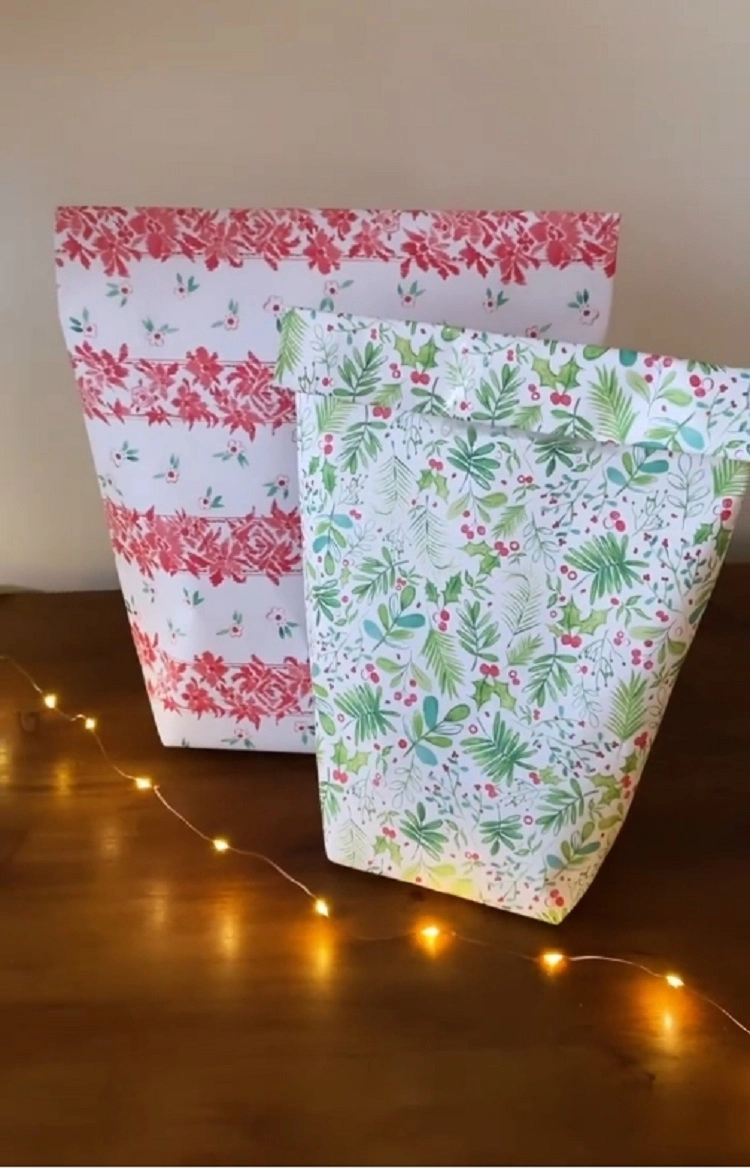
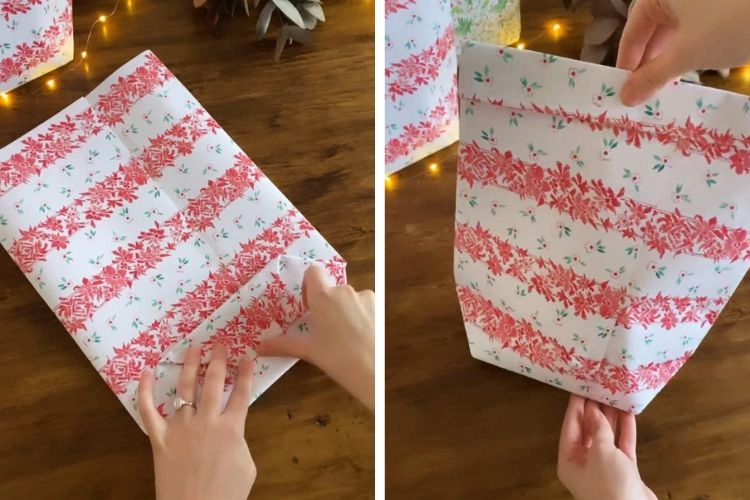
In need of a last-minute idea to wrap your Christmas present? How to make a bag with wrapping paper?
If you are someone who loves adding a personal touch to each carefully picked-out gift, then this article is just for you! Today at Deavita.net, we will show you step-by-step how to make a bag with wrapping paper for the perfect Christmas gift presentation you have made so far! It’s super easy really, are you in?
How to Make a Bag with Wrapping Paper? An Easy Step-by-Step Guide
So, you prefer the more modern version of gift wrapping? I mean, don’t get me wrong, I love the traditional look of wrapped Christmas presents with chic gift toppers under the festive lighted pine tree, but a presentable and colorful bag is certainly the next best thing! But have you been gift bag shopping lately? They cost a fortune! It is common that the prices go up before and during the big holidays, but you can make a very chic bag of your own with wrapping paper without going broke! Just follow our super simple step-by-step guide for the cutest Christmas gift bag ever!
What you will need:
- Wrapping paper of choice
- Double-sided tape
- Scissors
- Hole punch (optional)
- Ribbon or twine (optional)
Step 1: Measuring, Cutting & Folding Your Wrapping Paper
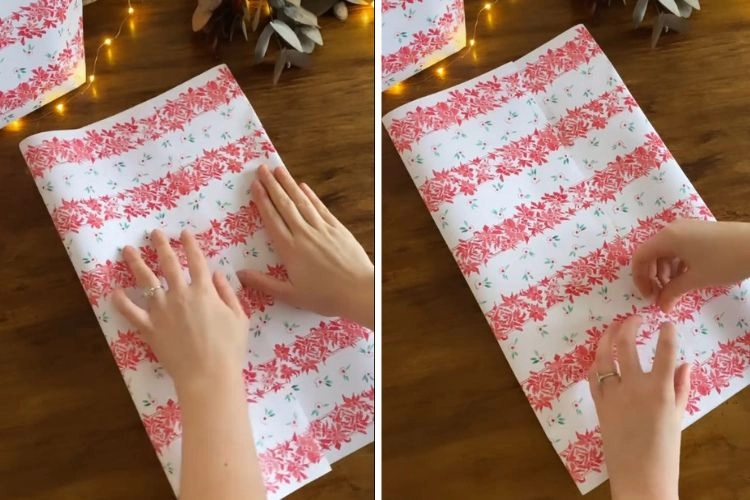
Begin by first laying out your chosen wrapping paper on a flat surface. Take the gift you are planning to put in your DIY gift bag at the center to measure how much paper you’ll need, so the present can fit inside. Just to be sure, you can add a few extra inches on each side.
Cut out the paper and fold it in half lengthwise to align the edges. Insert a piece of double-side tape at the top and bottom center of the wrapping paper, as shown in the picture above.
Step 2: How to Create the Bottom of Your Wrapping Paper Bag?
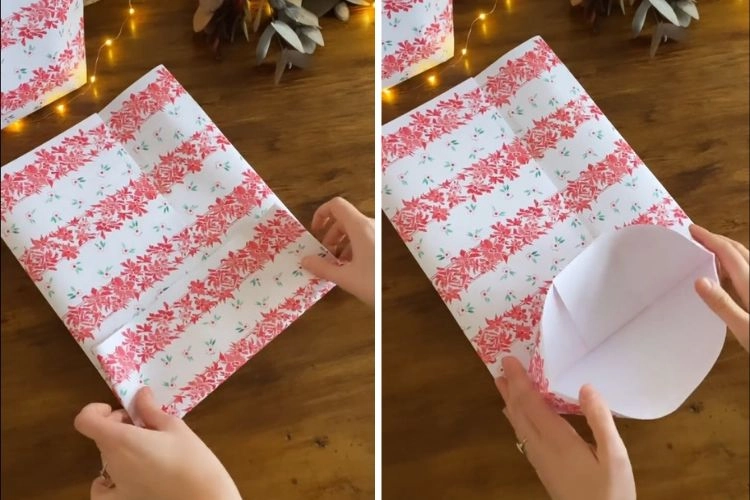
To create the bottom of the bag, fold about 4 inches off its end towards the center. Open the bag’s bottom like in the picture.
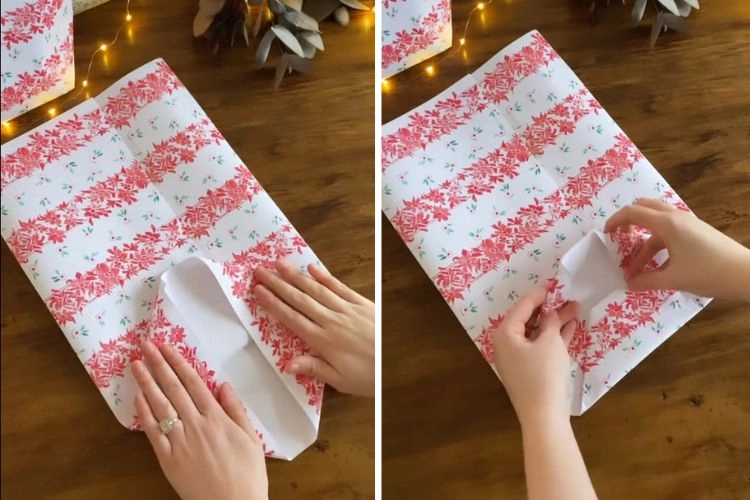
Push down the triangles on the left and right side. Then fold over the triangles on the top and bottom side so that all triangles meet at the center of the bottom of your bag.
Step 3: Securing the Christmas Gift Bag & Finishing Touches
Use a piece of the double-sided tape to secure the bag’s bottom, and then you can open it up. For a very simple design, you can leave the bag as it is and just fold a few inches from the top. But if you want something more captivating, here are a few cute decorating ideas you can try:
How to Make a Bag with Wrapping Paper: Decoration Ideas
- If you want your gift wrapping paper bag to have handles, measure where you want them to be and use the hole punch to make small holes. Insert a ribbon that will match your bag’s color and style, or a piece of twine. Tie it tightly at both ends to secure your bag’s handle.
- Or, if you want to preserve the bag’s folded look, you can simply make a little hole with the hole punch at the center and tie a pretty ribbon through it.
- For extra flair, glue a chic gift topper, and you can be sure that your present’s wrapping will be noticed!
Also read: 10 Unique Gift Wrap Ideas for Christmas 2023 That Will Leave Everyone in Awe!

