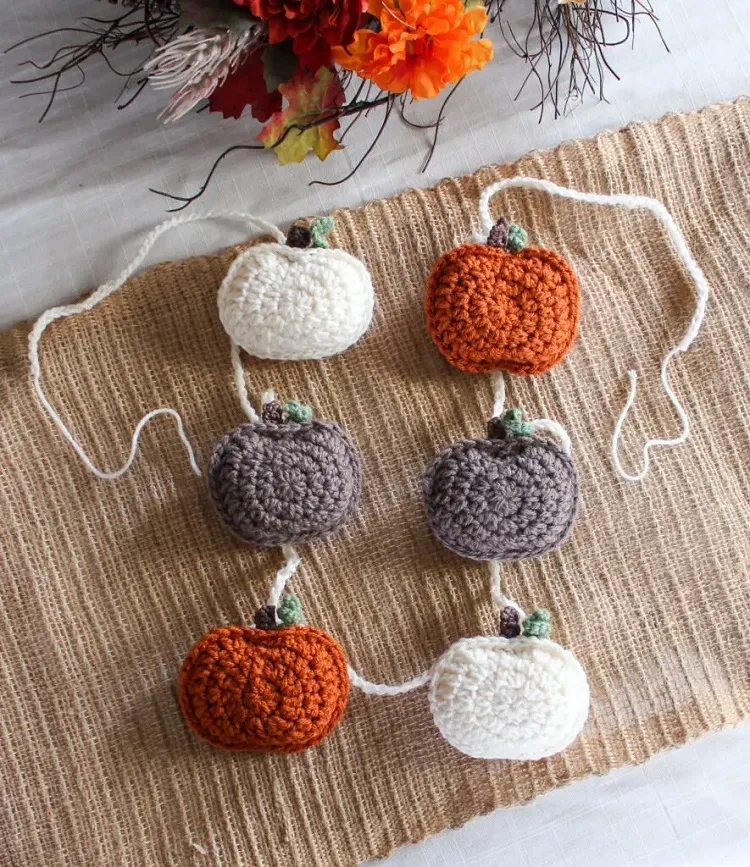
Do you enjoy doing crochet projects? Have you started reminiscing about the cozy afternoons spent knitting on your couch? Well, it’s time to whip out your yarn and hooks and give one of my favorite fall crochet ideas a try! Whether you’re well-versed in this craft, or a complete beginner, you’ll be able to complete this project in no time! Follow the free crochet pattern guide and have fun!
Fall Crochet Ideas: Small Crochet Pumpkin Garland
Credits: knottednest
This pumpkin garland is the perfect seasonal decoration for a rustic and minimalist home. It’s so simple and satisfying to make that you won’t even feel the time passing by and by the end, you’ll have a stunning fall decoration piece that you can even gift to friends and family! Here’s everything you’re going to need and the steps you need to follow to crochet this pumpkin pattern!
Read also: Squirrel Craft Ideas (+Template): 3 Fall Crafts with Toilet Rolls, Natural Materials & Paper
Level: Beginner
Materials:
- 30 yards of weighted cotton yarn (in 4 colors of choice)
- 5 mm hook for the body of the pumpkin (size H)
- 3.125 mm hook for the stem and the spiral of the pumpkin (size D)
- 4.25 hook for the chain of the garland (size G)
- stuffing material for the pumpkins (preferably fiber fill)
- a yarn needle
- scissors
Note: Each pumpkin’s size is around 3,75” x 3” (9.5 cm x 7.62 cm). The garland should be around 68” (172 cm).
Abbreviation guide:
- ch – chain
- dc – double crochet
- hdc – half double crochet
- sc – single crochet
- sl st – slip stitch
- st – stitch
Instructions:
- Each pumpkin is made of two flat crochet panels, which then get stuffed and sewn together.
- The stem and the vine and crocheted and sewn on separately.
- The ch 2 (chain) that you begin each new round is not to be taken as an actual stitch.
For the body of the pumpkin
- Take a color of choice and a size H hook.
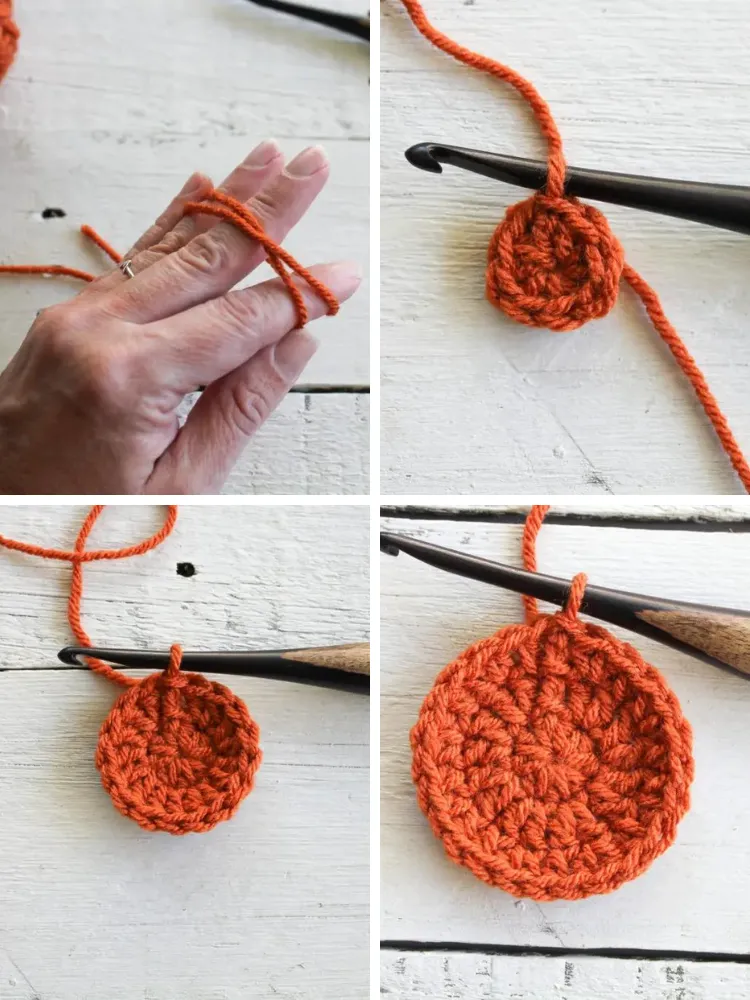
- Make a magic circle
- Ch 2. 8 hdc in the magic circle and sl st to the first hdc to join them together. 8 half double crochet.
- Ch 2.2 hdc in the first st and each next st.
- Sl st to the first hdc of the second round to join. 16 half double crochet.
- Ch 2. – 1 hdc in the first st, and 2 hdc in the next one.
- Sl st to join them together. 24 half double crochet.
Next up:
- 1 sc in st, 2 dc in st, 1 dc in 2 sts, 2 dc in the next st, 1 dc in 2 sts, 2 dc in 1 st, 1 sc in 1 st, sl st in 2 sts.
- 1 sc in st, 2 dc in st, 1 dc in 2 stc, 2 dc in st, 1 dc in 2 sts, 2 dc in st, 2 dc in st, 1 sc in st, sl st in the last st, sl sl to the very first stitch to join them together. (32 stitches)
Now for the stem
Materials:
- brown yarn
- size D hook
Instructions:
- ch 3, sc in the 2nd ch from the hook, sc in the last ch, then turn.
- sc in 2 sts, turn.
- Fasten and stitch in the ends.
For the Vine Spiral:
Materials:
- green yarn
- size D hook
Instructions:
- ch 10, 2 sc in the second ch from the hook and then in each ch.
- Do 18 stitches.
To assemble the pumpkin
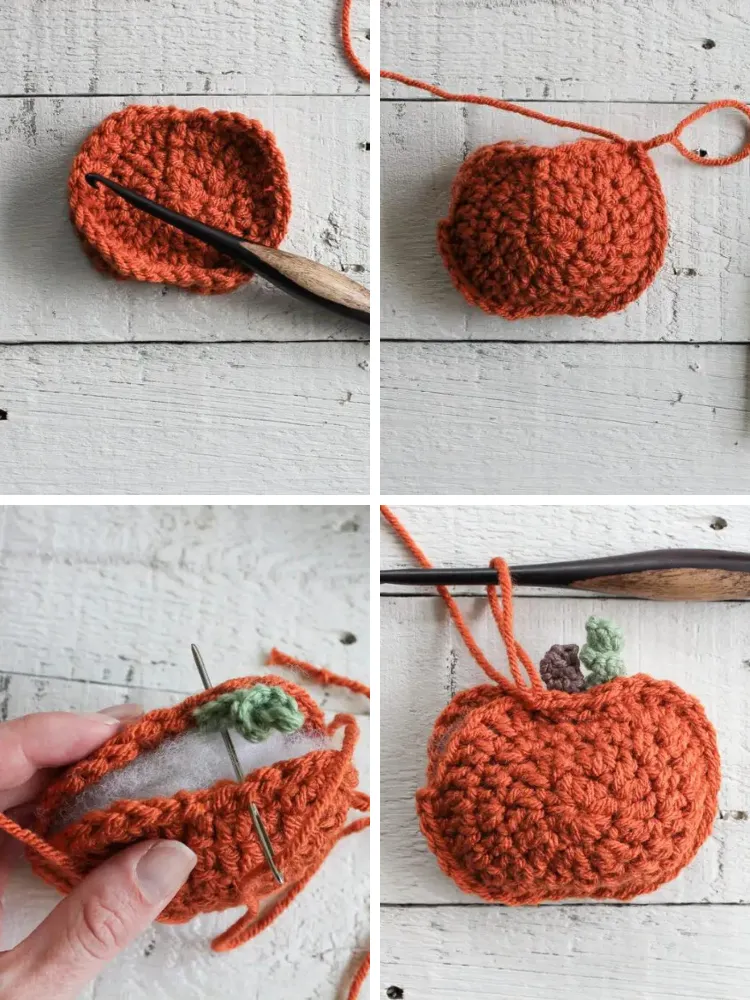
- Align together the two panels of the pumpkins.
- Cut off 6″ of the main colored yard.
- Turn the front of the pumpkin towards you.
- Start crocheting from the left side and join the two panels together by crocheting on their outer side.
- Stuff the pumpkin gently with your filler of choice.
- Use a yarn needle and the 6″ of the main yard you set aside to stitch the spiral in the middle between the two panels.
- Do the same thing with the stem.
- Once you’ve attached the stem and the vine, pull the needle through the stuffing and contour the whole pumpkin.
- Tie the yarn to the back panel and secure the stitch by tucking the end in between the two panels.
- Repeat the contour stitching and sew the two panels shut at the stem and the vine.
To make the garland
Once you’ve made all your pumpkins (with the initial yarn you should be able to make 6), use a white yarn and a size G hook to join all the pumpkins together at even spacing.
Read also: DIY decorative velvet pumpkin – beginner-friendly sewing instructions for a noble fall decoration


