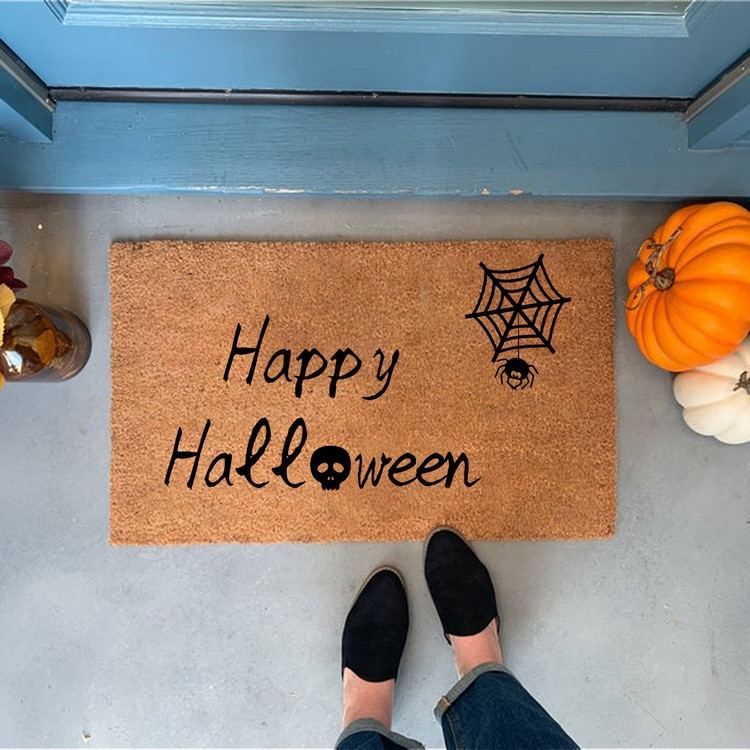
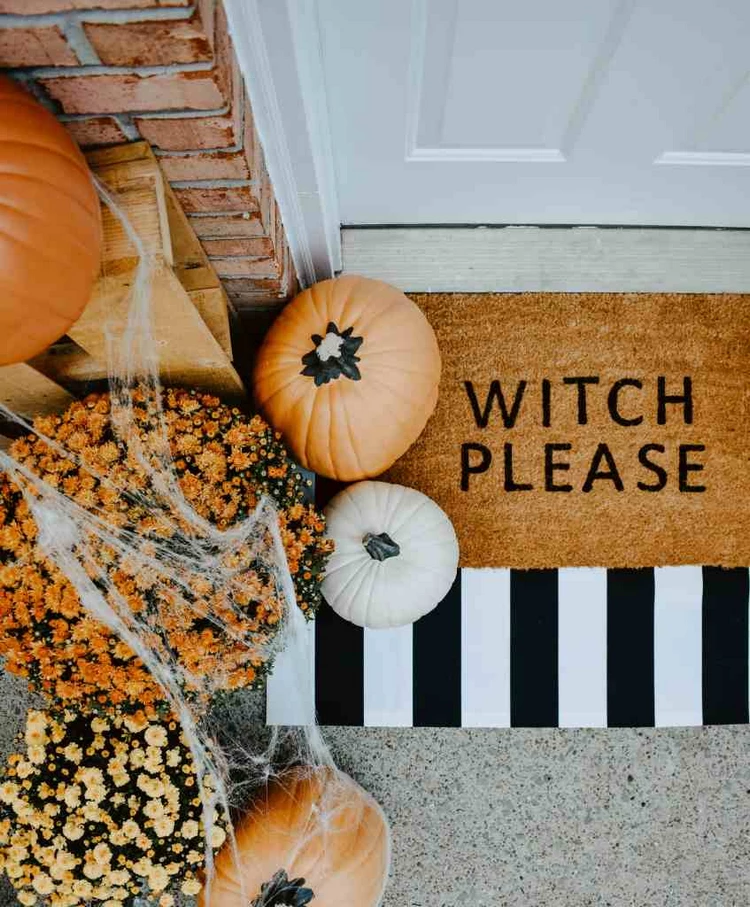
Door mats help keep your home perfectly clean. They are useful but can they be a part of your festive decoration? Sure, they can! DIY Halloween doormat ideas will show you creative designs that will make everyone smile. Such a doormat with an unusual design, cool inscriptions and drawings will be an excellent way to welcome everyone who crosses the threshold with the coming holiday!
DIY Halloween Doormat Ideas – Welcome Your Visitors with an Original Decoration
When people think of Halloween home decorations, what comes to mind is carved pumpkins, bats, skeletons, witches, ghosts, etc. There is nothing wrong with that as these are symbolic for the holiday. Of course, festive home decor includes many elements, both indoors and outdoors. Halloween wreaths for the front door are among the most popular decorations and fans of DIY projects can make their own unique model. How about adding a themed doormat in addition to your spooky front porch décor? You can buy one or make one with simple materials and we shall help you with some easy DIY Halloween doormat ideas.
DIY Halloween Doormat Ideas with Spray Paint
Using spray paint allows you to turn an ordinary doormat into a Halloween themed decorative element. It is quick, easy and budget friendly.
What you need:
- Doormat
- cardstock
- Spray paint
- Craft knife
- Mat
- Masking tape
Directions:
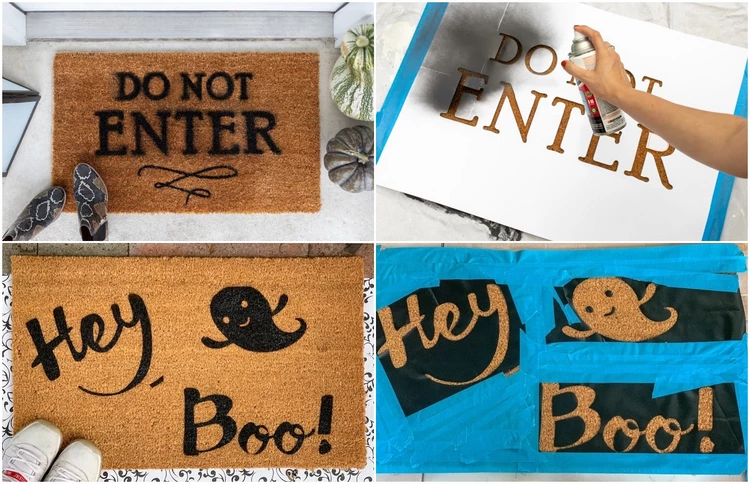
First, you need to create the designs for your stencils. It can be a ghost, bats, a “Do not enter” saying or any other pattern that you like.
Use a computer and printer for more complex designs. Simple patterns like a ghost can be drawn directly on adhesive vinyl paper.
Next, cut out the stencils and attach them to the doormat. Cover the rest of the mat surface with masking tape.
Apply the black paint directly over the carpet.
Finally, remove the vinyl patterns as soon as you are satisfied with the coverage and let dry for at least 24 hours.
Also read: DIY Halloween Decorations for the Balcony
DIY Halloween Door Mat with Sponge and Paint
Materials:
- Coir Door mat
- Black outdoor paint
- Sharpie
- Sponge
- Paint brush
- Alphabet stencils
Directions:
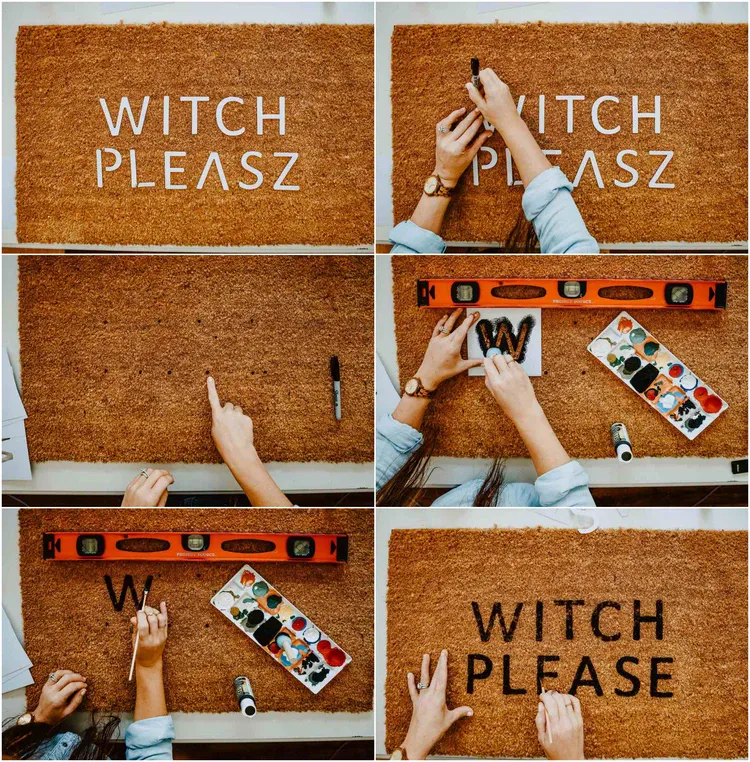
Arrange the letters on the door mat. This will help you space them properly. Mark them with a sharpie which will give you an idea where to put the stencils for painting.
Press the sponge on the letters. Keep in mind that you may need to go over the stencil a few times until you get the desired look. If necessary, use a paint brush to make the letters look more full.
How to Make Witch’s Feet Halloween Door Mat
Materials:
- Old pair of black shoes with heels
- Black and white striped stockings
- Plastic bags (or old pieces of fabric)
- Tape
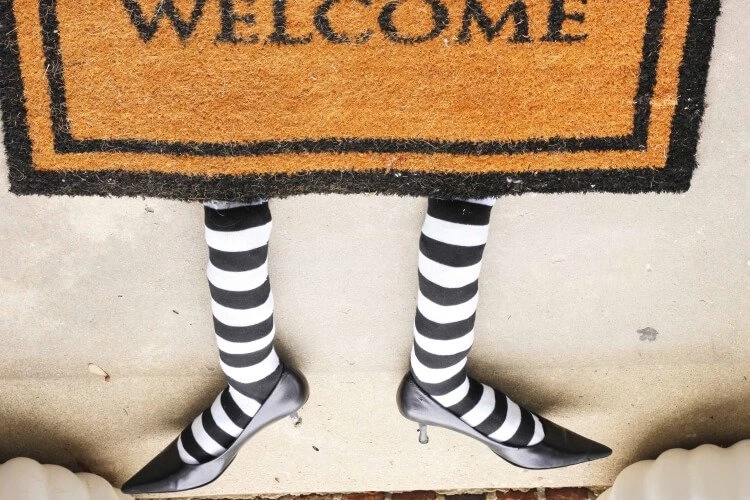
- “Welcome” brush mat
Directions:
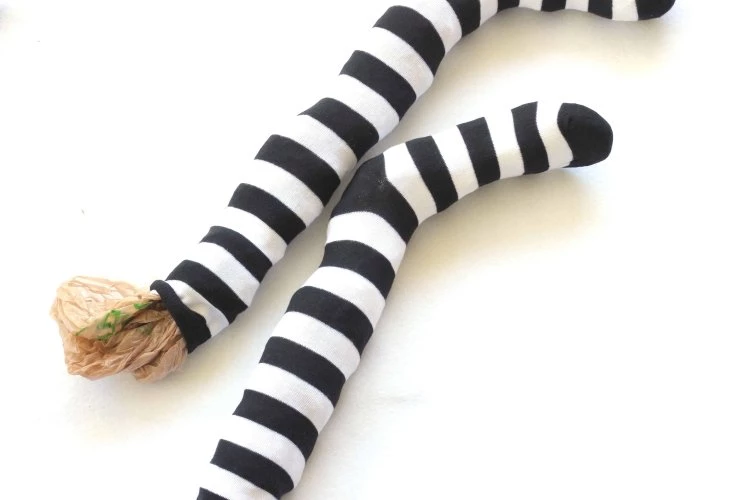
Fill the stockings with plastic bags, being careful to respect the natural shape of the feet and the folds for the ankles. Leave the last 10 to 12 cm of the stockings empty. In this way, you will be able to glue the unpadded part under the doormat.
DIY Spider Web Doormat
Materials:
- low pile black semi-circle doormat
- white fabric paint
- thin bristle paintbrush
- acrylic craft paint
Directions:
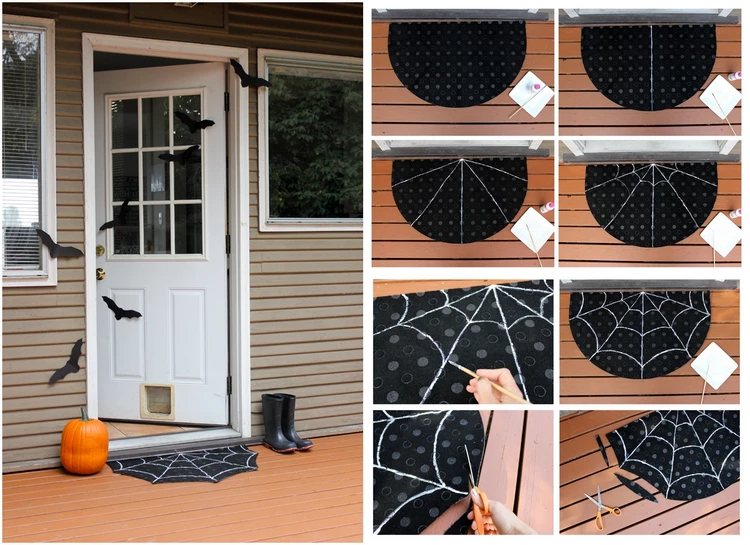
Paint on the straight lines. Start with the center line and then fan out the rest as evenly as you can.
Add the curved web lines in between the straight ones.
Cut curved pieces out of the perimeter of the curved edge.
Let the door mat dry completely.
DIY Monster Bite Doormat
Materials:
- Plain doormat
- Permanent marker
- Scissors and/or box cutter
- White paint
- Paintbrush
Directions:
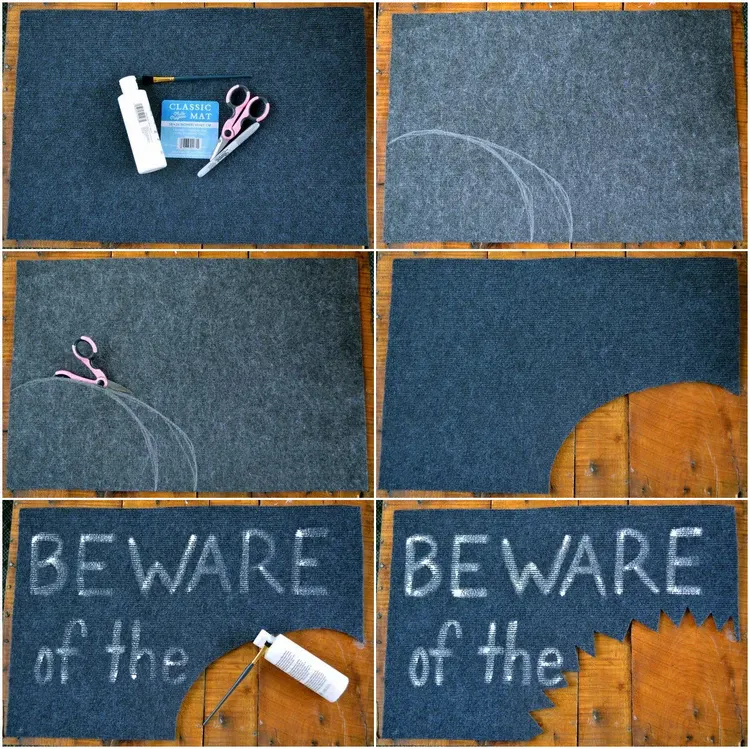
Flip the doormat over so the bottom side is up.
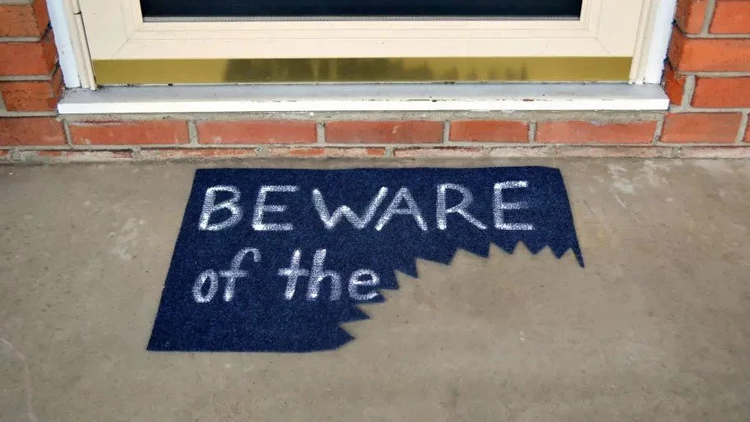
Draw a rough outline of the monster bite on the bottom left corner of the back of the mat.
Use scissors or a box cutter and cut the doormat along the outline you drew.
Flip the mat over so the top is up.
Use the paint to add the word “BEWARE” to the top half of the doormat, and the words “of the” on the remaining bottom half.
Use scissors to add jagged tooth marks to the bite outline you created.
Place your Halloween doormat outside of your front door.
DIY Vampire’s Teeth Door Mat
Materials:
- Jute doormat with rubber pad on the bottom
- Pencil
- Cutter
- Black marker
- White, black and red acrylic paint
- Medium sized brush
- Small brush
- Small paper plate
Directions:
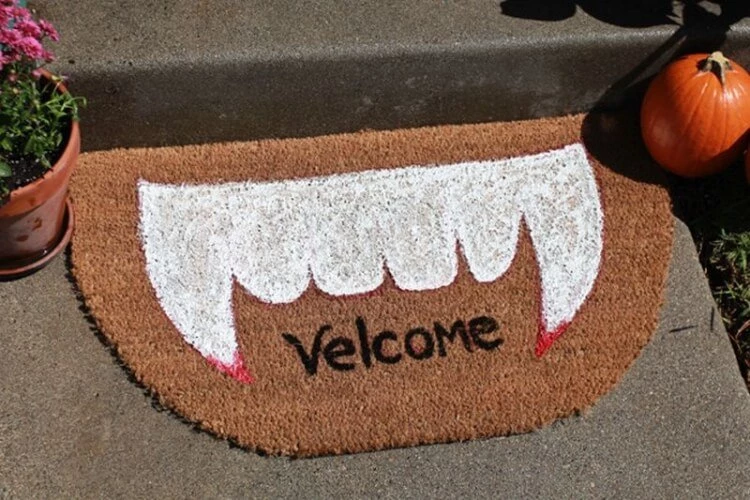
Grab the two short ends of your rectangular doormat and fold them together as if you were closing a book. With your pencil, draw a line from one corner of the doormat to the middle of the opposite side. Flip the “book” over and duplicate the same sloping line so that when your doormat is open you have something that looks like a semicircle.
With your cutter, start cutting along your pencil line until you have a semi-circle doormat.
Using the black marker, draw four teeth (rectangles with slightly rounded edges) and two fangs in the middle of the doormat.
Pour a generous amount of white paint on your paper plate and start painting inside your drawn marks. If necessary, apply paint several times.
Let the white paint dry. Meanwhile, write a greeting of your choice using black paint.
Finally, add a little red paint (that would be the blood) to the base of the fangs.

