Have you ever thought about getting permanent LED lights installed for your house? I mean, recently I have been going through a lot of ideas on exterior Christmas decorations, and I want something for my home that would put it in the spotlight, but you know, without spending too much money. Is it possible? Well, it certainly is! Instead of paying a lot of cash for having LED lights installed, I think I am going to try to do that all by myself. Do you want to join me on my journey? Then hang on tight and let’s follow 7 easy steps to set up DIY permanent Christmas lights!
How to set DIY permanent Christmas lights?
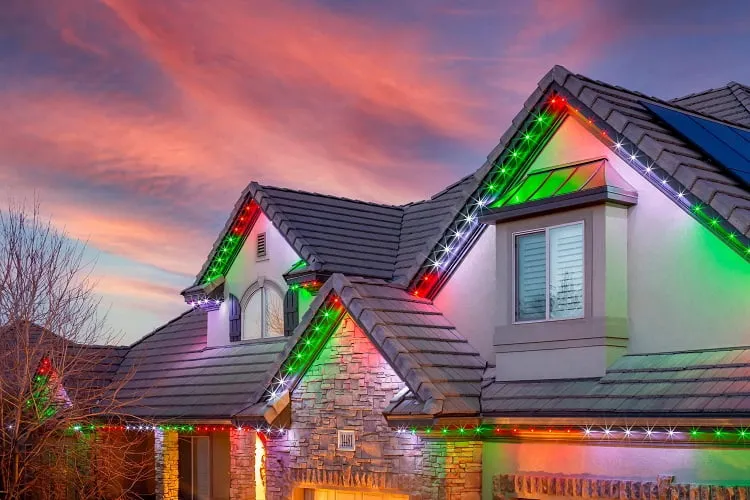
Before going through each step, let me first say on why you should choose DIY permanent lights as Christmas 2022 decorations. These lights have to be put up only once! You don’t need to go out in the cold every year to set a pair of string lights, which you will have to bring down later. Going with the option of gemstones LED lights for Christmas, will mean that you can leave them all year round, and use the lights for other holidays as well! The lighting is specifically designed for your taste, and you can change the colours with the help of a controller! What’s not to like? Do I have you convinced? Then let’s see what supplies are required to set up the lights.
What you will need:
- 12 v LED lights
- controller (should be able to take same volts as the lights/ 12v)
- power supply
- power cord
- j-channel
- a 1/2″ drill bit
- metal screws
1. Get the DIY Christmas lights ready
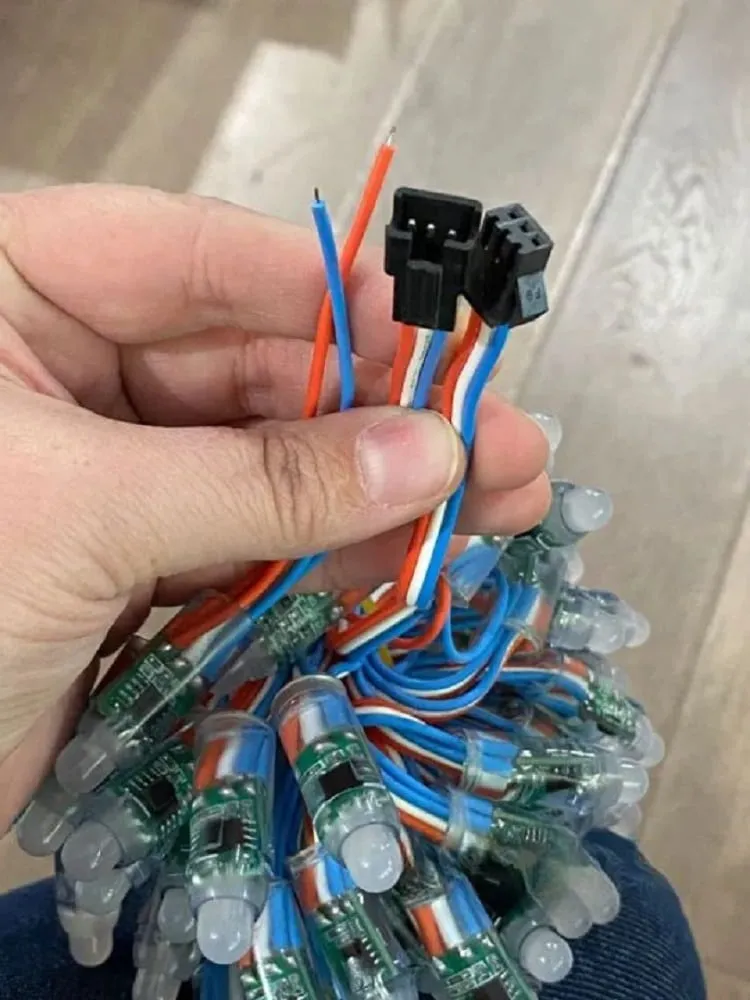
Let’s start with the first step of installing your DIY permanent Christmas lights! Take your LED lights. The string of lights will come with a female connector on one end, and a male on the other. Cut the male connector off only of the first strand. Leave all the other connectors on the other strands. The cut one will be used to attach it to the power supply.
2. Connect lights to power supply
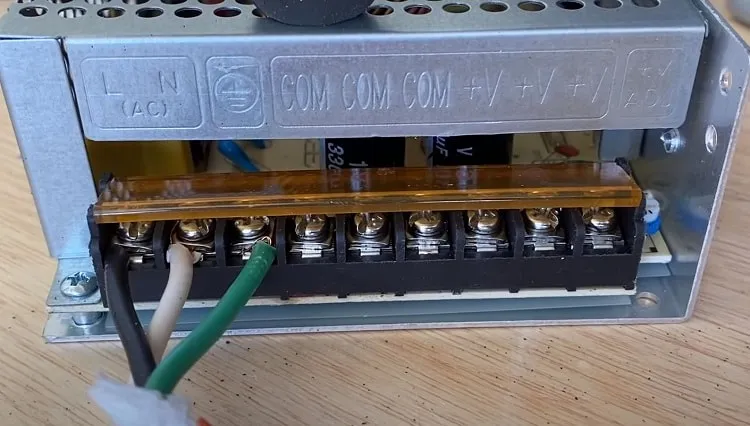
Moving on to the next step. Since you cut the male connector off, the lights should have 3 wires. Look at their labels and see which are positive, negative, ground and which are data or digital input. Attach the positive and ground light wires to the power supply. Be sure you know which light is which, because if you attach the wrong one, you will fry your lights. Connect the power supply with a power cord. Don’t rush on plugging that in into the wall. Leave it for when everything is connected.
3. Prepare the LED lights controller
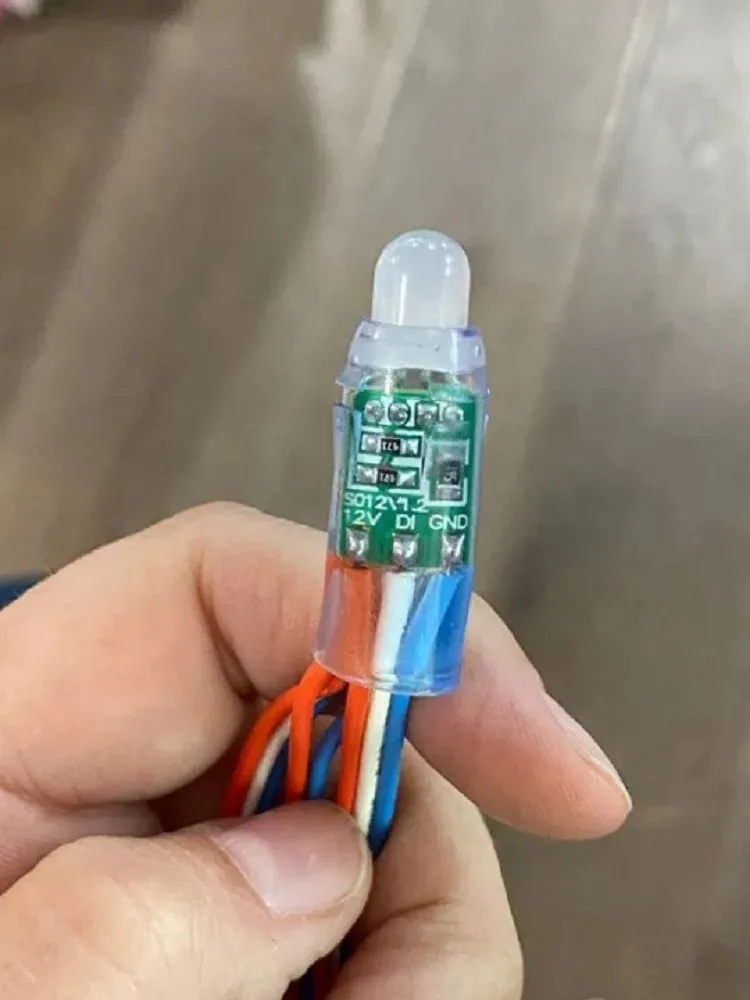
How to connect your LED lights to your controller? You will need to snap it into a breadboard. This will make it easier for you to plug wires. Connect the data wire to the breadboard in the D4 pin on the controller. The LED lights and controller must be at the same volts. Now install the program/ app on a Wi-Fi device of your choosing (best on your laptop), with which you will control the LED lights. Decide on any program you like. Then attach the controller to the device with the installed program by using a USB cable. Copy the program into your controller.
4. Secure the controller and power supply
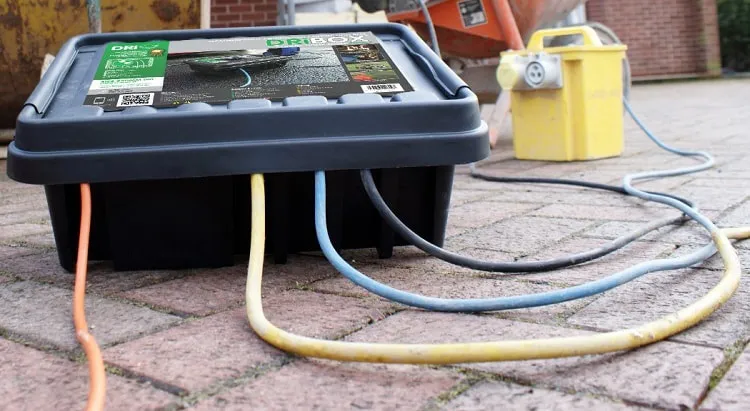
How to secure the controller and power supply to your home? Well, there are two viable options you can go with. The easier one would be to get a weatherproof box, and place them there on the outside of the house. The craftier option would be to secure the controller and power supply on the inside of your garage wall, and drill a little hole through the eaves of your home. Then run an extension wire from the controller, through the drilled hole, to the outside of your home. Attach the wire to the permanent lights.
5. Drill holes for the DIY Christmas lights
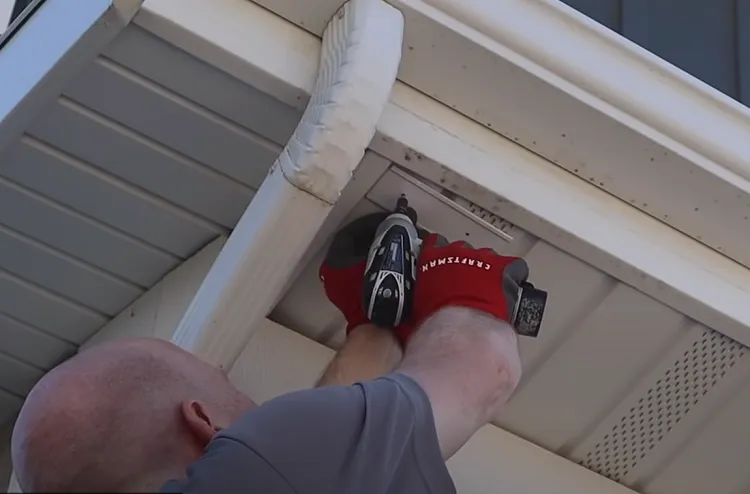
Where should your lights be placed on the j-channel? Before you start to drill, decide which way your gemstone lights will point to. I personally wanted them to be pointing out, not down, so I drilled into the face of the j-channel. If you want them to point downward, drill into the underside of the j-channel. Drill the holes into the j-channel with a 1/2″ drill bit. Make sure the distance between the holes is the same as the one between the LED lights.
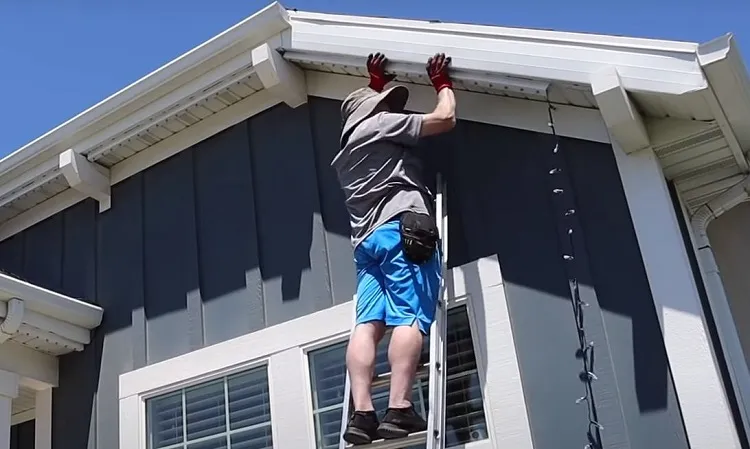
6. Place permanent lights into j-chanel
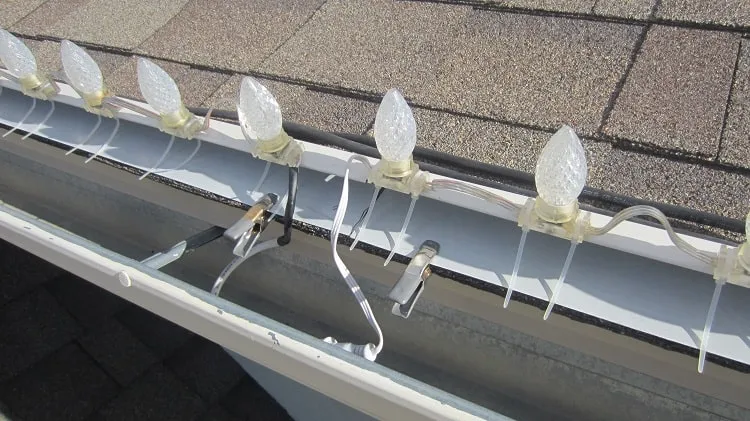
How to attach the j-channel to your home? First, make sure to measure and cut your j-channel to fit under your eyes. Then, attach it to the house by using the metal screws. The front of your j-channel should be even with the front of your home. Now let’s install those permanent Christmas lights! Place the LEDs into the j-channel, and tuck the wires behind. To properly hide them, you can use electrical tape.
7. Connect DIY Christmas lights strands
Depending on what kind of controller you have, now you need to connect the LED strands to it. If your strands are longer, best to connect one light strand in to the next. The gemstone lights will have tiny connectors on each end (male and female). Snap one strand into the next. When you get to the end and stop with the lights, just cut off the wires between them. Secure it with electrical tape. Great job, now you have your DIY permanent Christmas lights!
I hope this easy 7-step tutorial did wonders for you and now your house is the talk of the neighbourhood! And hey, if you really enjoyed creating a beautiful Christmas decor for your house, why not give a go at our other DIY ideas for festive outdoor decorations? Enjoy!