Nature in fall offers us a huge abundance of natural materials with which to create beauty and comfort at home: cones from different trees, acorns, nuts, leaves, twigs, seeds, fruits and herbs! With Thanksgiving approaching, it’s time to unleash our creativity! We’ve prepared a few easy Thanksgiving crafts for adults that are worth trying to recreate!
Еasy thanksgiving crafts for adults
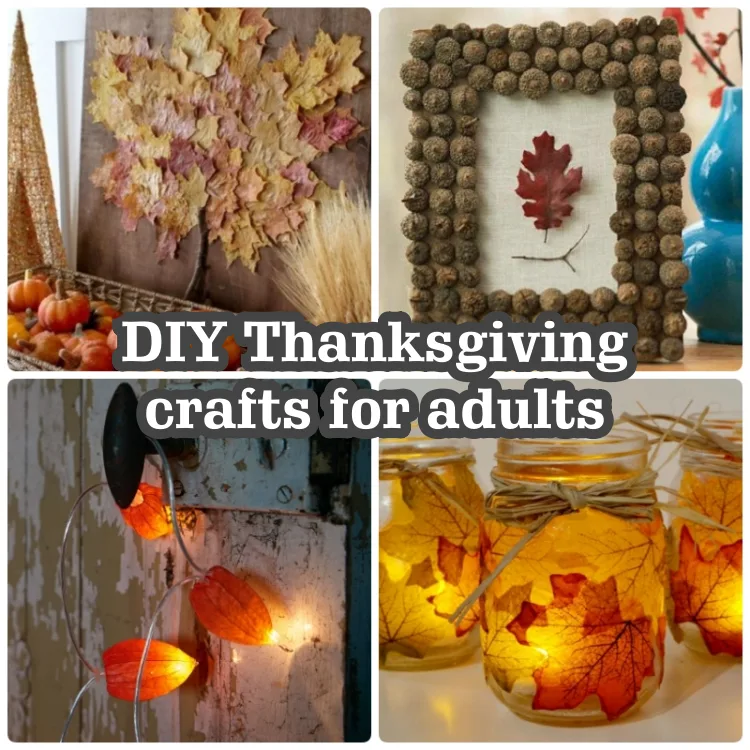
Creative work is equally enjoyable not only for children, but also for adults! We have selected a few easy Thanksgiving crafts for adults that, in fact, can involve the whole family. We know you can’t wait, so we’re starting with our first suggestion!
1. Fall-themed candle holder
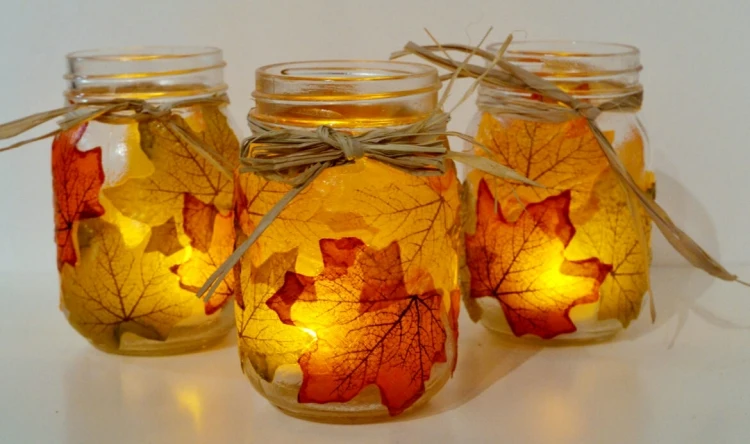
Candles are perhaps one of the most popular decorative items typical for the cooler months of the year. It’s a great idea to use fall as inspiration and make a candle holder based on this theme. A very easy and interesting option is to use dried fall leaves!
Tools and appliances:
- glass jar
- rubbing alcohol
- a piece of sponge
- dried leaves
- glue
- scissors
- a couple of sprigs of hay
Instructions:
- If there are stickers on the jar, you should remove them first. To do this, wet the jar to make peeling faster and easier!
- Degrease the jar with rubbing alcohol – a very important step that should not be missed! Put alcohol on a cotton swab and go over the entire surface of the jar.
- Choose the leaves you like the most. With the help of scissors, you can shape them even better and in a way that you want!
- Glue the leaves on all sides of the jar, so you like the final look!
- Tie the neck of the jar with sprigs of hay and form a small bow.
2. Fall fairy lights – Physalis flower garland
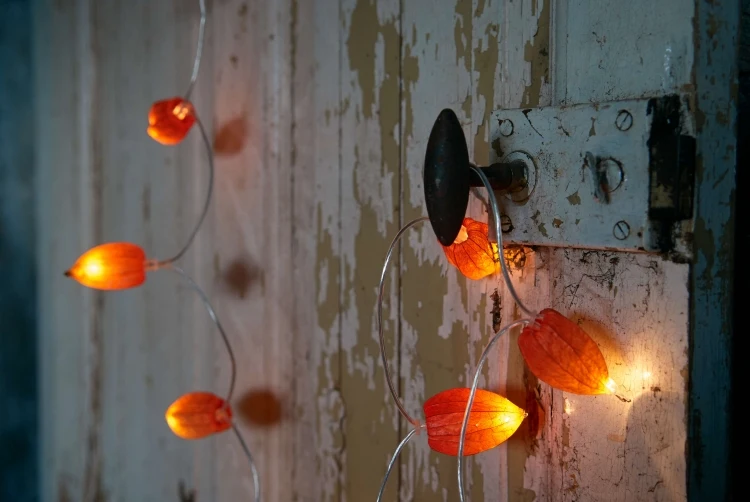
As mentioned above, nature in fall is extremely rich, and we should use what it offers us for our creative purposes. The colored pods of the physalis resemble small lanterns and are therefore ideal for making glowing garlands or other amazing physalis fall decorations. Check out how to make a magical glowing chain of little lanterns with your own hands.
What you will need:
- dried physalis pods
- scissors
- glowing garland
Instructions:
- Prepare all the necessary materials – dry physalis pods, scissors and a glowing garland.
- Carefully cut out the center of the pod with scissors, removing the seed and the stem, but the pod should stay intact.
- Place the prepared pods over the lights.
- Your fall fairy lights garland is ready!
3. Leaf Wall Art
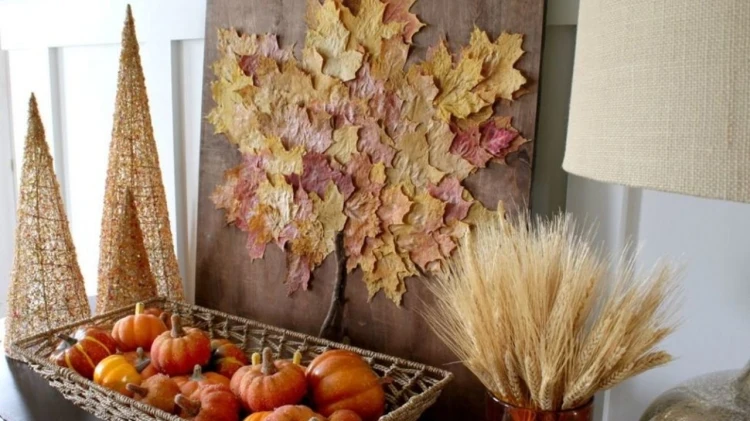
Our next idea is to create a fall leaf wall art – it’s not at all complicated, but at the same time you can really have fun with your family while doing it. When it’s ready, you can combine it with other fall decor items to create a warm, cozy atmosphere!
You will need:
- dried maple leaves
- a twig
- plywood
- dark varnish
- pencil
- glue
- sandpaper
- paint brush
Instructions:
- Before you start decorating, you will need to sand the board well.
- Your next task is to coat the board with varnish in several coats.
- Draw a large maple leaf on it with a pencil.
- Glue the leaf onto the drawing. Start at the edges, gradually moving towards the centre. The edges of the leaf should match the edges of the outline. Glue the next row of leaves, overlapping the previous one. Do not glue the edges, they should hang in the air to create a volume effect.
- Glue the twig in place of the leaf stem.
4. Acorn Frame

Acorns can be used to decorate many objects, even to bring beauty into the most ordinary ones. How about an acorn frame? Sounds good, right? Let’s see how you can make one:
To make such a frame, you will need an old wooden photo frame, glue and many, many acorns (a good reason to get out in nature and look for some). But then again, fall is the best season to get acorns, when the material is literally lying around in any oak grove or park.
We start with the acorns – remove their caps. They are the only ones we will need to make the frame. Then we just glue them all over the outline of the frame (the hot glue gun is the best option).
To recreate the inside of the frame (if you like how it looks in the picture), you’ll need a piece of burlap, a pretty autumn leaf, and a small thin branch. Cut the burlap piece exactly to the outline of the frame (turn the frame backwards). Stretch it well at the ends and pinch it with a stapler or hot silicone. Turn the frame over again so you can see her face. Arrange the branch and leaf as you like (they are in the middle in the picture). Fix very lightly with hot silicone!
Your autumn frame is ready to adorn your home!