What do you need to have a great holiday? Of course – a great mood and appropriate atmosphere. Try something new for this year’s Halloween and decorate your home for the spooky holiday. How to make a haunted house? Look at these craft ideas which will help you create a festive atmosphere at home so that everyone has the mood to have fun and celebrate the holiday. These craft projects require only a few hours of free time, a desire to create and a variety of materials that you most probably, already have.
Halloween has its own specifics, symbols, traditional decorations and you can make a spooky Halloween haunted house from different materials. Halloween crafts with children will not only help you have fun, but also help your child in all-round development.
How to Make a Paper Bag Haunted House?
Materials:
- Paper Bag
- Crayons and Markers
- Glue
- Construction Paper
- Halloween Stickers (optional)
- Scissors
Directions:
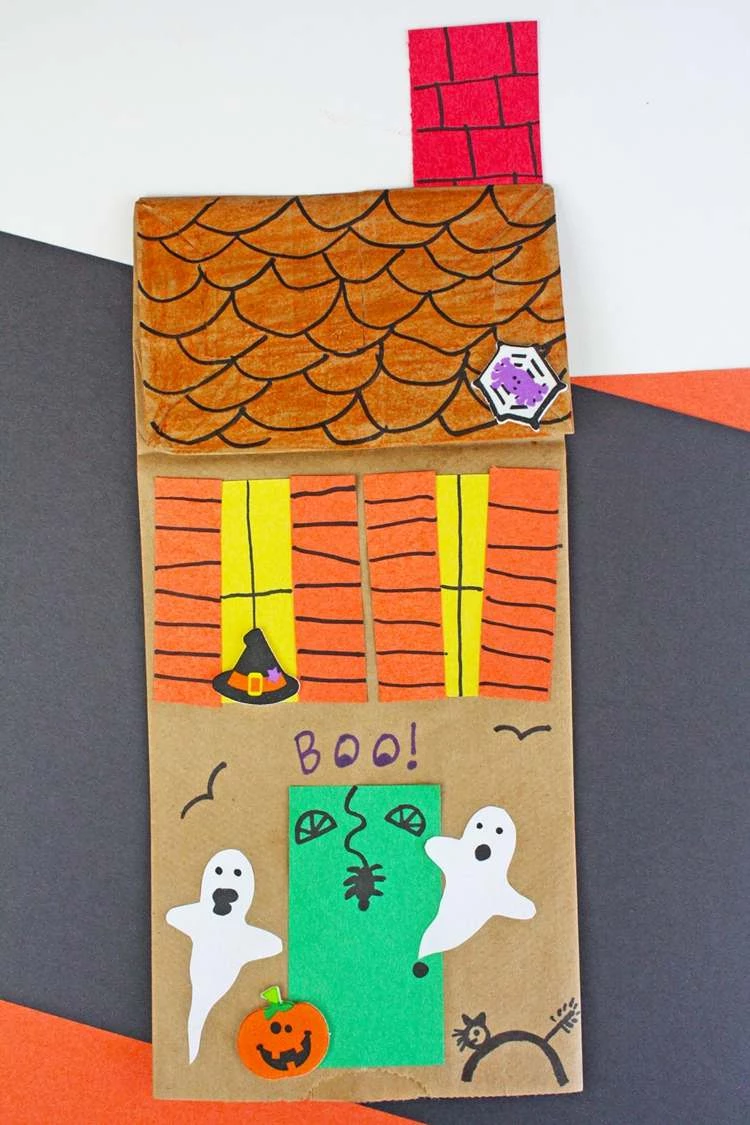
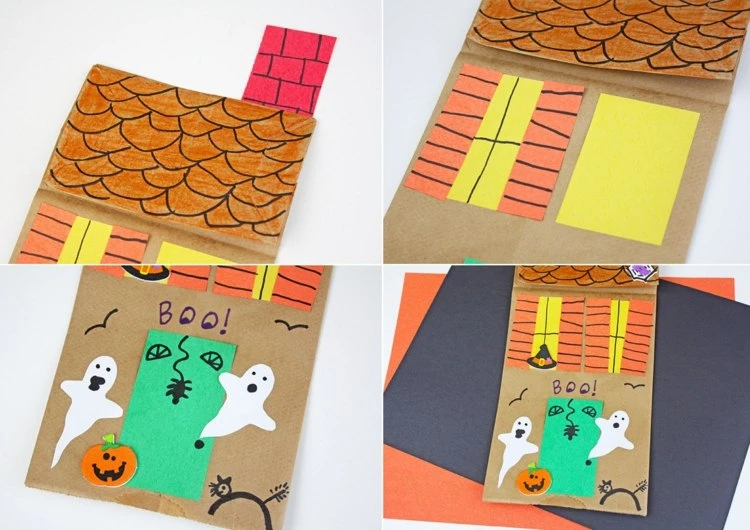
The bottom of the bag has the perfect shape for the roof, so you can use it for just that.
Draw the roof color and tiles directly on the paper or alternatively cut out a suitable piece of colored paper and then glue it onto the bag.
Cut a small red rectangle from red construction paper and draw black lines to imitate bricks. Glue the chimney to the back of the roof.
Cut two rectangles from yellow construction paper and use a black marker to make the window’s frame. Glue both the windows onto the front of your haunted house. Add shutters from orange construction paper.
Cut a small rectangle from green construction paper to make the front door, glue onto the house. Draw bats with a black marker and use any fun Halloween stickers to decorate your paper bag haunted house.
How to Make a Haunted House from Tissue Boxes?
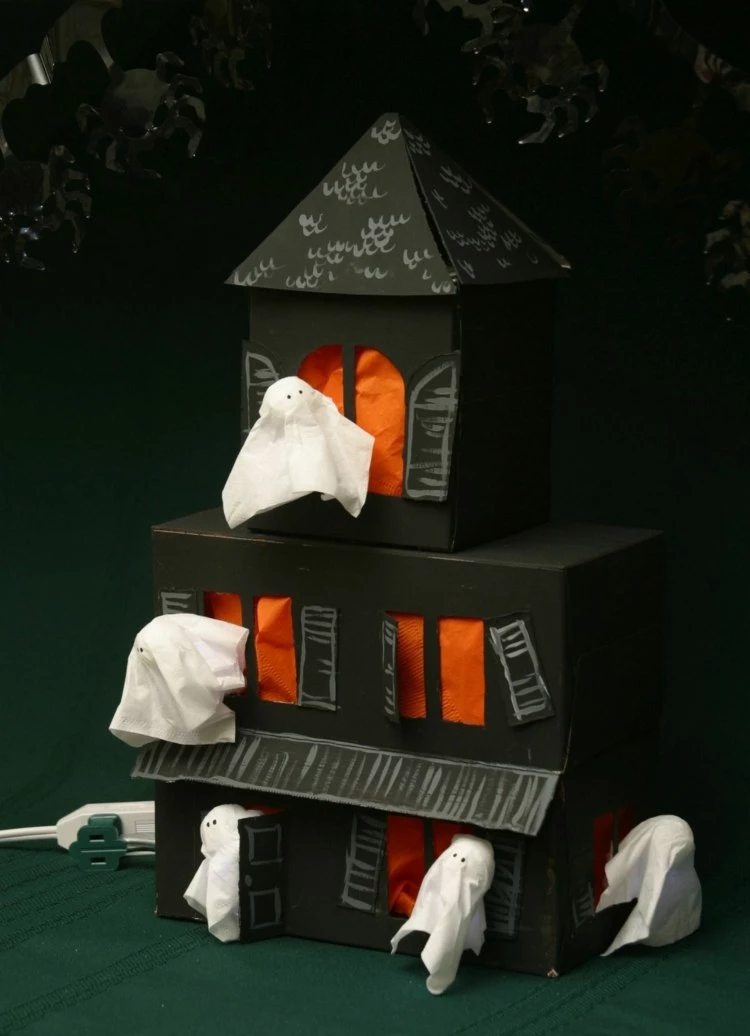
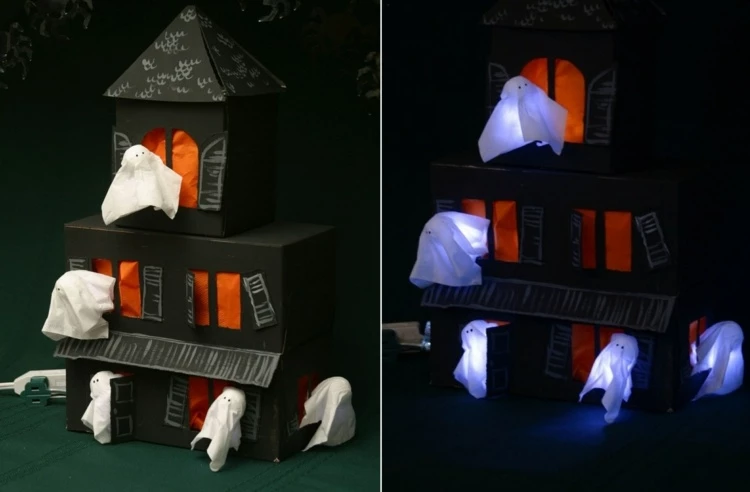
A Halloween craft idea that will help you make an impressive haunted house with ghosts. The ghosts can even shine by adding LED lights to them, but even without lights the house looks very interesting and is great as a decoration for the window or mantelpiece.
Materials:
- 3 rectangular paper tissue boxes
- 1 square tissue box
- 10 orange napkins (approx. 25 x 25 cm/ 13”X13”)
- 2 white tissues
- 8 styrofoam balls (2.5 cm/1” diameter)
- 4 white pipe cleaners
- black acrylic paint
- gray or white acrylic paint (alternatively a marker is also suitable)
- glue stick
- double-sided tape
- duct tape
- liquid glue
- pen
- black felt pen
- Craft knife or box cutter
- optional: string LED lights
Directions:
For this Halloween craft idea, take the first rectangular box and place it upside down in front of you (the closed side faces up). Draw windows and a door anywhere. Use the knife to cut into the door on the two short and one long sides, bend it outwards and then back again so that it is slightly open. Cut out the entire area of the windows.
Now take the second rectangular box. Cut from the edges of the tissue hole out to the edge of the box, to extend the edge of the hole the entire length of the box. This way you get a flap which you can then fold outwards and which later becomes the canopy for the house. Then turn the box upside down and add windows to it as you did with the first box. Now cut windows into the square box as well.
From the last box, cut two bow tie shapes made from equilateral triangles with 5 inch/13 cm long sides. These will form the top roof of the house. Tape them to the square box using double sided tape on the inside.
Paint all these elements and the boxes with black acrylic paint. If necessary, apply two coats of paint. Let each layer dry well. Then you can use the gray paint to draw details like bricks, roof tiles, window frames and shutters and door.
Make the ghosts. Cut each tissue into 4 squares. Then apply glue to a styrofoam ball (top and sides) and place one of the squares over it. Repeat with the other balls and tissues. Once the glue is dry, paint on eyes and mouth with black acrylic paint or felt-tip pen.
Cut the pipe cleaners in half and push one piece per ghost into the bottom of each ball.
Assemble the haunted house. Cover the inside of the boxes with the orange napkins by pushing them through the holes. If you want, you can add LED string lights in each box. Now glue all boxes to each other. Then glue the pipe cleaners into the insides of the windows and hide a light bulb under each of their robes.
Cool Halloween Craft Idea – DIY Milk Carton Haunted House
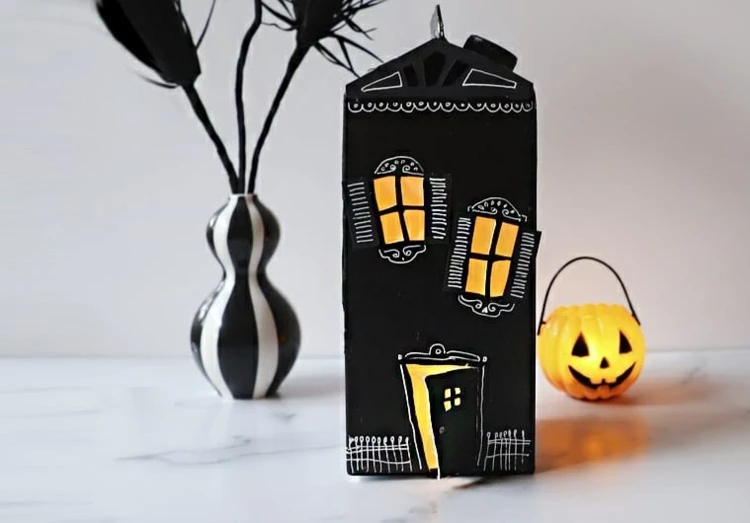
A milk carton has the perfect shape to be transformed into a DIY haunted house and is an easy and fun Halloween craft for children. You can add LED lights or a batter-operated tea light and turn it into a super cool Halloween window decoration.
Materials:
- a clean, empty milk carton
- black acrylic paint and brush
- Craft knife
- orange tissue paper
- LED tealight
- white gel pen
- black craft paper and glue
Directions:
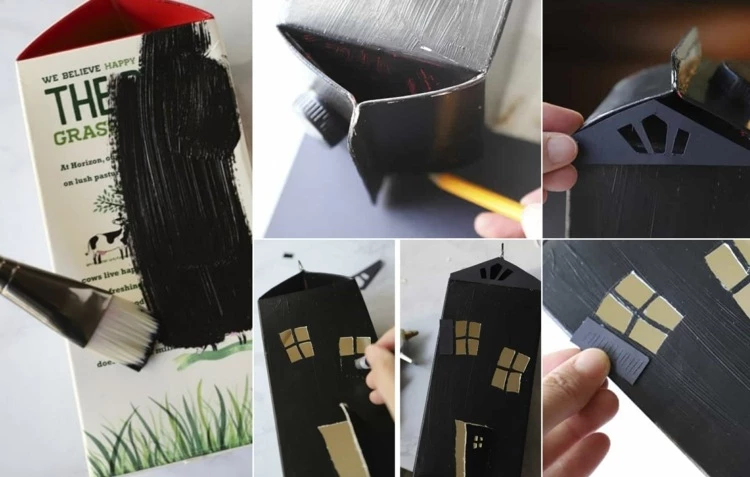
It is important that the milk carton is well rinsed and dry so that milk residues will not start smelling over time.
Paint the milk carton black. You may need to apply a second coat.
Cut a triangle piece of black card stock, cut some decorative holes in it and glue it to the gable of the milk carton roof with a bit of hot glue.
Draw windows on the front and sides (except the back) of the milk carton and cut them out with the knife. The windows can be crooked to give your haunted house looks an older and even spookier and creepier look.
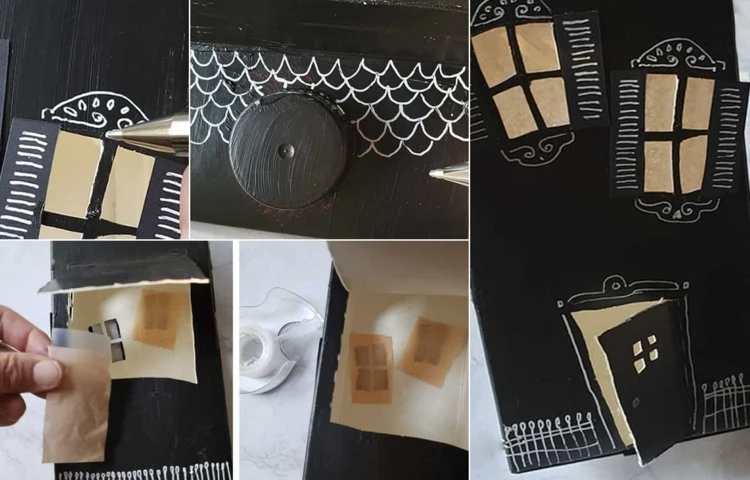
Cut some rectangles out of black card stock and glue them to the sides of the windows to look like shutters.
Cut a door in the front of the carton and then cut a large flap in the back through which you can now comfortably cover the window and door with the tissues and also later add the LED tealight.
Use the white pen to draw all the little details like roof tiles, wooden strips for the shutters, a fence and other decorations.
Tape some small tissue paper pieces over the windows from the inside through the handy trap door in the back. Add in a flickering tea light and your Halloween haunted house is finished!
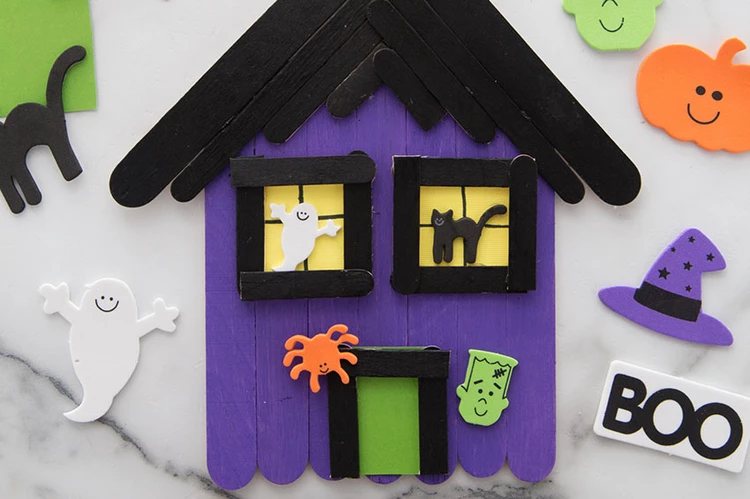
How to Make Popsicle Stick Haunted House
Materials:
- Popsicle Sticks in a different sizes
- Yellow and green cardstock
- Green, black and purple paint
- Hot glue gun
- Halloween foam stickers
- Black sharpie
Directions:
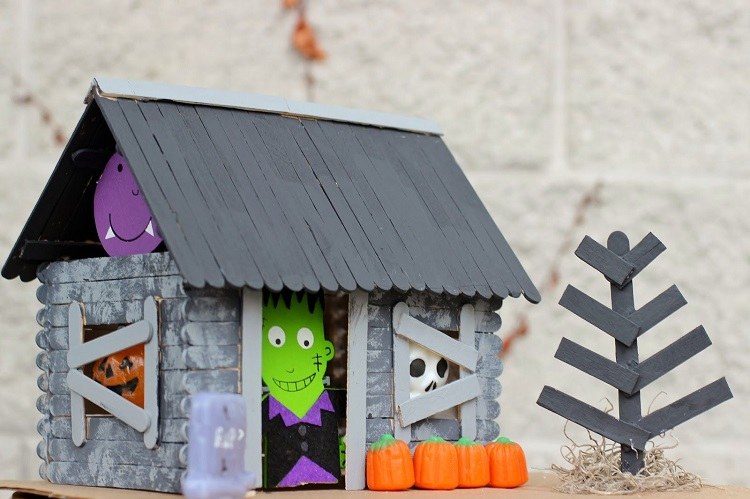
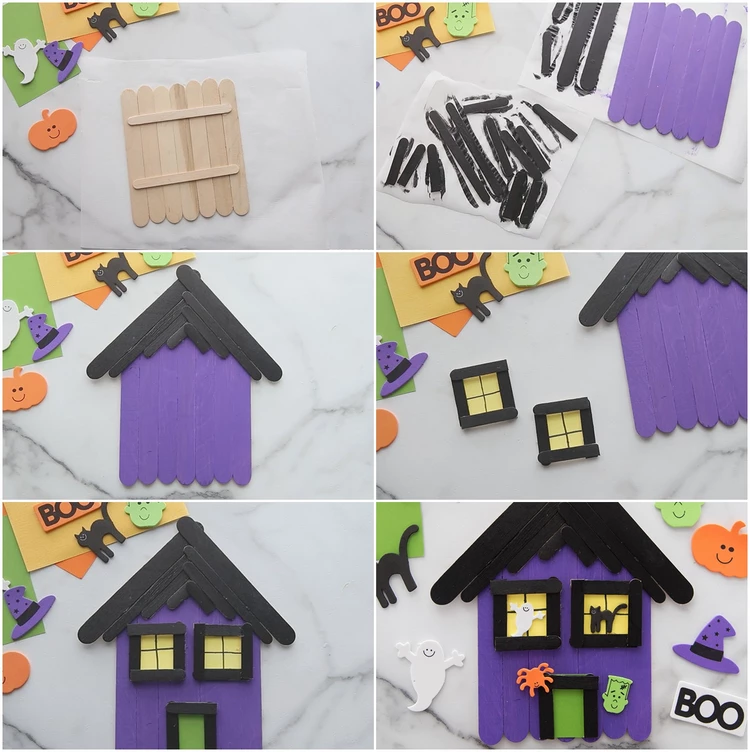
Take your largest popsicle sticks and line 6-7 beside each other. Take 2 more sticks and glue them horizontally onto the back of the lined-up sticks. This will create a base for the haunted house.
Paint the house purple. Then paint smaller popsicle sticks black for the roof, windows and door.
Glue 2 popsicle sticks, overlapping at a point onto the purple base to form a roof. Continue with smaller-sized popsicle sticks until you are happy with the size of the roof.
Cut out 2 squares from the yellow card stock for the windows. With a black sharpie, add lines for the window panes. Glue 4 pieces of popsicle sticks around the outside edge of the yellow paper, overlapping them at the corners.
Glue the windows onto the purple house. Using the same method as the windows, glue small black popsicle sticks to a green cardstock rectangle for the door.
Decorate the haunted house with foam Halloween stickers.
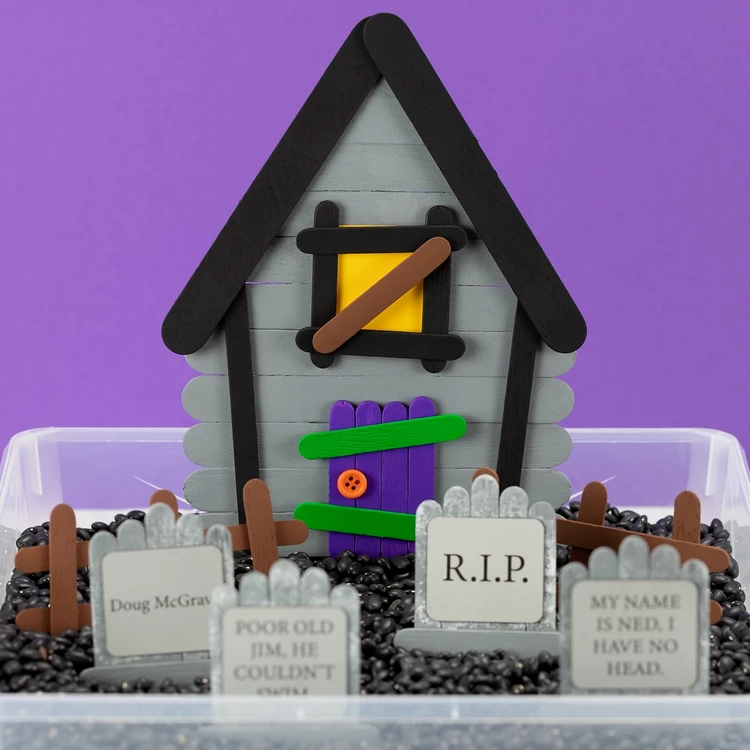
DIY Popsicle Stick Haunted House and Graveyard
Materials:
- Printable house and tombstone epitaphs template
- White, yellow, and grey cardstock
- Popsicle sticks in different sizes – mini, standard and wide
- Hot glue gun
- Black, grey, purple, green, white, and brown acrylic paint
- Paintbrushes
- Orange button
- Sponge for sponge painting
- LEGO ghosts and/or skeletons
- Black beans
Directions:
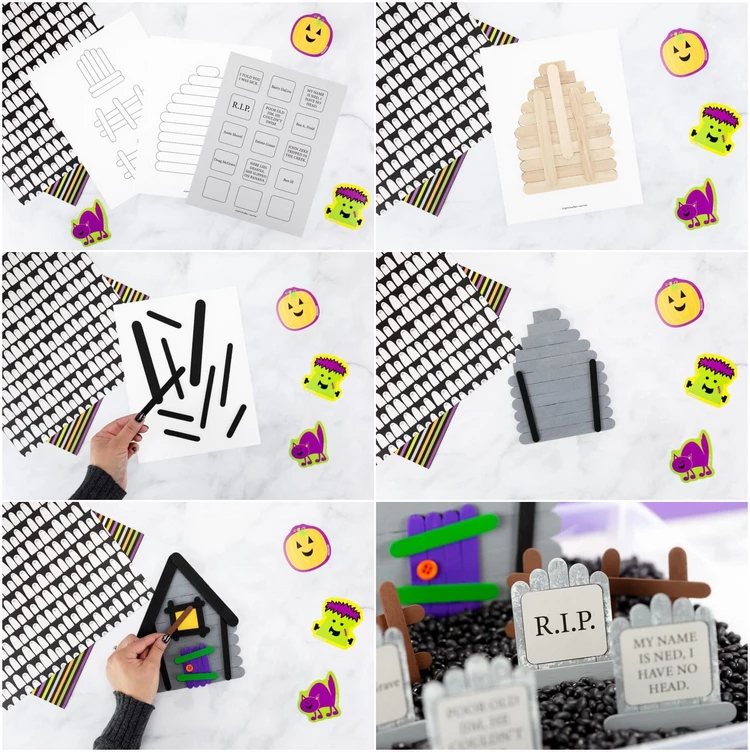
Print the house template on white cardstock and the tombstone epitaphs on grey cardstock.
Paint the popsicle sticks with acrylic paint.
Assemble the haunted house. Start by gluing down the black trim, followed by the roof. Trim any popsicle sticks that stretch beyond the top of the roof.
Glue a small square-shaped piece of yellow cardstock to the upper portion of the house. Assemble the window around it, then put together the popsicle stick door.
Your popsicle stick haunted house is complete! Optionally, hot glue extra popsicle sticks to the bottom of the house to help it stand.
Paint the tombstones grey, then sponge paint white and grey paint over the top. Glue 1 epitaph onto each tombstone.
Paint the fences brown.
Arrange the house and tombstones in a container filled with black beans. Add LEGO ghosts and/or skeletons.
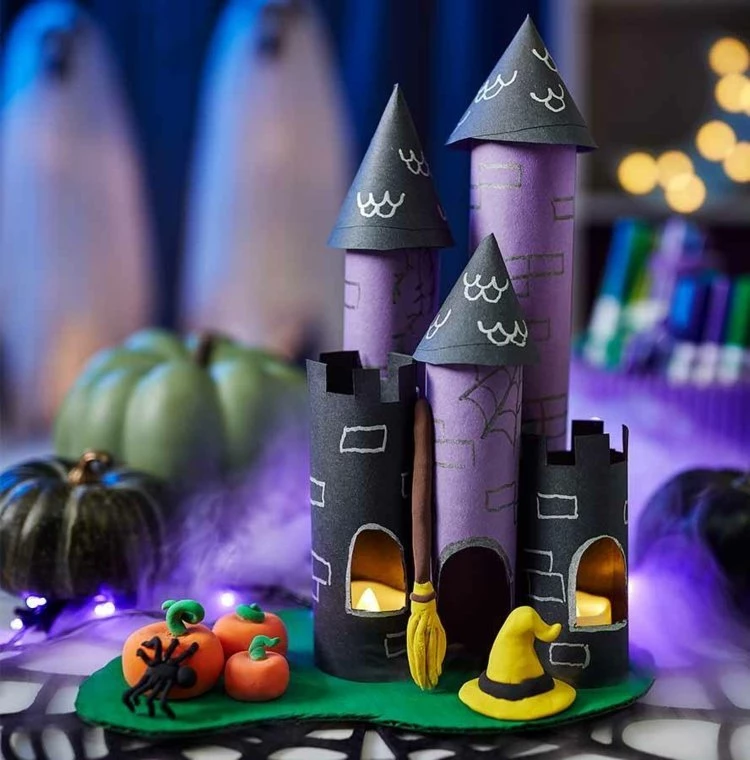
Halloween Paper Crafts – DIY Haunted Castle
Materials:
- Construction paper in purple and gray/darker purple
- silver marker
- cardboard
- Acrylic paint and brush
- liquid glue
- duct tape
- Optional: craft clay and LED tea lights
Directions:
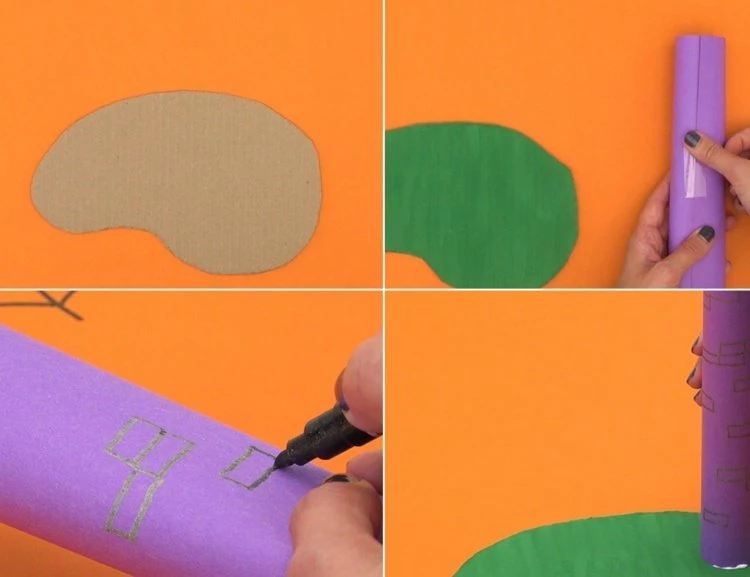
Cut out a base in any shape from the cardboard and then paint it with acrylic paint. Let the paint dry for about an hour or two and then apply another layer that needs to dry as well. In the meantime, you can make the other elements.
Take a sheet of purple colored construction paper and roll it up like a cylinder. Use duct tape to hold the paper together. You can then use the marker to draw bricks here and there. Add glue to bottom of tower and press it to the base. You already have the first tower for your castle as a Halloween craft idea.
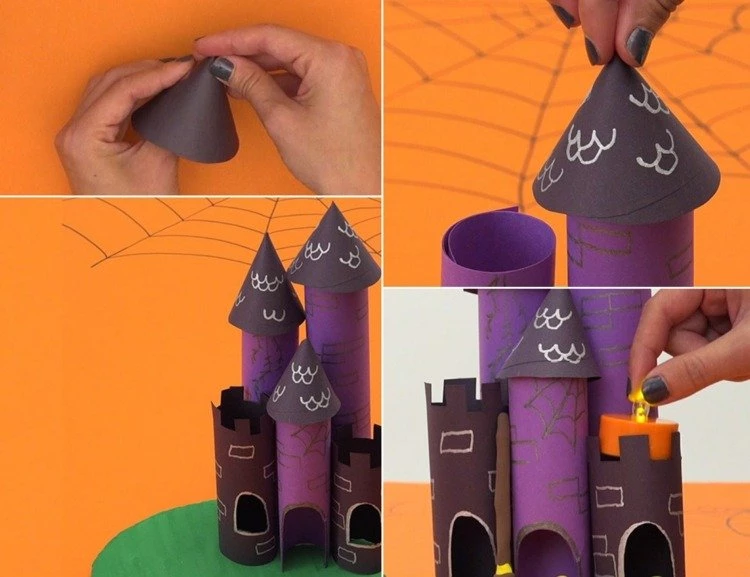
Draw a circle on gray or dark purple colored paper. The diameter of the circle should be larger than that of the tower. Cut out the circle and cut a slit to the middle. Overlap the two sides and glue them together to make a cone. Draw details on the roof and then glue onto the tower. Repeat these steps for a few more towers, which can be of different heights. Cut out an opening for the gate on the front tower.
Use battery-operated tea lights and place them into towers with windows (cut openings beforehand) for a spooky glow.
Make some small decorations from craft clay to give the castle an extra touch. Pumpkins, for example, are a great and easy Halloween craft idea.

