January is the perfect time to stay indoors, unwind from the hustle and bustle of the past holiday season, and make some super cute winter craft projects with your kid. January crafts for kids are a nice change from the Christmas crafts that dominated December, because there is still a lot left of winter after the holidays. Which idea will you do first?
Creative January crafts for kids and winter project ideas
Indoor activities that keep the little ones busy and having fun are often hard to find in winter, but don’t worry! These craft ideas are perfect for the weekend or snowy afternoons at home.
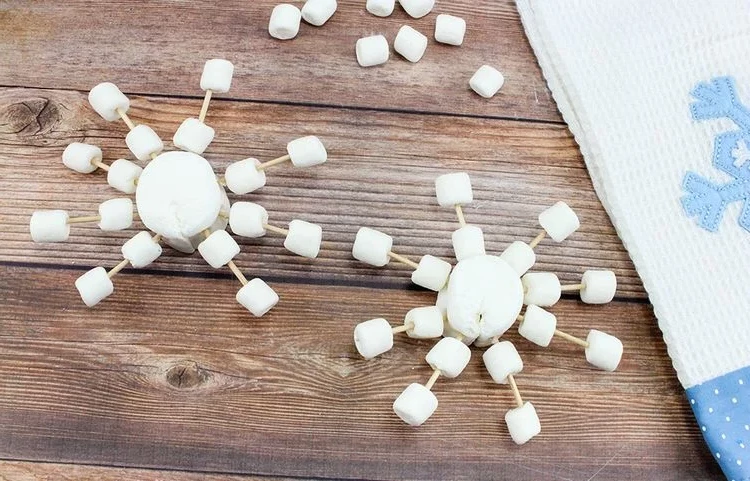
Marshmallow Snowflake – a delicious addition to the hot chocolate
This fun and engaging activity is great for young children who can design their own snowflakes to help develop their fine motor skills. For added fun, you can find some pictures of real snowflakes and ask the kids to copy the designs.
You need:
- Jumbo marshmallows
- Mini marshmallows
- toothpicks
Step-by-step instructions:
- Start by sticking 2 mini marshmallows onto each of the 8 toothpicks, leaving a space between them.
- Next, insert toothpicks into the sides of a jumbo marshmallow.
- Repeat the process for as many marshmallow snowflakes as you want to make.
Also read: Valentines Day Construction Paper Crafts for Kids: 5 Easy Ideas to Try This Weekend
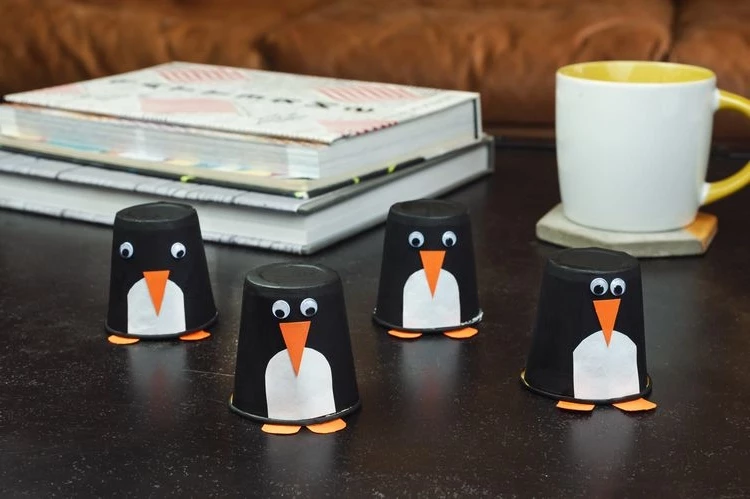
January crafts for kids – How to make paper cup penguins
These paper cup penguins are so cute and fun to play with or use in a little puppet show and storytelling.
Materials needed:
- 1 black paper cup
- 2 googly eyes
- Black, white and orange paper
- Glue
How to craft the penguin:
- Cut out 2 orange feet and 1 orange beak from the paper.
- Trace the opening of the cup on the white paper and cut out the perfectly shaped penguin belly.
- Also trace the oval bottom of the glue bottle to create the wings.
- Glue the googly eyes, the wings, the beak, the feet and the belly onto the paper cup.
Also read: Martin Luther King Jr Arts and Crafts for Preschoolers: 5 Ideas To Honor The Great Man
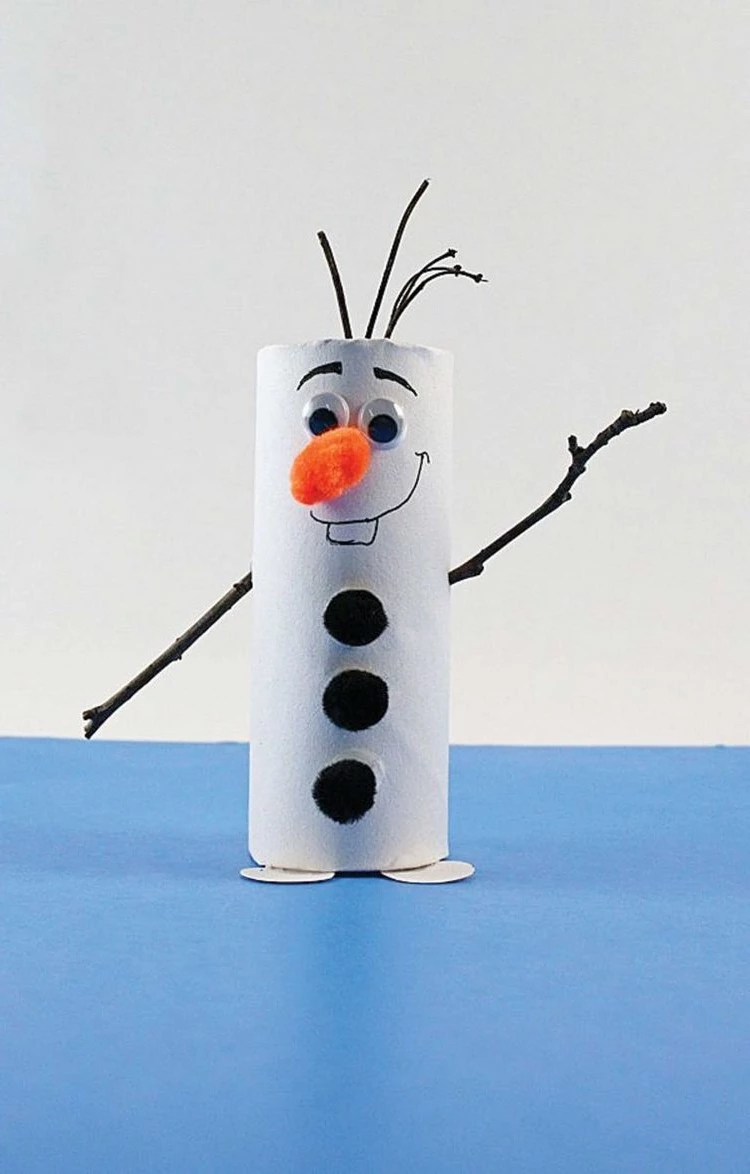
Winter crafts: DIY Olaf from cardboard rolls
Probably you have not only seen the movie Frozen, but you’ve played it over and over again on DVD. And you probably know the cute Olaf!
Necessary materials:
- cardboard tube
- White paper
- Black pompons
- Orange pompom
- 2 googly eyes
- Fine black felt-tip pen
- 2 twigs for the arms
- 3 small twings or leaf stems for hair
- Glue, scissors, pin, toothpick
Instructions:
- Cover the cardboard tube with white paper.
- Cut 2 circles from the remaining white paper and glue them to the bottom of the tube as Olaf’s feet.
- Glue 3 black pom poms to the front of the cardboard tube.
- Roll the orange pom pom between your palms to flatten it out a bit and glue it to the front for a nose, and the googly eyes above it.
- Draw the eyebrows, smile and tooth with a black pen.
- The easiest way to poke a hole in the side of the cardboard tube (for the arms) is to first poke a pin through, then remove it and insert a toothpick into the hole to enlarge it. Now you can put the twigs through the hole.
- Glue the small twigs or leaf stems inside the top-front of the tube.
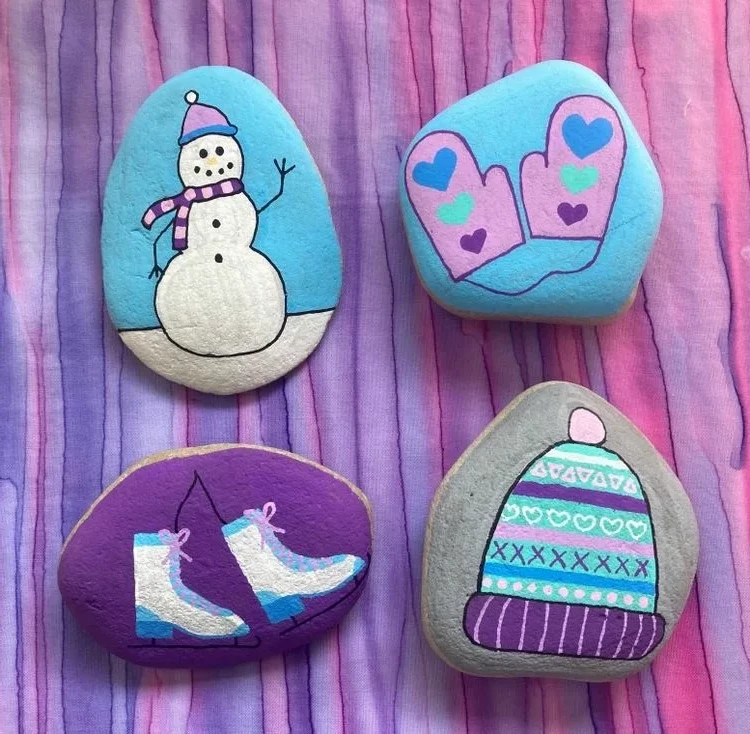
January crafts for kids – DIY winter rock paintings
Show off your artistic skills and invite your little ones to create this adorable winter rock painting.
You need:
- Rocks (collect or buy some)
- pencil with eraser
- Acrylic paint pens or acrylic paint
- Paint brush
- Sealant
Design your rock painting:
- First clean the rocks you will be using. Remove any dirt and debris by washing with water, soap and a brush. If you have dark colored rocks, you can paint them white before you start designing.
- Once the stones are clean and dry, use a pencil to draw your designs, then carefully color in the areas with acrylic paint or pens. Acrylic paint is better for larger areas and acrylic pencils are easier to use for the more detailed areas. Wait for each color to dry before using the next color so they don’t mix.
- Trace the outlines with a marker or acrylic pen to highlight your design. Finish your painted rocks by using a sealer to make them last longer and allow them to be used outdoors.
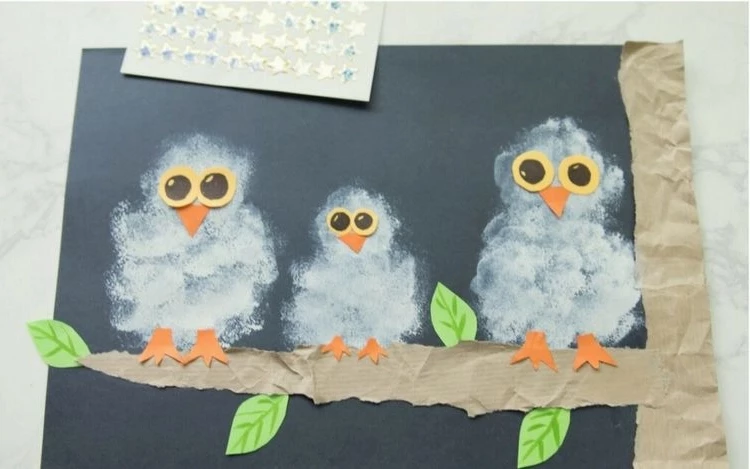
Pom Pom Stamped Snowy Owl Painting
While you are making this beautiful winter picture with the kids, you can also tell them about the Arctic animals that live in the colder climates.
Necessary materials:
- Large pompom
- White acrylic paint
- Black, brown, green, yellow and orange paper
- scissors
- markers
- glue stick
- Small bowl or paper plate for the paint
Instructions:
- Pour a generous amount of white paint into a small bowl.
- Attach the black paper to a flat surface or workspace.
- Dip a large pompom in the paint and dab three small owl from of a brown paper bag. Join two or more pieces together if your torn paper is too small. Crumple the paper by rolling it between your palms to add texture. Glue the brown paper with a glue stick in the shape of a tree branch. Make sure there is a branch just below the owls. Encourage the children to create their own designs.
- Cut out eyes, beaks, claws and leaves from the paper. Add more details like the veins on the leaves and the irises with markers.

