In a few days, the popular candy hunt will start again, which the children especially enjoy. But in order to be able to transport all the sweet treasures reliably, you obviously need the right container. Regardless of whether it is a bag made from paper, cloth, or a basket– it should be robust and as large as possible, and of course also fit the occasion. Equipped with this, you can then get started!
We have collected a few ideas that you can use to make the perfect Halloween bag. But not only that! Paper bags and baskets are also included. And the best? They’re so easy to make that you’ll be able to do it just in time before the big spooky festivities begin!
How to Make Halloween Bag Craft for Candy?
In principle, a simple shopping bag is ideal – it is large and durable. But unfortunately, it doesn’t fit the occasion at all and somehow ruins the costume. But you can also easily redesign it using simple means and make the perfect Halloween bag! Here’s how:
What you’ll need:
- Wide adhesive tape in black, neon yellow, and orange (or other colors depending on the chosen motif)
- Wax paper
- Scissors
- Printable templates
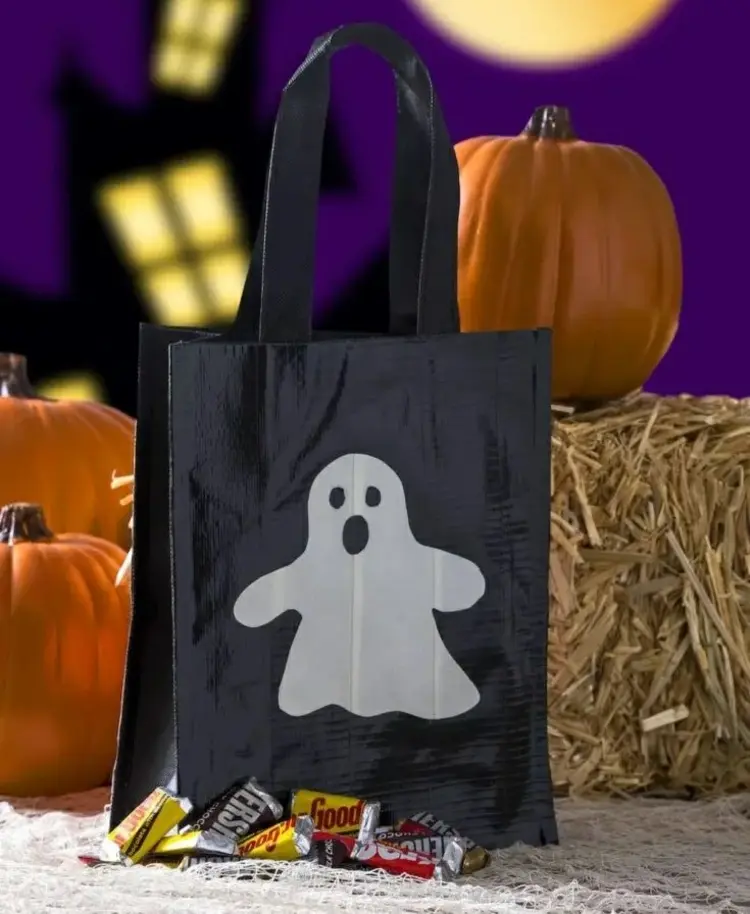
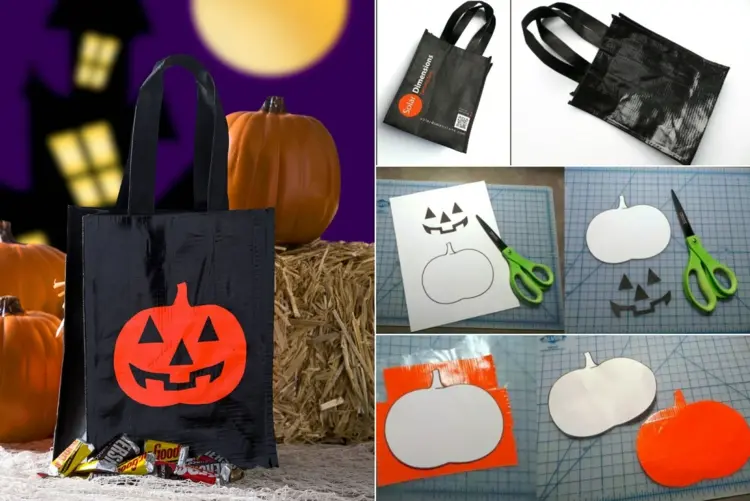
First, prepare the Halloween bag. It doesn’t matter whether it is made of fabric or plastic or what color it is, because you simply cover it with the black adhesive tape. The strips should overlap a little on the sides, but can be glued horizontally or vertically as desired. The vertical variant is more recommended in this situation because you can fold the strips of adhesive tape inside the bag so that the edge is well covered.
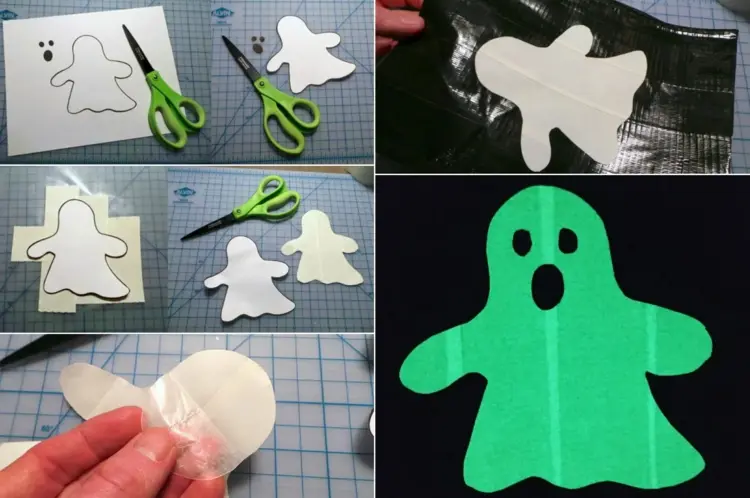
Print the templates and cut them out. Then stick a few strips of the desired color of tape side by side on the wax paper. The stripes should overlap slightly and create an area large enough for the motif. Place the template on top and trace the outline to then cut out the design. Now you have homemade stickers! Peel this off the wax paper, and you can stick the motif onto the bag. Add eyes and a mouth and you’re done!
Templates: Jack O’ Lantern and funny ghost
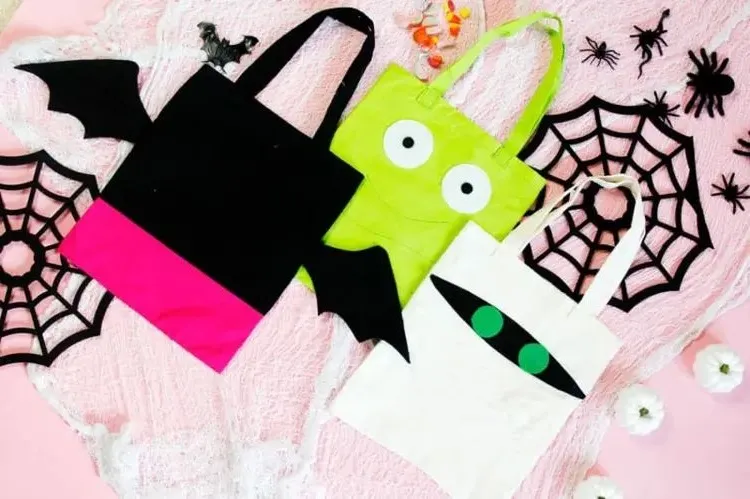
Design Colored Fabric Bags with Felt
Felt can also be used instead of paper – a really popular craft material! And it will get you through the candy hunt just fine, even in the rain. The craft itself is not necessarily any less simple, as felt can be easily cut and glued on with hot glue or other liquid glue. It’s best to get fabric bags in matching colors to save yourself the work of coloring or sticking tape on them. Then you can make the faces and other elements.
How to Make Halloween Bag with a Simple Design?
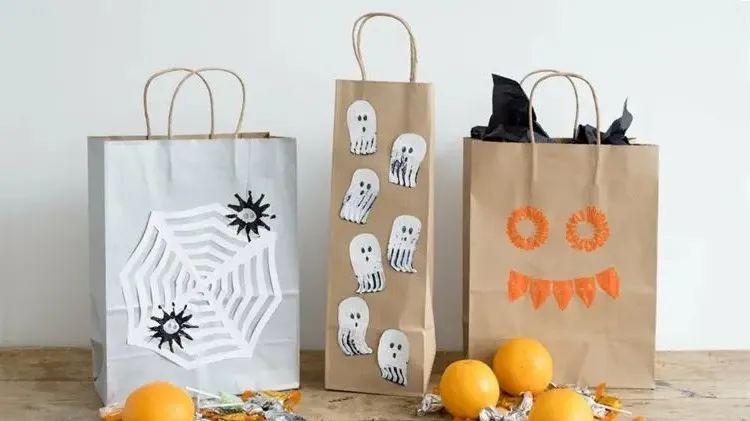
You can also easily use a finished model for a bag that you just need to redesign. And the children can help wonderfully with this. Despite the material, paper shopping bags are usually made to hold a good amount of weight without tearing. And they have practical handles that make carrying them particularly comfortable.
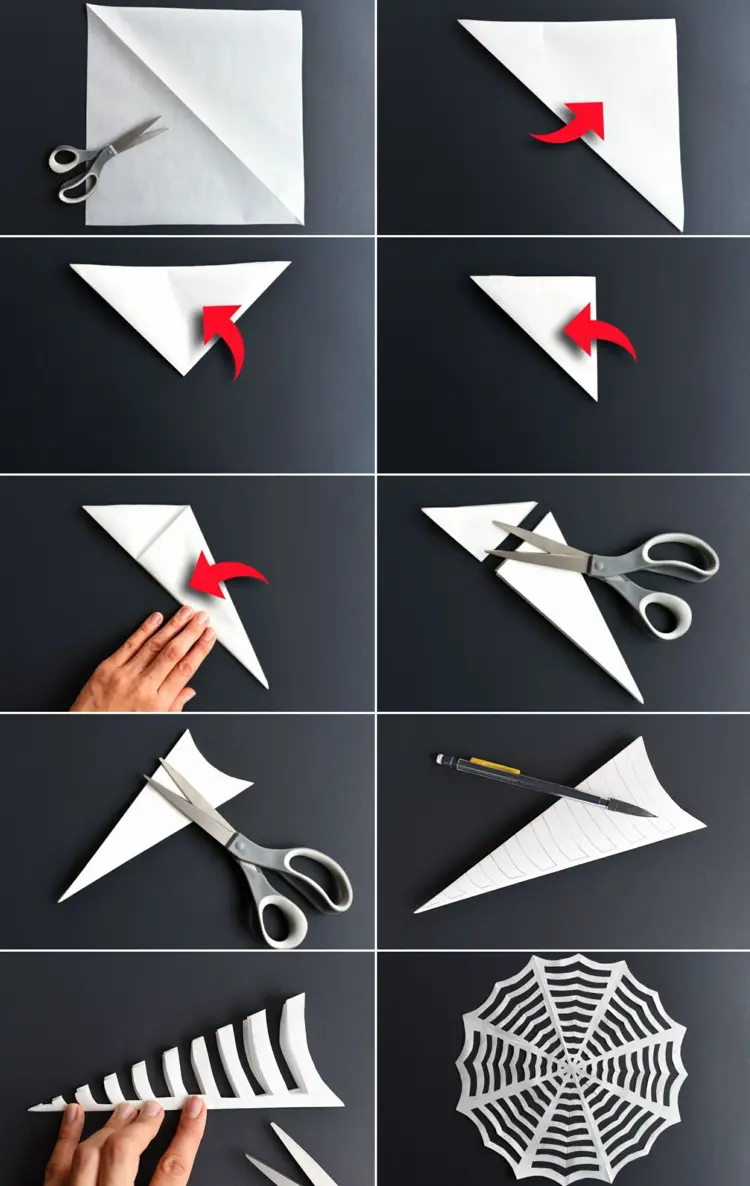
You can use paper bags as they are or paint them with acrylic paints first. Either way, it depends on the motives. You can also paint these on or make them out of paper. For example, you can paint the ghosts on black paper with white paint and then cut them out. To make a simple spider web, use paper that you fold several times and then cut into. You can see how exactly to do it in the provided instructions.
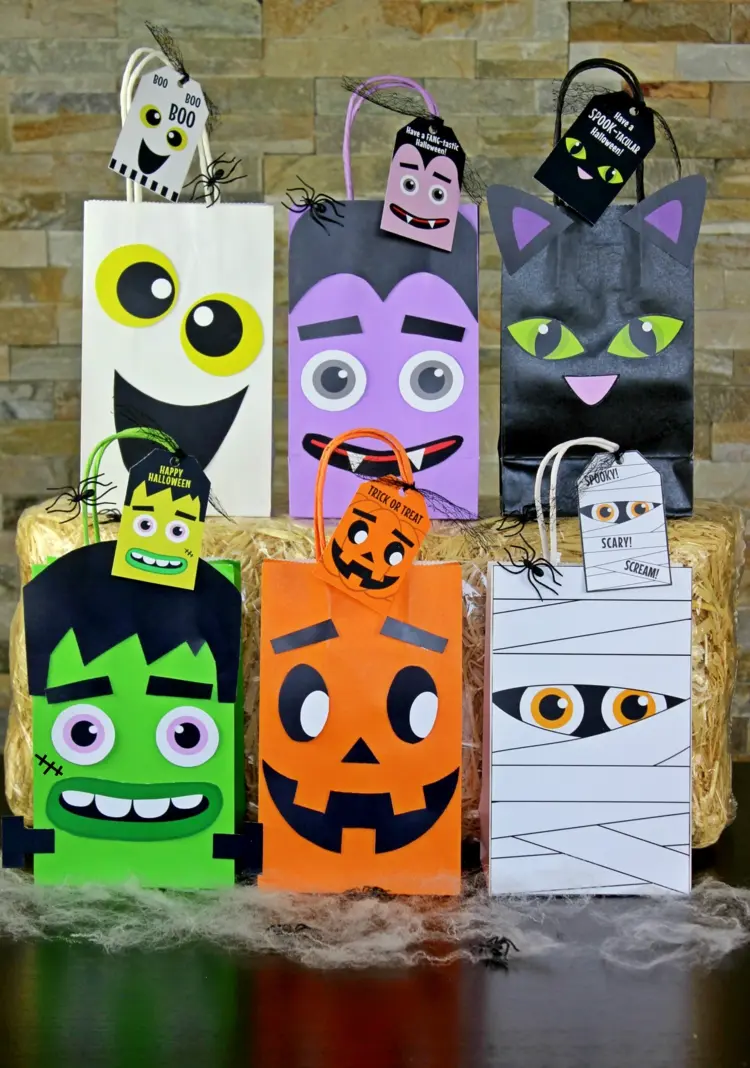
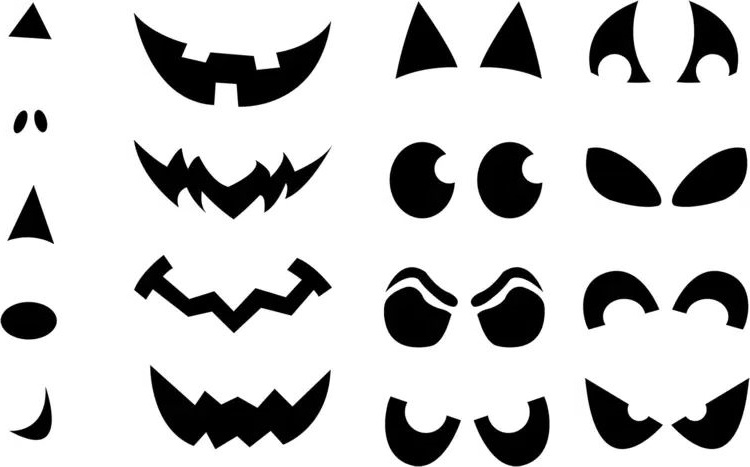
The little ones can also make pumpkins with faces or monsters out of paper for the Halloween bags and then stick them on the surface. You can use the free template provided below that depicts different eyes and mouths.
Also read: Cute Halloween Crafts for Kids: 6 Easy Ideas for a Festive Mood
Pumpkin Basket Craft for Treats
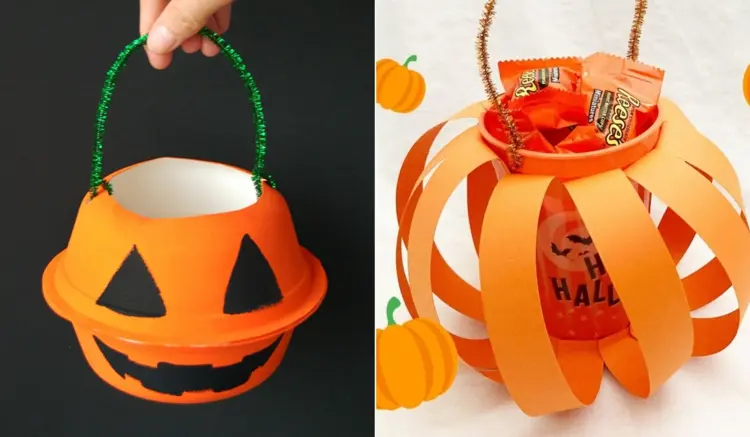
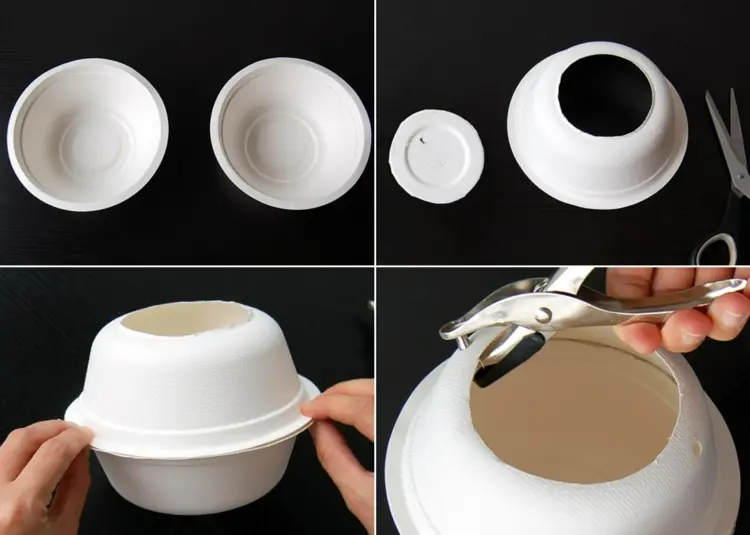
You could just as well make a Halloween basket that you can use to collect Halloween candy. For this, use simple cardboard bowls that you just have to cut, paint and glue together. The alternative to the Halloween bag can be made as follows:
What you’ll need:
- Two cardboard bowls
- Green pipe cleaner
- Black and orange poster color
- Paint brush
- Glue
- Perforator
- Scissors
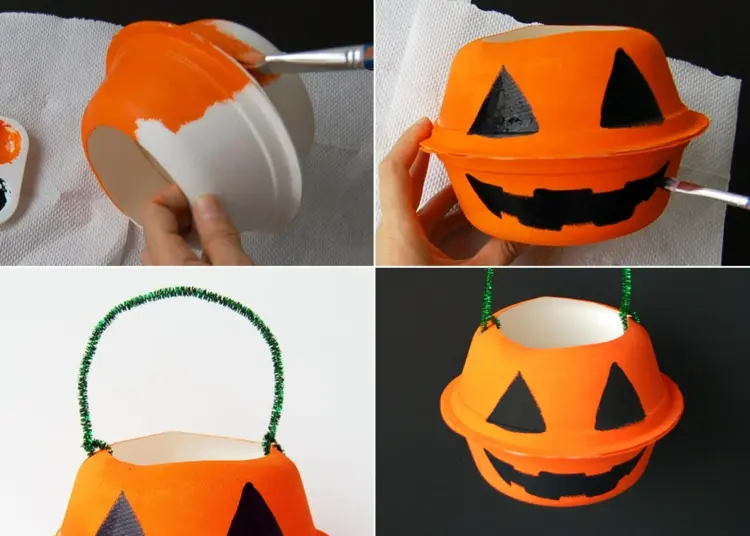
Cut out the bottom of one of the two bowls. Then glue the edges of both together to create a cavity. Once the glue has dried well, you can punch holes in two opposite places and paint the Halloween basket. The pumpkin is just one example. Feel free to try Frankenstein’s monster or a simple ghost that just needs a face in black painted on. Be creative!
After the paint has dried, tie the pipe cleaner or a ribbon as a handle, and you’re done!
You can also make a cool pumpkin-inspired basket instead of a Halloween bag by gluing strips of orange paper to a paper cup. It’s a simple project that even the most reluctant crafters can do. Here too, add two holes for a handle.
Also read: How to Make Your Own Vampire Teeth? 4 Quick & Easy Tutorials

