With the arrival of October, we mark the start of the Halloween season. It is time to decorate the homes and choose different projects. How to involve the children? Just chose some of these Halloween crafts for kids! The materials are simple and easy to find and the projects are suitable for preschoolers, so plan a Halloween-themed workshop and have fun!
Easy Halloween Crafts for Kids with Different Materials
The weather in the fall is often gloomy but this season offers many valuable finds to use for crafts. Have a stroll in the park or just pick up some colored leaves from the garden. Look at what you already have at home, any material will do –from toilet paper rolls to popsicle sticks and yarn, from printer paper to pipe cleaners – a few drops of glue here and there, some craft paint and your children will be happily occupied thanks to these easy projects and Halloween crafts for kids 2021.
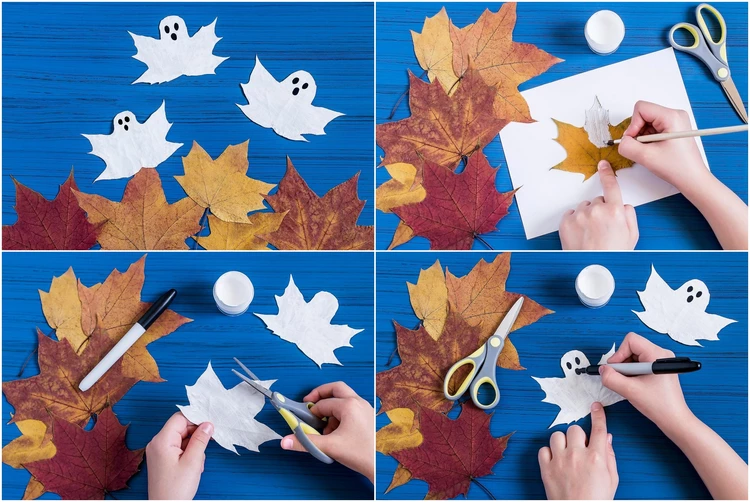
How to Make Ghosts from Fall Leaves – The Easiest Halloween Craft
Materials:
- large leaves
- scissors
- white paint
- black marker
Directions:
Choose large leaves and make sure they are dry.
Paint the leaves white and set them aside. Allow to dry.
Round off the top of each leaf using the scissors to create the ghost’s head.
Draw on a ghost face with the black marker.
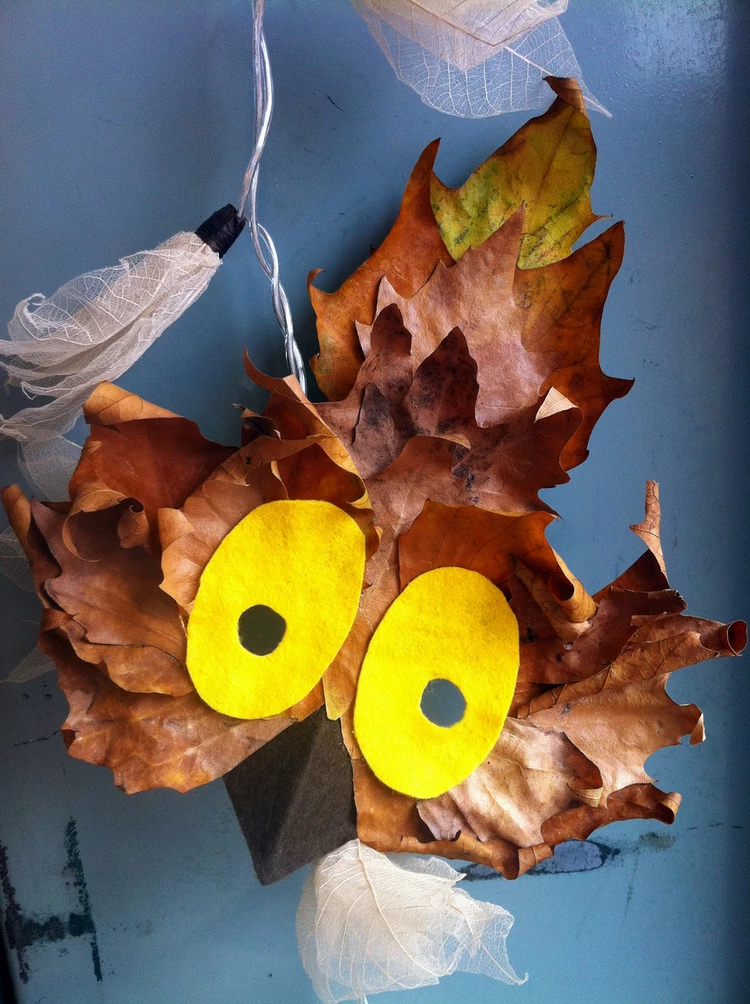
DIY Halloween Owl Mask from Dry Leaves
Materials:
- Dry leaves in different colors – (brown, rust, yellow
- A tube of UHU glue
- Yellow and brown felt
- Scissors
- A pencil
- A sheet of card
- Elastic string
Directions:
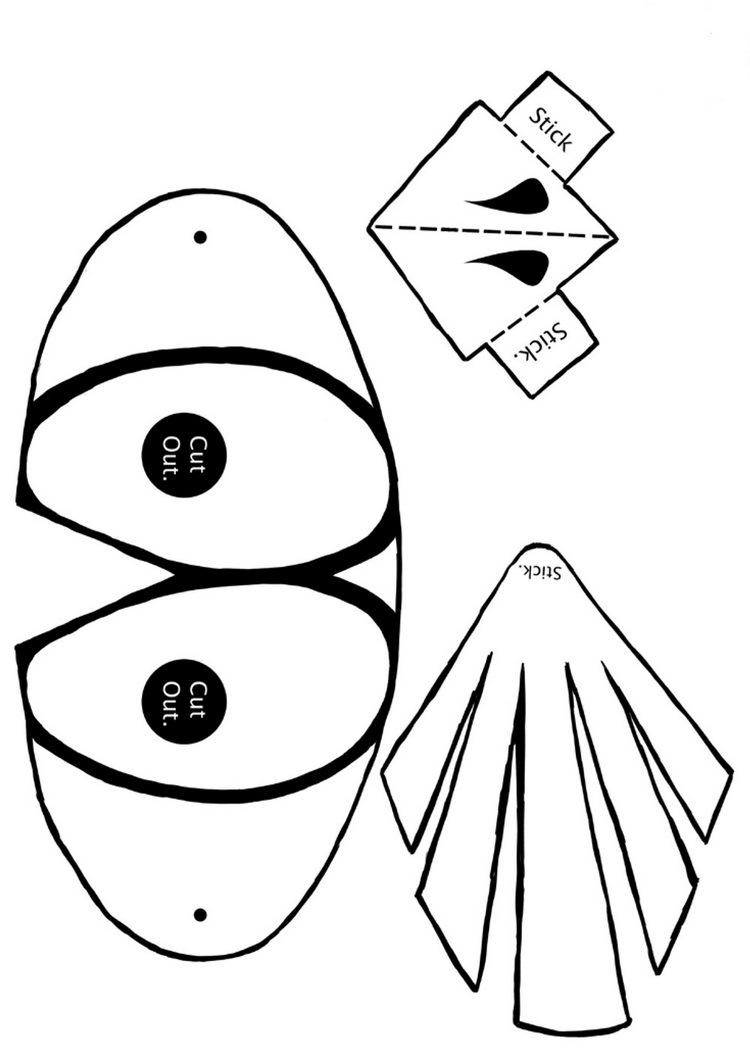
Print out the template and then cut out the face and plume. Stick them together. Make the holes for the string.
Take the leaves and start glueing them to the card. Continue until the card is covered.
Cut out the beak from the template. Glue some brown felt to this small piece of card and then stick the tabs to the back of the mask.
Cut out the eye shapes from the yellow felt. Place on the mask then gently feel where the hole is and draw a small circle on the felt. Cut out these little holes and then stick to the mask.
See also: Free Printable Halloween Coloring Pages
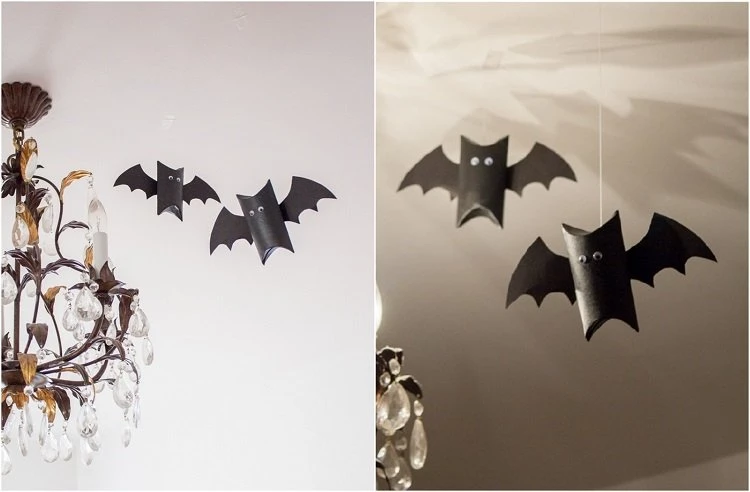
DIY Toilet Paper Roll Bats
Materials:
- a few rolls of toilet paper
- glue or stapler
- black paint
- white marker
- wiggly eyes
- black paper (for the wings)
Directions:
Start by folding the roll in half. Paint it black and let the paint dry.
Cut the wings out of the black paper and staple them to the toilet paper roll.
To shape the bat’s head, fold the top of the roll inward.
Glue the wiggly eyes and draw the teeth with a white marker.
Follow the same steps to make as may bats as you like.
After you finish, fill them with candy or hang them from the ceiling with invisible thread.
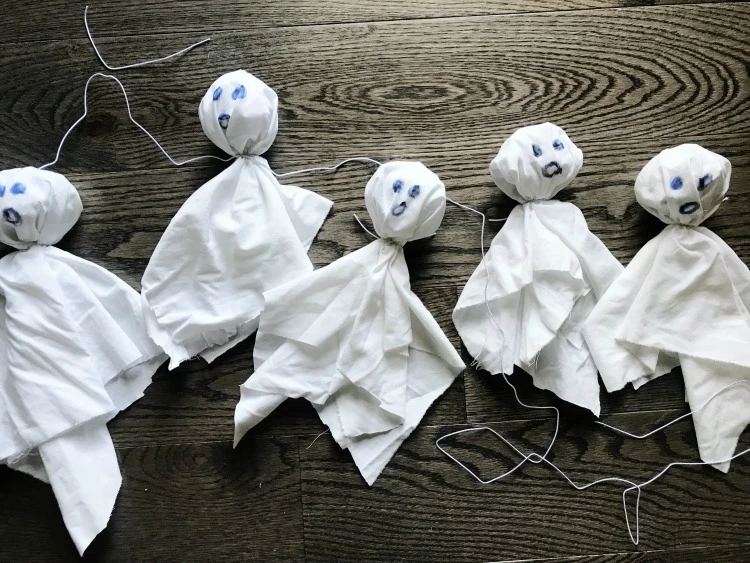
Halloween Crafts for Kids – DIY Ghost Garland
Materials:
- Old White Sheet (t-shirts)
- Newspaper or white printer paper
- Black marker
- Scissors
- String
Directions:
Cut out squares from an old white sheet.
Cut up a few small pieces of string.
Once the squares are cut out, take a piece of paper and gently wad it up. Place under a sheet square and tie up with a small piece of string.
Draw faces on your ghosts with the black marker and cut out a long piece of your string to hang your ghosts from.
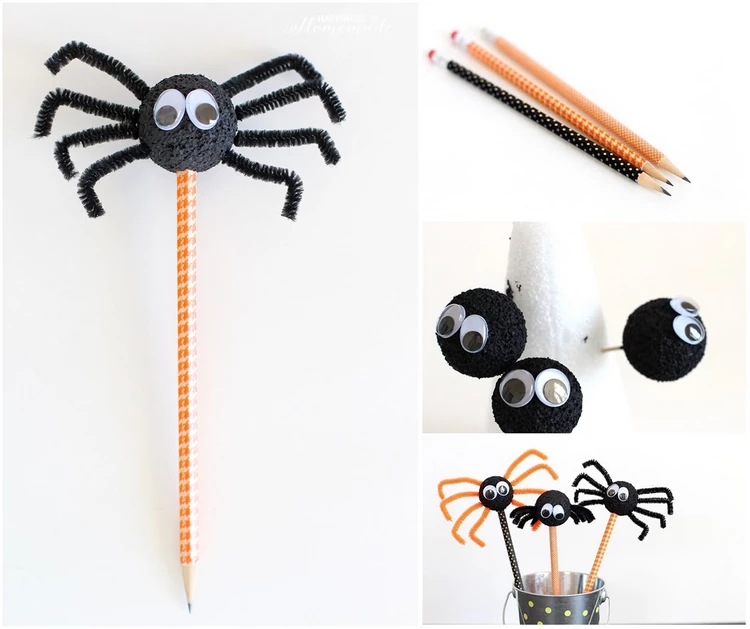
DIY Halloween Spider Pencil tops
Materials:
- Pencils
- Washi tape
- Small Styrofoam balls
- Pipe cleaners
- Black paint
- Googly eyes
- Quick dry glue
Directions:
Cover the pencils with washi tape.
Paint the styrofoam balls with black paint, and allow them to dry completely. Once dry, use glue to attach the eyeballs.
Cut the pipe cleaners into smaller pieces, and stick into the styrofoam ball for legs.
Insert the pencil into the bottom of the spider.
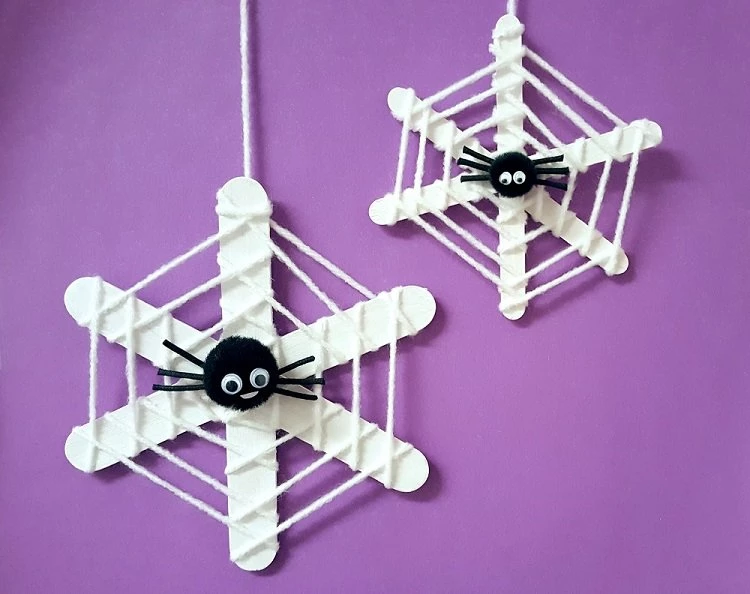
DIY Popsicle Stick and Yarn Spider Web
Materials:
- Popsicle sticks
- Glue
- Tempera paint in Halloween colors
- Yarn in different colors – black, white, orange
- Scissors
- Plastic Spiders
Directions:
Glue three popsicle sticks together and paint with tempera paint.
Once the paint has dried, cut off a long piece of yarn.
Tie one end to a popsicle stick.
Wrap your yarn around each popsicle stick and when you’re done, tie the end, leaving a long string of yarn for hanging your spider web.
Add a spider to the web.
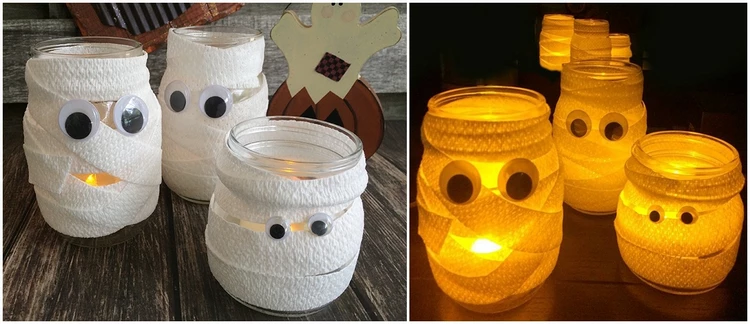
Mummy Mason Jar Luminaries – Halloween Craft Ideas for Children
Materials:
Mason Jars
- 1″/2,5cm Gauze Bandage
- Googly Eyes
- Glue
- Flameless Votive Candles
Directions:
Wrap the bandage around the Mason jars in a mummy-like way.
Glue the googly eyes
Place a flameless votive candle in each jar.
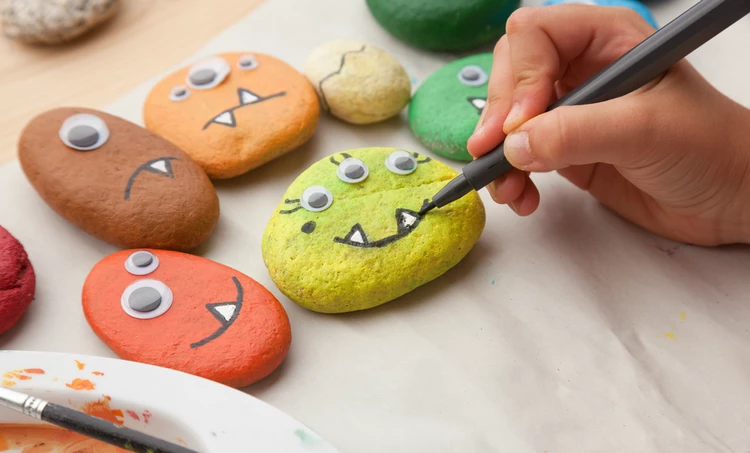
DIY Halloween Monster Painted Rocks
Materials:
- acrylic paint in different colors
- googly eyes
- hot glue gun
- black sharpie
Directions:
Clean the rocks with dish soap and let them dry.
Paint the rocks.
Glue one or two googly eyes on each rock.
Use a black sharpie to draw a mouth.
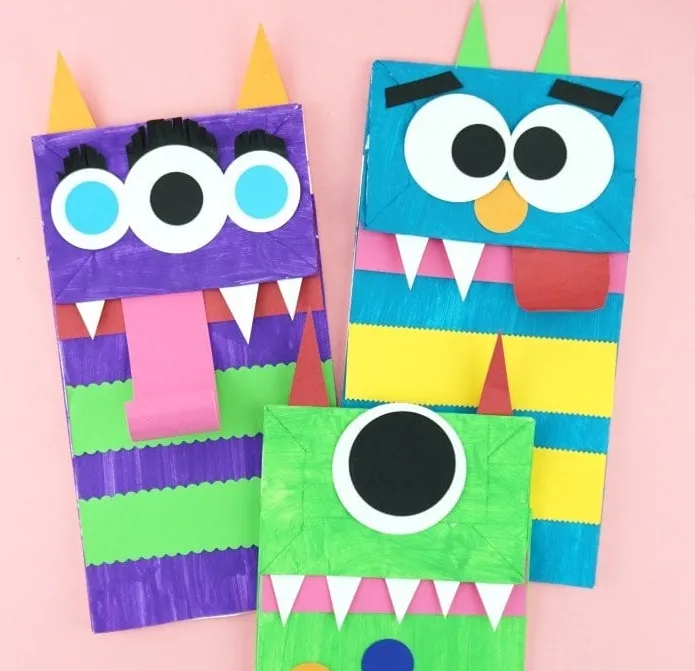
DIY Paper Bag Monster Puppets
Materials:
- Paper bags
- Acrylic paints
- Colored cardstock paper
- Scissors
- markers
- circle punches
- glue
- googly eyes, optional
Directions:
Paint the front and bottom of your paper bag with a color of your choice. Let it dry completely.
Use your colored cardstock paper, construction paper, scissors, circle punches and markers to design a unique monster.
Cut out eyeballs, teeth, pointy ears and horns and glue them on each paper bag.
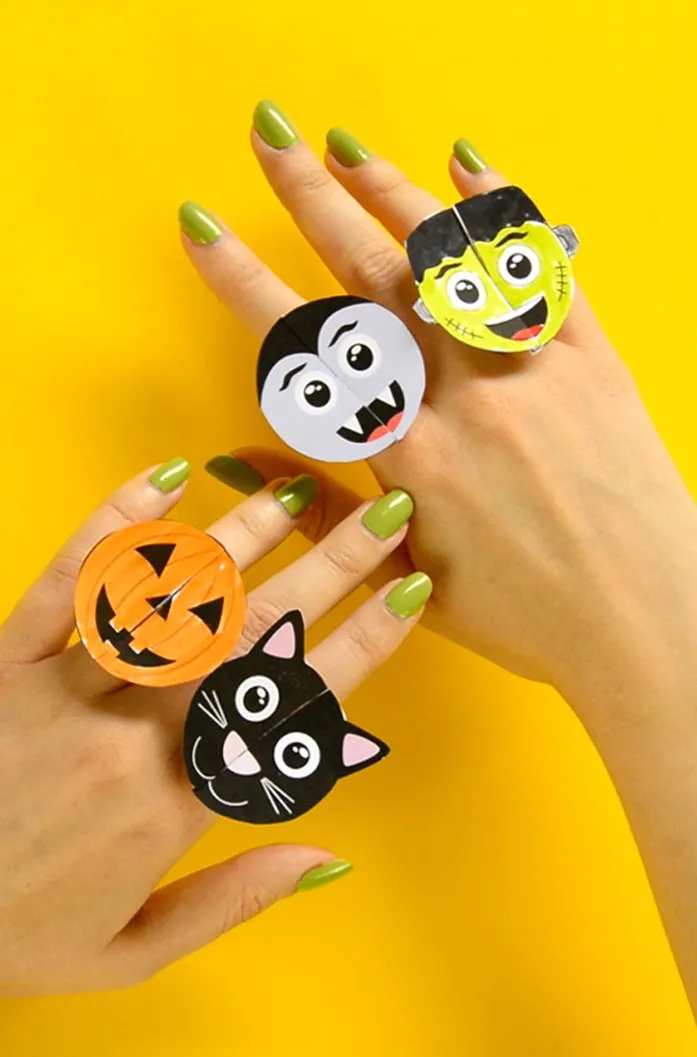
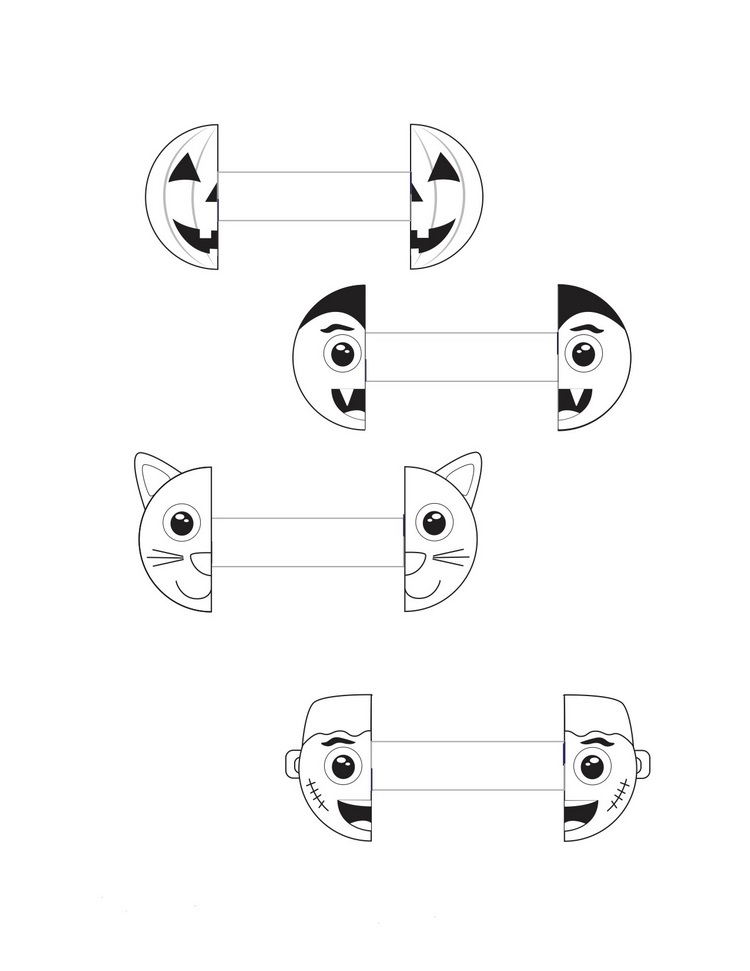
DIY Halloween Monsters Paper Rings
Materials:
- printable template
- printer paper
- scissors
- coloring supplies
Directions:
Print out our Halloween monster paper rings templates
Color the Halloween rings before cutting them out.
Once the rings are colored in, cut them out.
To make the rings you have to cut halfway at the end of the “gray” ring strip on each end of the strip – on the opposite sides.
Make a loop and slide the slits you made to the paper one into another.

