Christmas nails ideas come in hundreds of beautiful and fun designs and different styles. Of course, you could visit a salon and have your manicure done by a professional nail technician but you can have some Christmas fun and add to the festive spirit of the season by doing your nails at home. Christmas manicure differs from all others, because it has a specific and special character. You can choose a more formal looking manicure for the corporate events and a funny nail design for the time you spend at home with your family. We shall give you some great ideas for the Christmas holiday and will show you some really great nail art ideas.
Creative and cute Christmas nails ideas and easy designs
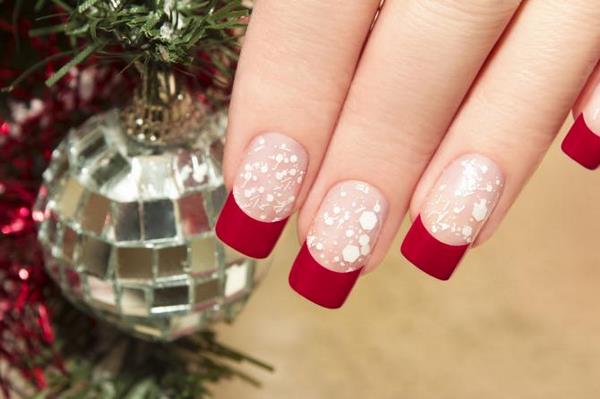
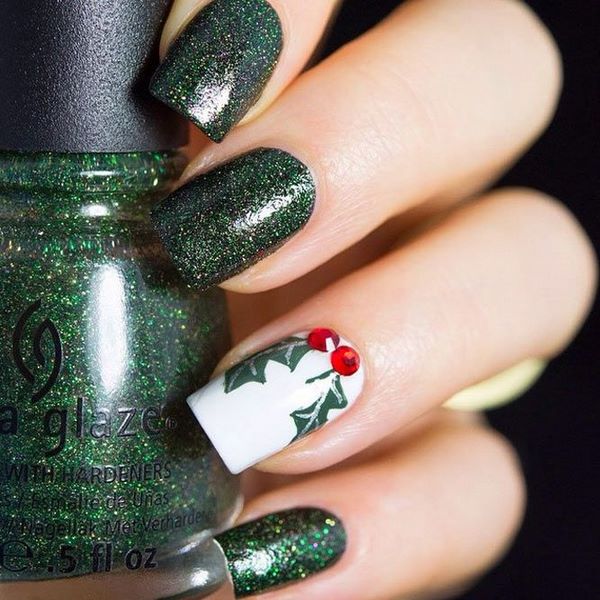
Christmas manicure features all the symbols of the holiday – Christmas trees, ornaments, Santa Claus, deer, snowmen, snowflakes, bells, etc. You do not need to wait until the last moment to look for Christmas nails ideas. You can find the nail decoration that you like best and just wait for the beginning of the holidays! Warm colors like red, brown, bordeaux, gold give a sense of Christmas coziness. A matching gradient color, glitter powder or rhinestones make the manicure look especially festive. You can opt for the classic Christmas color – red and green. For more splendor on the fingers, additional layers of shimmering nail polish are applied or spread with fine glitter over it and subsequently coated with top lacquer.
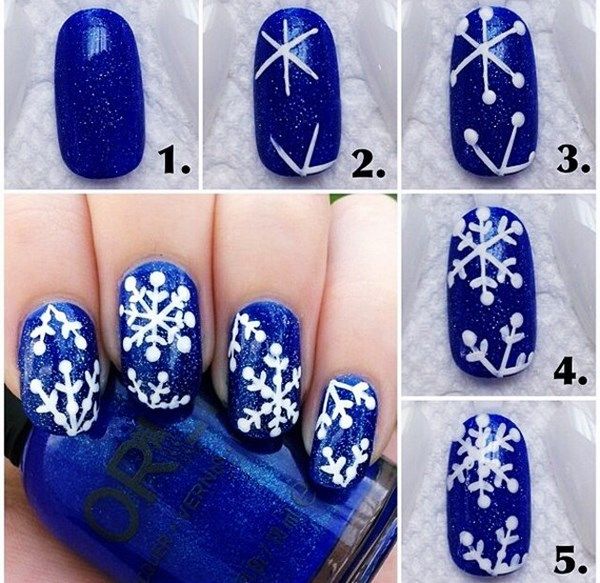
How to draw a snowflake on nails?
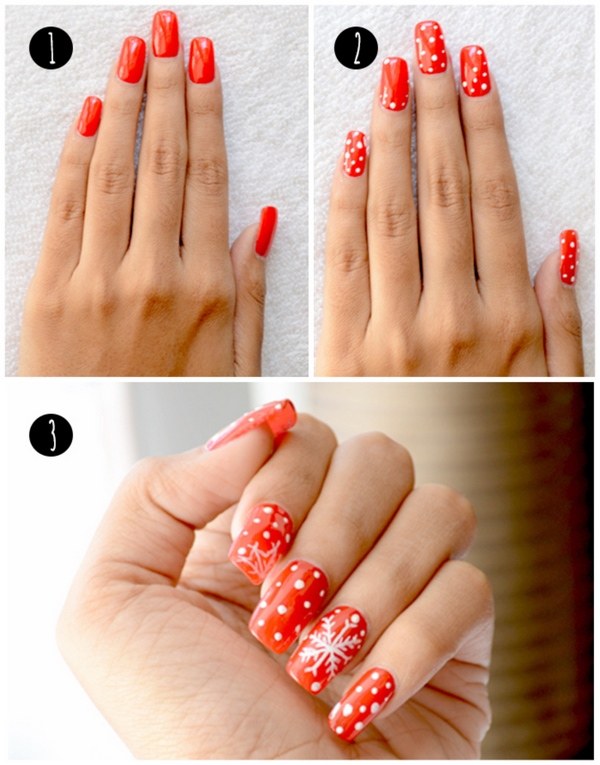
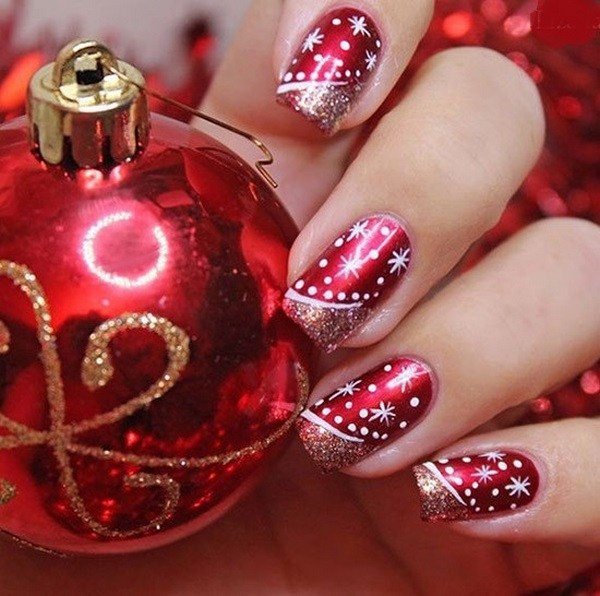
Snowflakes are one of the most popular winter symbols and you can draw them easily in a few simple steps. You can choose a base color of your taste – classic red, green or blue, if you wish. Here is what you need:
- Red (green, blue, gold, or any other color) nail polish
- White nail polish
- Dotting tool (toothpick)
- Thin brush
Method:
Apply the base color on your nails and wait until completely dry.
Use the dotting tool or a toothpick to make dots.
Draw a snowflake with the nail stripper.
Apply a top coat.
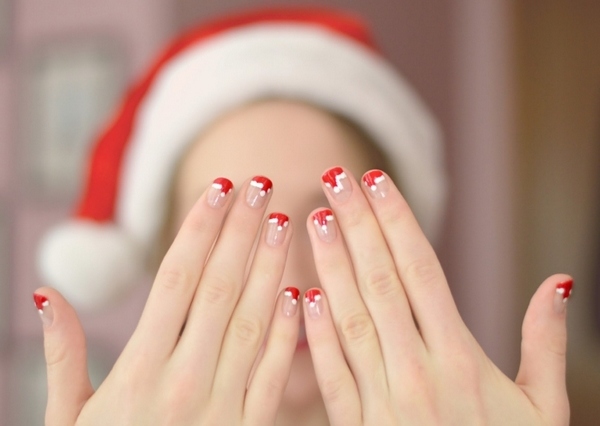
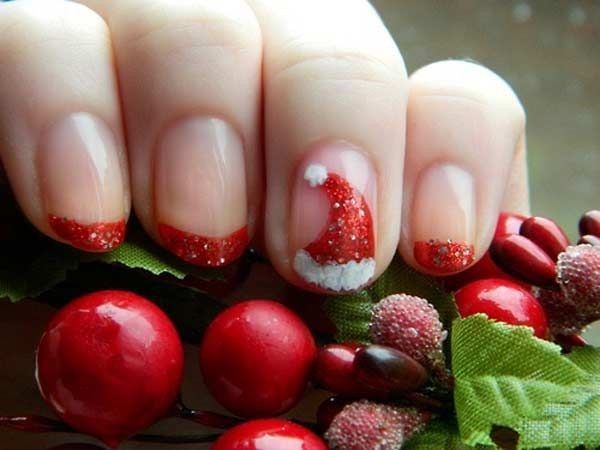
Santa’s hat nail art tutorial
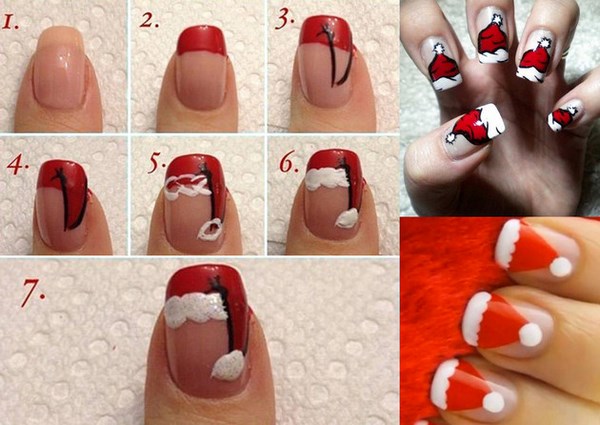
To draw Santa’s hat on the nails you will need:
- Red nail polish
- White nail polish
- Dotting tool (toothpick)
- Adhesive tape
Method:
Apply a transparent base on your nails and wait until completely dry.
Paint the tips of the nail plate in red. For a clear contour use the adhesive tape. You can use the tape to shape triangles.
Use the dotting tool (a thin brush) or a toothpick to make white dots and connect them.
Apply a top coat.
How to draw a peppermint pattern on the nails
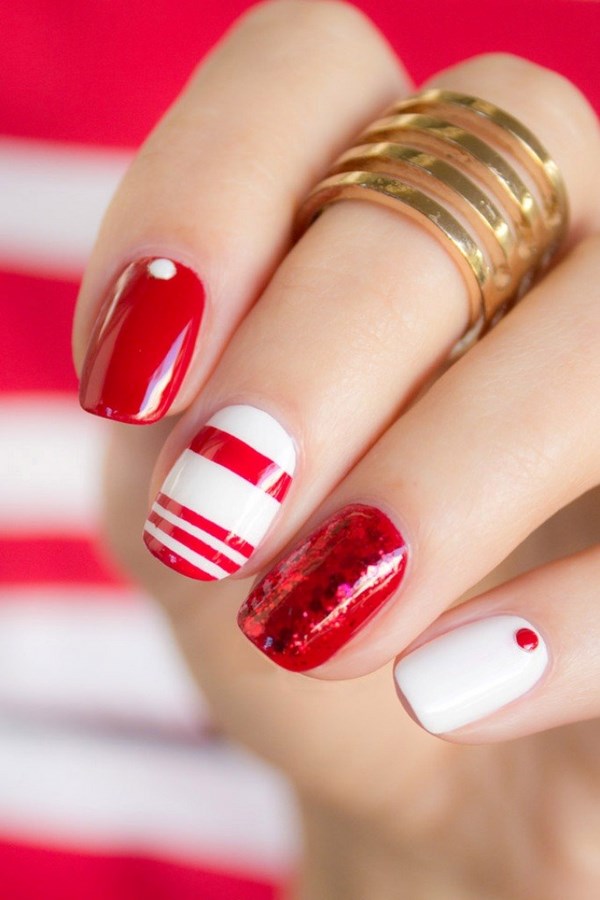
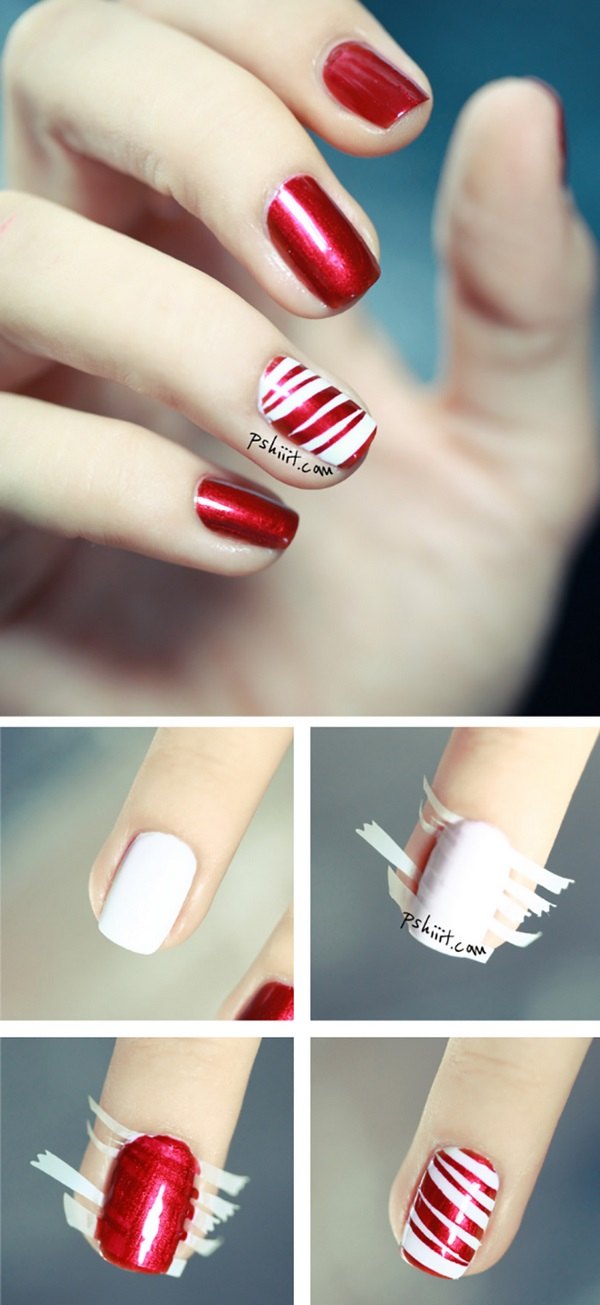
This is one of the easiest Christmas nail ideas and suitable for beginners. For a peppermint nail art you will need:
- Red nail polish
- White nail polish
- Adhesive tape
Method:
Apply white lacquer on your nails and wait until completely dry.
Glue the adhesive tape cut into thin strips on each nail plate.
Apply the red varnish and carefully remove the tape. Wait until the nails are completely dry.
Apply a top coat.
Santa’s costume nail art tutorial
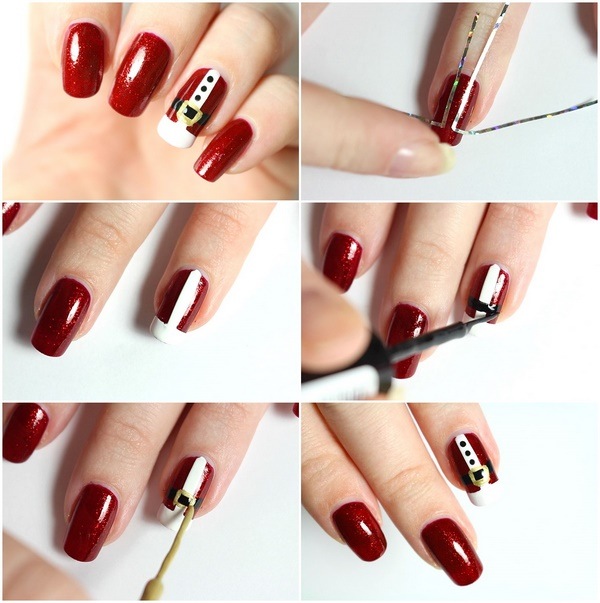
What you need:
- Red nail polish
- Black nail polish
- White nail polish
- Adhesive tape
- Gold glitter
Method:
Apply red lacquer on your nails and wait until completely dry.
Use the adhesive tape to divide the nail plate as per the image.
Apply white lacquer, carefully remove the tape and wait until dry.
Draw Santa’s belt with black lacquer and wait until dry
Use the gold to draw the buckle.
Apply a top coat.
Christmas tree nail art ideas
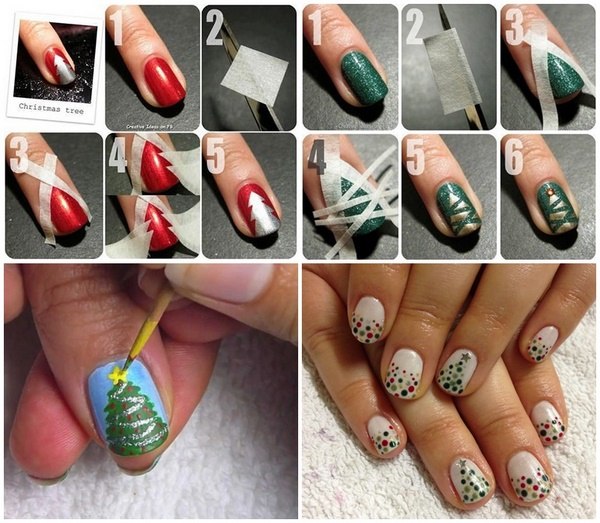
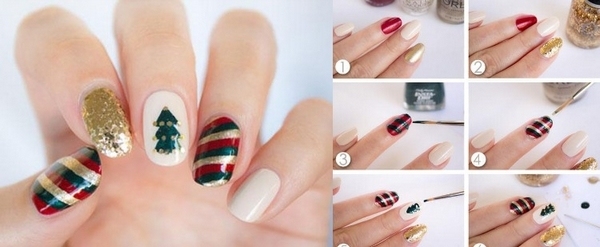
You can be really creative and draw a classic Christmas tree shape or opt for abstract shapes. You can use a dotting tool and shape the silhouette of the tree and those of you who are skilled at drawing could simply paint it. However, the best way for beginners is to use adhesive tape. Here is what you need:
- Two nail polishes – red and green
- Adhesive tape
- An embellishment which will be the tree topper – a rhinestone, star shaped glitter, a stamp or a toothpick to apply a golden dot.
Method:
Apply your base color (red) and let it dry completely.
Cut the tape and stick it on the nails forming a tree. Press them firmly and apply the second color (green). Carefully remove the tape and wait until the nail polish is dry.
Finish with a tree topper of your choice.
Rudolf the reindeer Christmas nail art tutorial
To make beautiful Rudolf nail art you will need:
- A neutral color as a base
- Cocktail sticks or a toothpick
- Brown, white and red nail polish
Method:
Paint the neutral base color and wait until dry.
Paint a circular shape at the tip of your nails with brown nail polish.
Use a cocktail stick or a toothpick to draw two thin lines from the top of the reindeer head.
Draw smaller lines on either side of the two long lines.
Use the dotting tool to place two white dots for the eyes.
Use a toothpick or a cocktail stick to place two black dots for pupils.
Add a red polish dot for the nose.
Finish with a top coat.
Twinkling star Christmas nail art – step by step tutorial
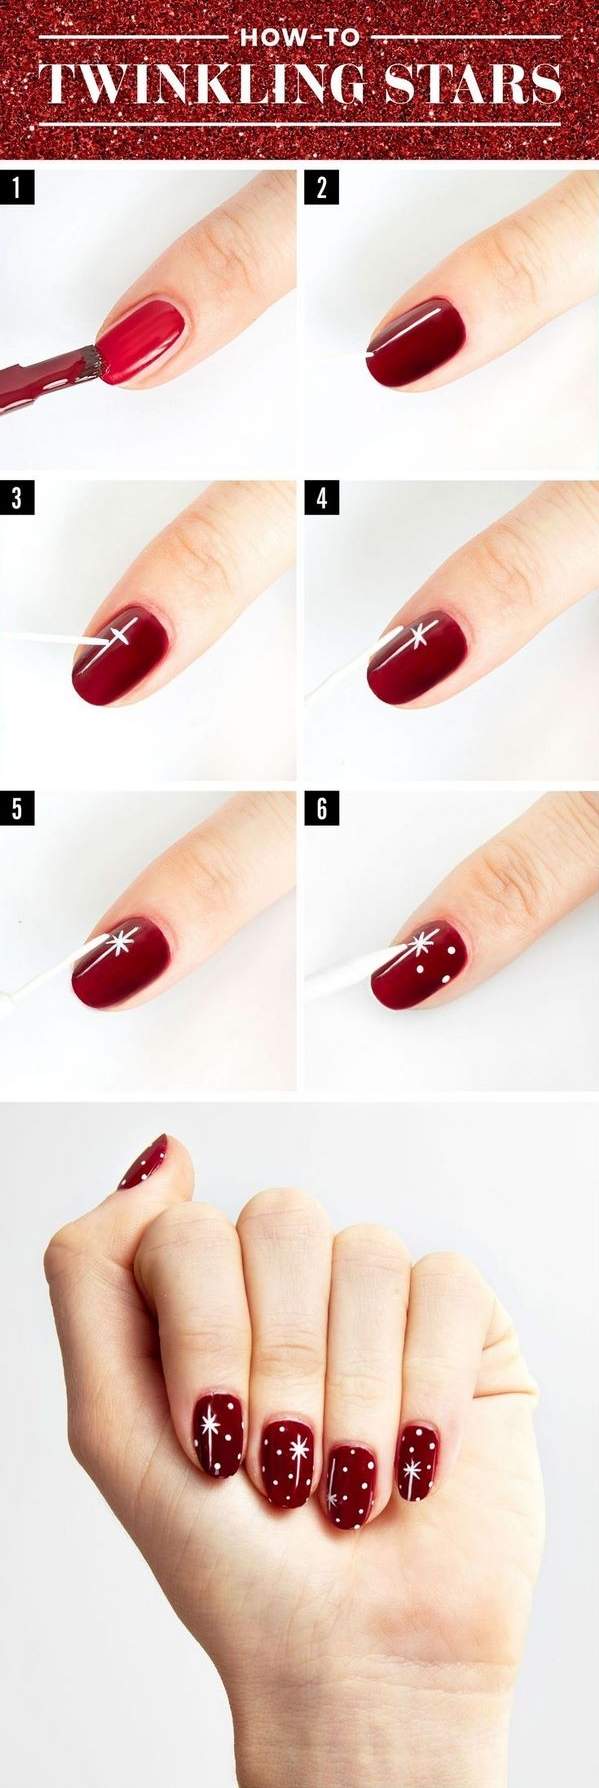
Drawing a twinkling star is one of the easiest DIY Christmas nail art ideas. It does not require any experience and every beginner can manage it in a matter of minutes.
What you need:
- A base color – red or dark blue
- White (gold) nail polish
- Dotting tool
- A thin brush
Paint the base color.
With the help of the thin brush draw a vertical line and then a short horizontal, perpendicular to the vertical one. Add one short diagonal line on the intersection of the first two lines and another diagonal line in the opposite direction.
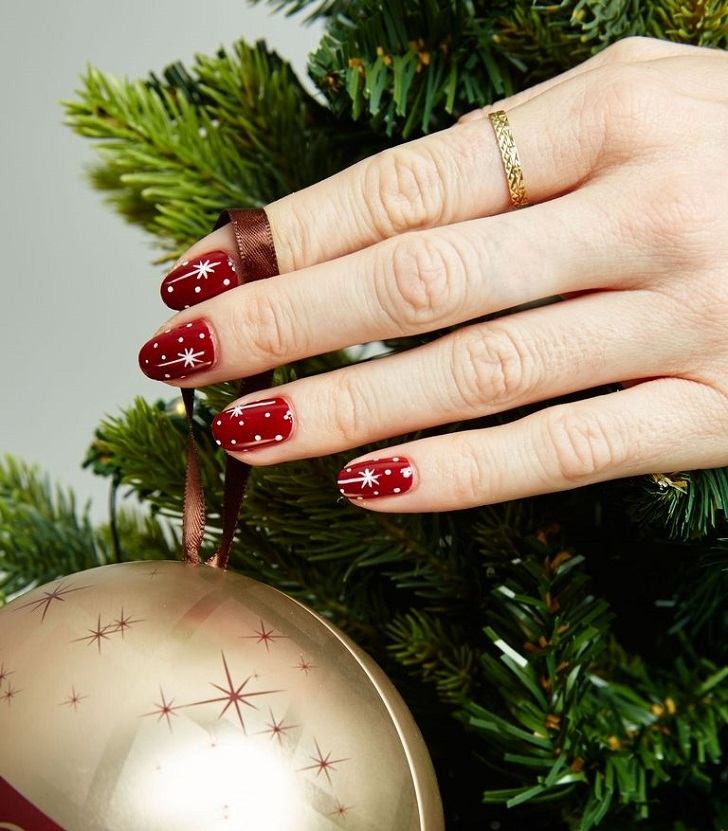
Add tiny dots around and your star nail art is ready!
Enjoy the gallery and the festive Christmas nails ideas. Find out which one you like the most!

