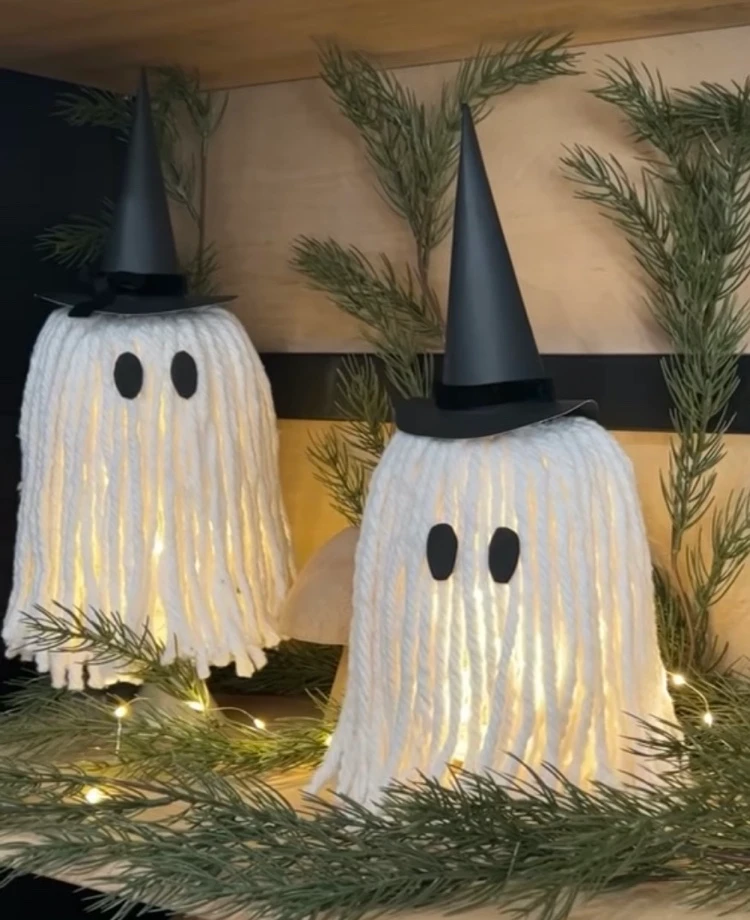
Would you like to put up an original ghost lights decoration for Halloween? Have you thought about trying out some quick DIY projects?
The clock is ticking: the spookiest night of the year is next week, and it’s high time to finish our decorations! This year I’ve decided to go for a timeless classic – ghosts. They bring an eerie flair and are the perfect choice for creating a sinister atmosphere. Furthermore, they don’t scare children as much, making them perfect for a kid-friendly celebration. Here are 3 ideas on how to easily make ghost lights all by yourself!
Quick DIY Mop Ghost Lantern
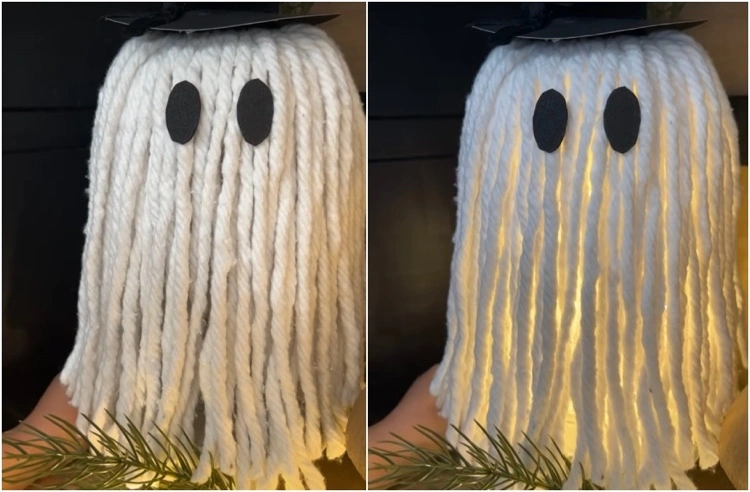
Who doesn’t like upcycling projects? Okay, for this idea you most likely won’t use the old mop head, but certainly a leftover one that you don’t need anymore. It’s also totally fine if you love this idea so much, and buy an inexpensive mop specially for it. Then you can whip out these cute, glow-in-the-dark ghosts every Halloween and decorate the shelves with them.
Supplies Needed for the Ghost Lanterns
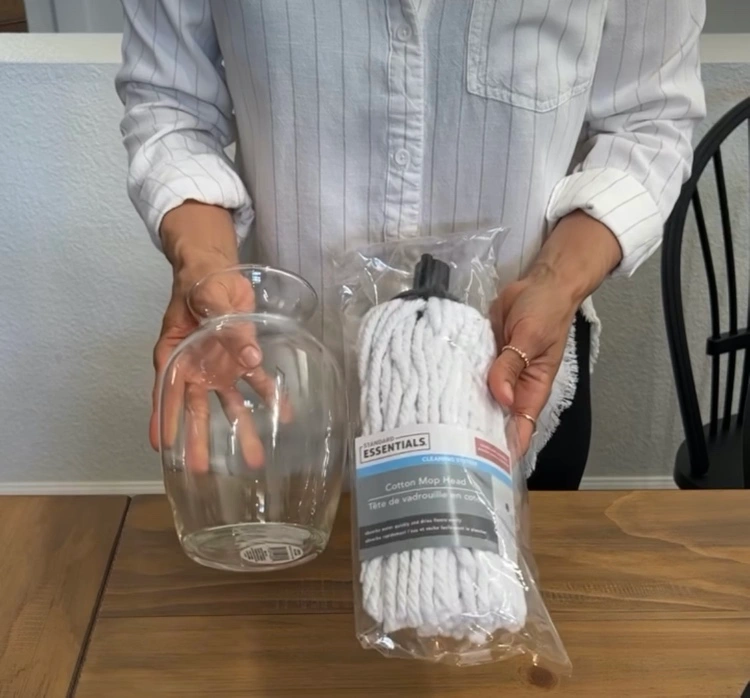
- white mop head (not used)
- bulbous glass vase
- black printer paper
- air-dry clay
- thin black ribbon
- scissors
- drawing compass (optional)
- LED tea lights or battery-powered fairy lights
Make Your Own Mop Ghost: Here’s How
Before you begin: Please note that the length of the mop should match the size of the vase or be slightly longer. Tall vases are not suitable for this purpose.
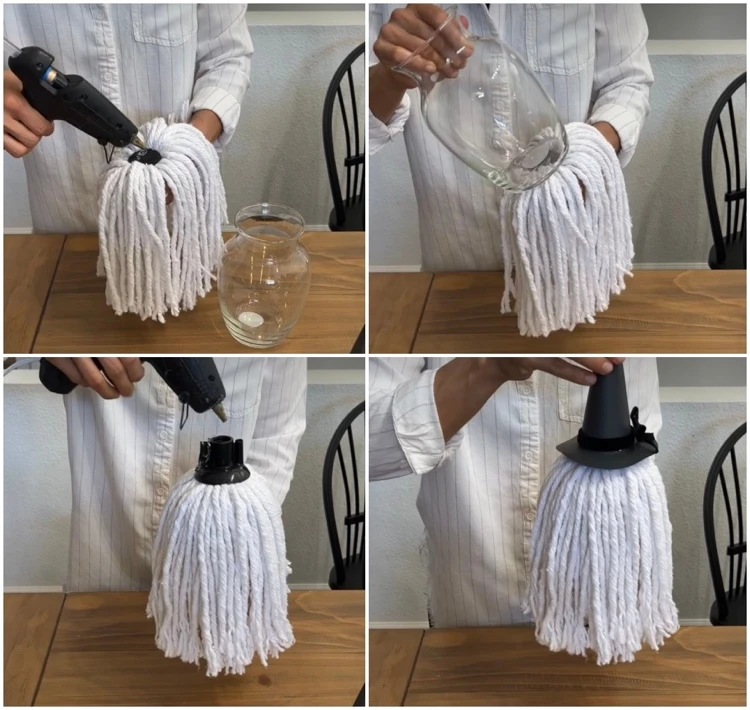
Let’s get started: Hold the mop replacement head by the screw thread and turn it over so that the microfibers hang around your hand. Apply a generous amount of hot glue to the plastic part in the center and place the bottom of the vase on it. Press down briefly to allow the glue to adhere and turn the vase, along with the mop, over.
To hide the plastic part at the top of the mop, you should add a headpiece. The best fit here is a witch’s hat, but you can use other things, as well.
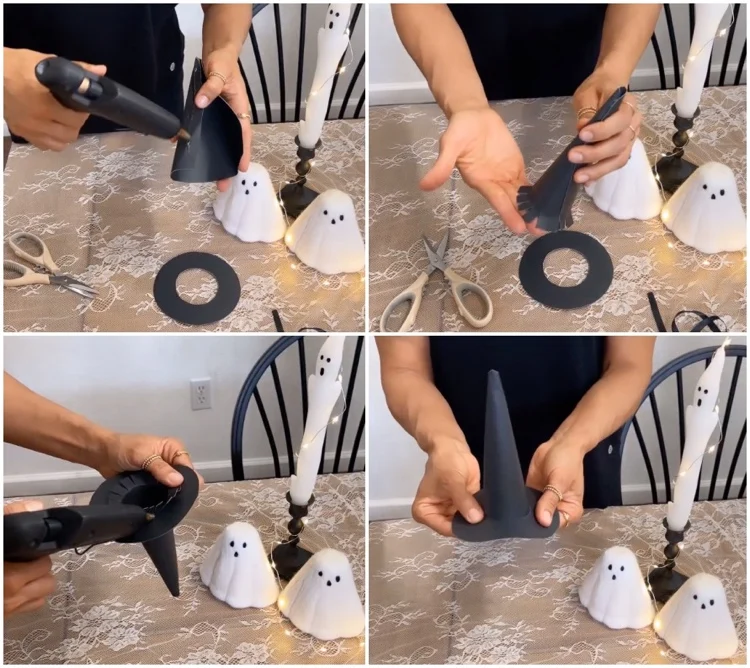
For the witch hat, cut a quarter circle out of black paper. Make it into a cone and glue the edges together with hot glue. Cut fringes in the bottom of the paper cone and fold them inward. Place the cone on a second sheet of black paper and draw a circle around the cone. Using a compass, draw the outer edge of the brim of the hat. Then cut out the outer circle and the inner circle making a black paper ring (the brim).
Bend the fringes of the paper cone outward and apply glue to them. Place the brim of the hat over the paper cone from the top and attach it to the fringes. Glue a piece of thin ribbon around the cone above the brim to finish the hat.
Now apply a good amount of glue to the screw thread of the mop and place the hat on top.
Cut two ovals from the black paper for the eyes and glue them at the front of the mop.
Place the glass vase on an LED candle or put a string of fairy lights inside and make your cool new ghosts glow!
Read also: How to Make Halloween Bag for Treats? 3 Easy Last-Minute Ideas
Papier-Mâché Ghost Lights Family
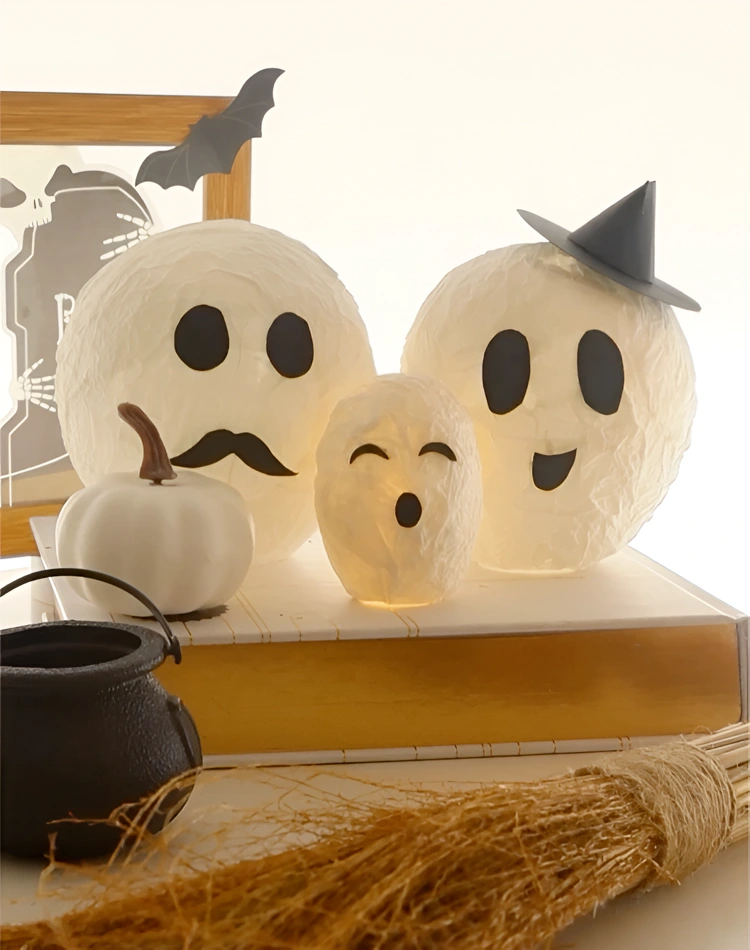
Lanterns are a beautiful decoration idea for all celebrations in the fall and winter. In the spirit of Halloween, we’re going to show you how to make cute ghost lanterns using a papier-mâché technique. Build a ghost family by choosing balloons in different sizes.
Read also: Pumpkin Painting: Beautiful and Creative Fall Decoration Ideas for Your Home and Garden!
You Will Need the Following Materials
- balloons
- papier-mâché paste
- brush
- white paper towels
- scissors
- black cardboard
- glue
- LED tea lights
Crafting Instructions
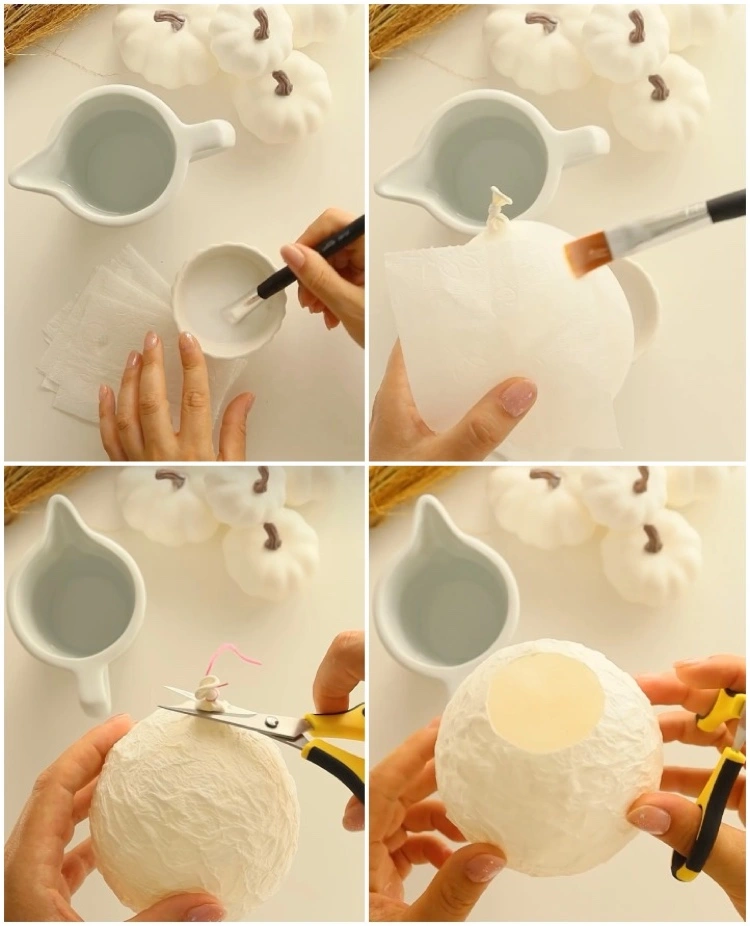
First, blow up the balloons and tie them in a knot. Use two larger balloons for the mother and father and a smaller one for the child.
Stir the paste and prepare the paper towels. Toilet paper, kitchen roll paper, or facial tissues are all suitable, as long as they are white.
Apply the paste on the balloon and stick the paper towels on it. Keep doing this until the three balloons are completely covered. It usually takes 2–3 layers. Then let the glue dry for 24 hours, or at least overnight.
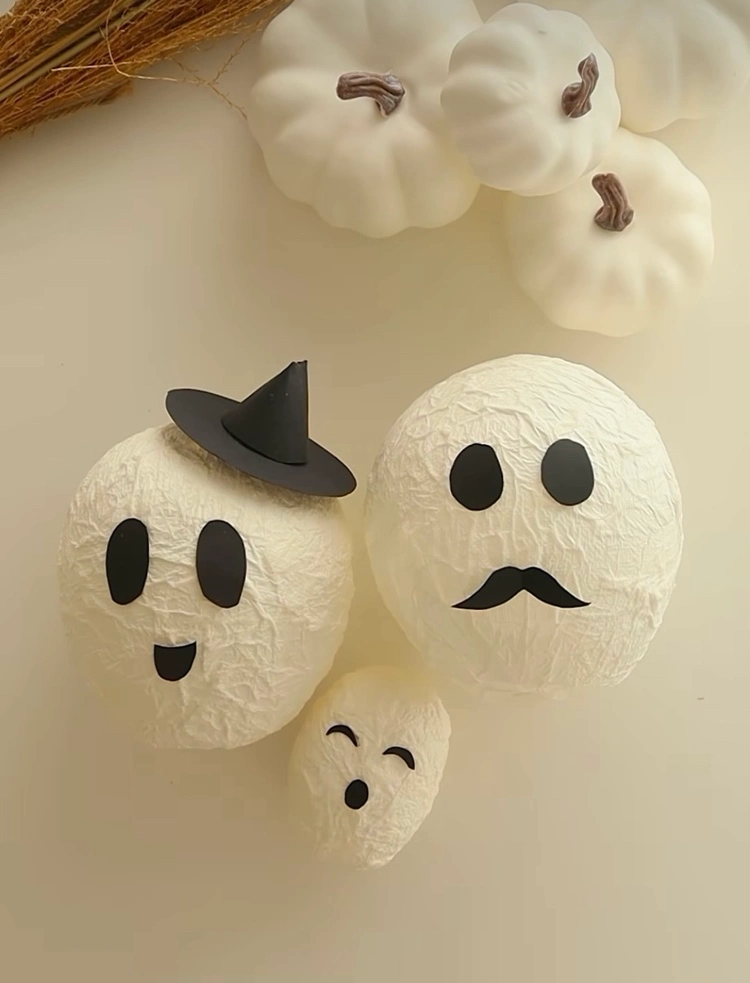
In the meantime, cut out the eyes and mouths from black paper. You can craft a witch’s hat for the mother as explained in the instructions above.
Once the papier-mâché is completely dry, cut out the knots of the balloons and remove the remnants. Cut out a large circle at the bottom so that the lanterns can stand upright.
Glue on the facial features and the hat. Put the papier-mâché lanterns on the LED tea lights and your glowing ghost decoration for Halloween is ready!
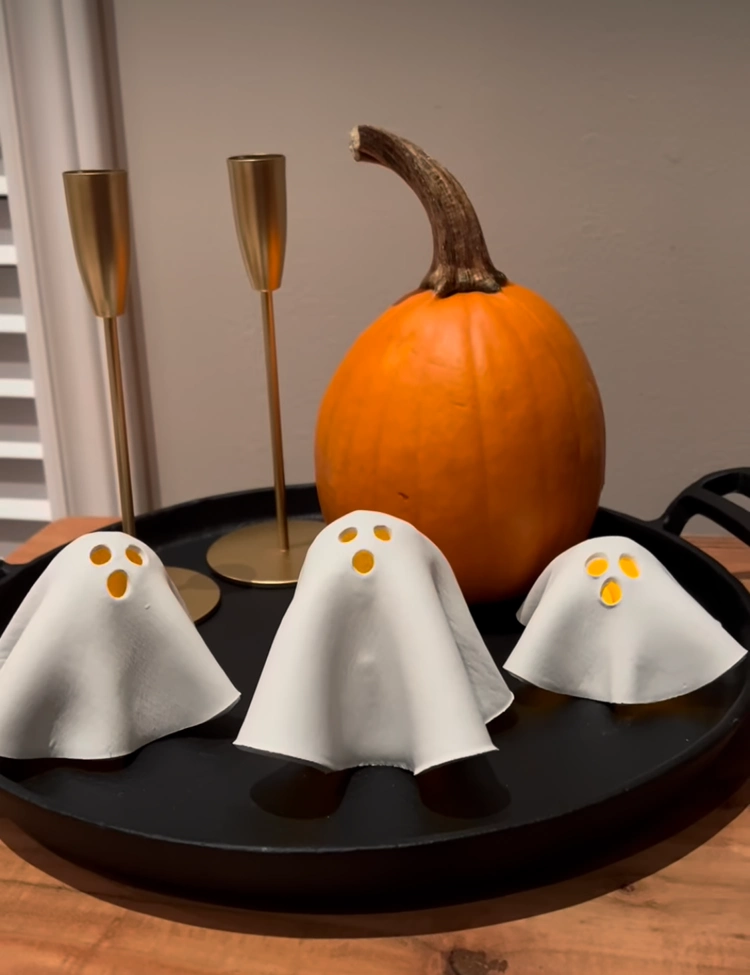
Mini Ghost Lights from Clay
The following idea is made very quickly, however, it is necessary to allow some time to dry the ghosts. The material used is air-drying clay, which usually hardens completely in two to three days. The final results are definitely worth the wait!
Necessary Materials
- white air-dry clay
- round bowl
- rolling pin
- knife
- tennis balls and canning jars or something of a similar size
- adhesive tape
- a straw
- LED tea lights
How to Make the Clay Ghost Lights
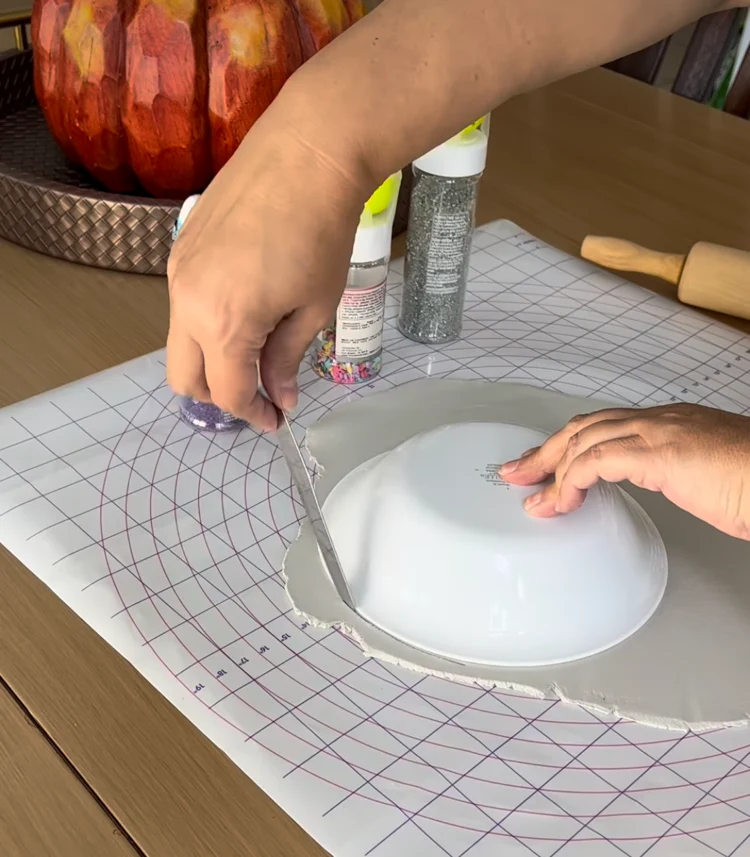
First, roll out the craft clay with a rolling pin and cut out circles using a round bowl.
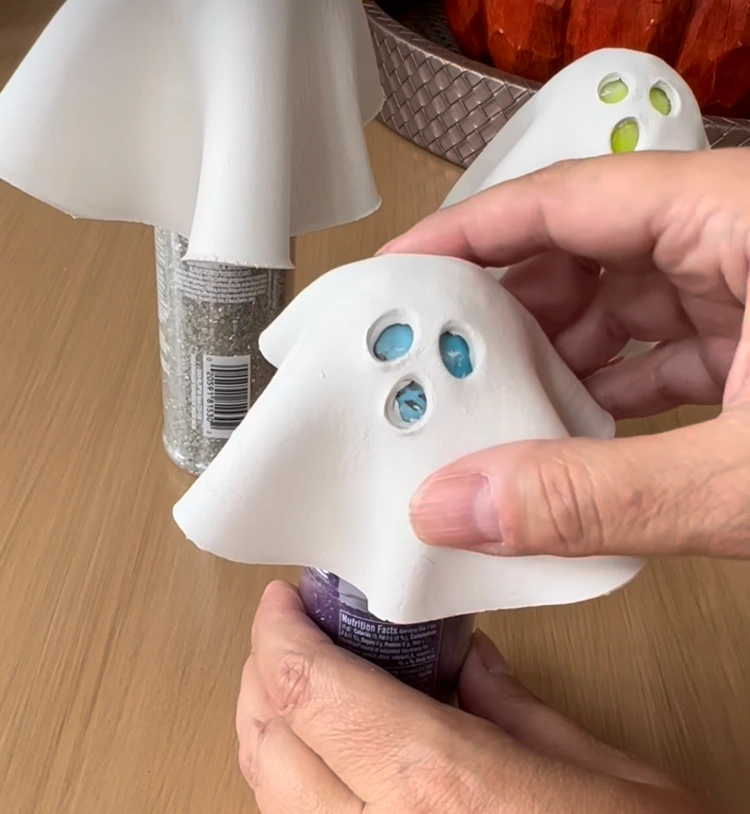
Attach a tennis ball on top of each can with tape. Place the rolled-out circles on the tennis balls and shape the sides as shown in the example below.
Cut out holes for the eyes and mouth with a straw. Leave the ghosts to dry at least overnight.
When the ghosts are completely dry, place them over LED tea lights and arrange them on a tray. Add a small decorative pumpkin and your easy Halloween decoration is ready.
Read also: Cute Halloween Crafts for Kids: 6 Easy Ideas for a Festive Mood

